So what's been happening... I have a curious nagging feeling that not enough wargaming is going on, but as I'm Renaissance man these days, and don't currently have enough time even to draw breath, I also suspect that even if I wanted to I wouldn't have the time! I blame it on the weather - I find it difficult to sit down to painting and the like when the weather outside is glorious (and the tide is in!) 
Which isn't to say that wargaming hasn't been going on as DG and I are continuing with the Camsix game which increasingly is looking like the denouement for the campaign... read on for a summary of moves 4 to 9...
Move 4:
The Militia and the hussars of the Legion continue to rout - in order to stiffen their resolve I move some staff officers to join them (they add bonuses for the morale throws).
DG continues the general advance - so many troops - slightly unnerving!
Move 5:
First piece of good news in a while, the hussars of Lauzun's Legion rally... well... halt shaken anyway!
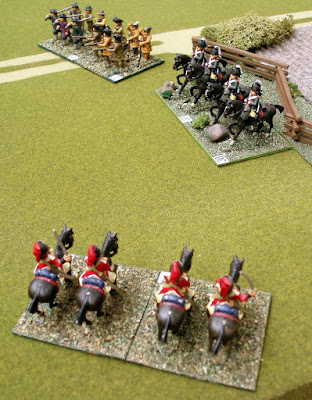
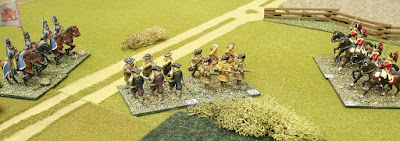
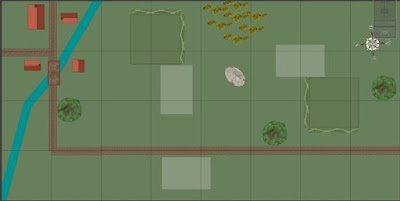
With the very rough handling of my advance guard complete (see here and here) I can see that DG has now started to manoeuvre so as to nullify the benefits of my field works. His troops are moving in echelon to the east - it's clear he's looking to try and outflank the field works and bring his superior numbers to bear.

Move 6:
The hussars recover fully, but the Militia continue to rout and in this turn hit zero strength points and cease to be an effective unit and are removed from the table.
NB. As this is a campaign I dice to see if they surrender, or survive to reform at a later date - happily it is the latter..

Move 7:
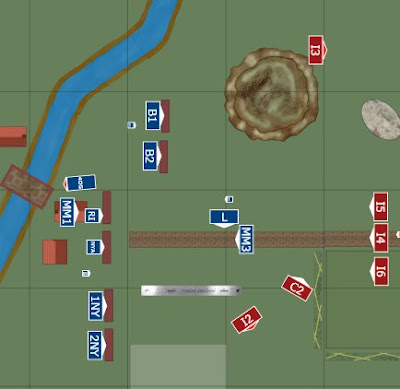
An hour into the game in real time and the first of DG's forces enter from the south of the table. I've already limbered one of my guns with the idea of moving it to the east to help bolster my open flank..
I also move up Lauzun's to cover DG's flank... hopefully this will worry him slightly..

Move 8:
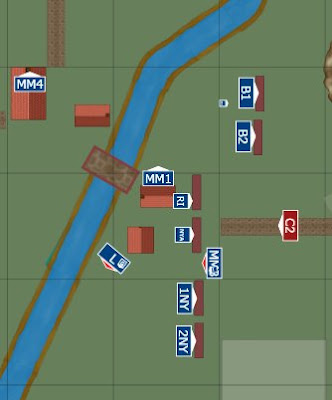
To the south of the river I move the Militia (MM4) out of the house and closer to the bridge - lot of troops coming up including two squadrons of horse and two regiments of Brunswick foot.
Not much to look forward to in this move, but one good piece of news is that DG's Rangers who have been routing since about move 2 finally hit zero and are removed from the table (and when the campaign saving throw dice are rolled, they come up with a "surrender" result!)

Move 9:
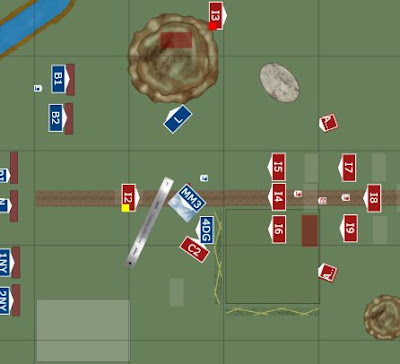
OK - time to take the bull by the horns - at the bridge I move the spare Militia unit to cover the river bank, and the artillery that was destined for the east is also moved to cover the bridge - the last thing I need is to be attacked in the rear. On the other side of the river I move the other Militia regiment in to the house nearest the bridge. I also about face on of my two crack French regiments and ready them to move.
In the British move the American artillery finally opens fire (reduced ranges because of night time and this is the first time I've had a target). No effect but its good to be hitting back..!
 More anon... stay tuned.
================================================
 Now a book review (told you I hadn't been idle) - it's been a bit of a Zulu'fest in Steve the Wargamers house recently with two books showing different approaches...
The first, and the one that started all of this, was the new novel by Saul David called "Zulu Hart". Now I've seen this in the bookshop a few times and thought it would be right up my street, so when I saw it in the library I snapped it up - hey, a free read is a free read...!
Saul David is a well known military historian with a background in Victorian colonial warfare - he's written a handful of books on the subject, including a number on the Zulu's but this is his first novel.
The main character is a chap called Zulu Hart - the illegitimate son of a half Irish half Zulu actress, and a highly placed member of British society. Due to this status Hart never gets to meet his father, and in fact only finds out he's still alive on his 18th birthday.
He's told by his mother who at the same time hands over a document from him that bequeaths Hart large amounts of money providing he fulfils a number of actions with a period of time - the end objective of these actions being to encourage a military career...
So - already armed with a sense of injustice Hart proceeds on his career to try and meet the objectives... at which point, having suspended belief enough (because I wanted to enjoy the story) I kind of gave up - though I did finish the book..
I quite expected the author to know his stuff and so it turned out to be, but the characters are right out of Victorian melodrama, all moustache twirling and wicked, or very very nice by turn... the one normal character is killed at Isandlwana, and of course despite being the most junior lieutenant in the entire army Hart knows exactly what is going wrong while no-one else has a clue (which may be quite accurate!). He then gets to Rorkes Drift and single-handedly persuades Chard and Bromhead to not abandon the post, and then shows them how to fortify it..... blah blah blah...
Disappointing I'm afraid... Steve the Wargamer gives this one 3 out of 10.
 Next up though is a book on the period that I first read years ago, and turned out to be an entirely different kettle of fish. "Captain Carey's Blunder" is one of that series of historical books by the godfather Don Featherstone that also included "Macdonald of the 42nd", "All for a Shilling a Day" etc
The book covers the death of the French Crown Prince Imperial, Louis Bonaparte (the son of Napoleon III - full name Napoléon Eugène Louis Jean Joseph) while in South Africa "serving" with the British army under Chelmsford. At the time he and his mother were in exile in Britain (his father had died earlier) and since he had been encouraged in a military career since the moment he was born (how could he not? he was a Bonaparte.. apparently he had a full Imperial Guard Grenadier uniform including busby at the age of two!) he had enrolled in the British army.
It was quite obvious he was what we would now call a right royal pain in the ar*e - that's him to the left and I think the face gives some of it away - it was clear that the British government would never knowingly put him in harms way (it reminded me a little of the recent arguments about letting Prince William and Harry go to Afghanistan), but he did everything he could to make sure he did get in harms way.

One way or another he ended up in South Africa with the avowed aim of making his name so that it would bolster support for a return to France.
While he was there, through a quite unplanned mistake, he found himself in a mapping party with a Captain (then Lieutenant) Carey, when the party were surprised by a party of Zulu's and the Prince was killed while the rest of the party escaped.
Not surprisingly there was huge uproar in Britain with all elements of the press and public expressing their opinion about whether Carey did enough to rescue the prince, whether he should have done things differently, even whether he was in charge of the party in the first place - fresh from the debacle at Isandlwana Chelmsford was very defensive, and in the end Carey became a bit of a scapegoat until public opinion and a very poorly run Court Martial resulted in him being acquitted....
What a cracking book - I'd quite forgotten how engaging a writer Don is, and I fairly raced through this one. Huge amounts of research including lots of original newspaper and magazine articles make this a very interesting read.
Steve the Wargamer gives this one a definite 8 out of 10
================================================
Lastly - two snippets - first off I've added two new links to the War of the Spanish Succession project page. The first to "Histoire de l'ancienne infanterie française" by Louis Susane which is a superb collection of colour plates of the French Army of the Ancienne Regime. Also a link to an article on the Dutch Army in the Vae Victis magazine. My thanks to the warsoflouisxiv blog (click here) for the "heads up" on these. Lovely - look under the French and Dutch Army link sections ont he right....
On the sailing front... there was no sailing this weekend.... no wind and no time... but the new jib has been deployed and I'm really looking forward to trying it for the first time!
...and that really is enough for now...

Which isn't to say that wargaming hasn't been going on as DG and I are continuing with the Camsix game which increasingly is looking like the denouement for the campaign... read on for a summary of moves 4 to 9...
Move 4:
The Militia and the hussars of the Legion continue to rout - in order to stiffen their resolve I move some staff officers to join them (they add bonuses for the morale throws).
DG continues the general advance - so many troops - slightly unnerving!

Move 5:
First piece of good news in a while, the hussars of Lauzun's Legion rally... well... halt shaken anyway!
With the very rough handling of my advance guard complete (see here and here) I can see that DG has now started to manoeuvre so as to nullify the benefits of my field works. His troops are moving in echelon to the east - it's clear he's looking to try and outflank the field works and bring his superior numbers to bear.

Move 6:
The hussars recover fully, but the Militia continue to rout and in this turn hit zero strength points and cease to be an effective unit and are removed from the table.
NB. As this is a campaign I dice to see if they surrender, or survive to reform at a later date - happily it is the latter..

Move 7:
An hour into the game in real time and the first of DG's forces enter from the south of the table. I've already limbered one of my guns with the idea of moving it to the east to help bolster my open flank..
I also move up Lauzun's to cover DG's flank... hopefully this will worry him slightly..


Move 8:
To the south of the river I move the Militia (MM4) out of the house and closer to the bridge - lot of troops coming up including two squadrons of horse and two regiments of Brunswick foot.
Not much to look forward to in this move, but one good piece of news is that DG's Rangers who have been routing since about move 2 finally hit zero and are removed from the table (and when the campaign saving throw dice are rolled, they come up with a "surrender" result!)

Move 9:
OK - time to take the bull by the horns - at the bridge I move the spare Militia unit to cover the river bank, and the artillery that was destined for the east is also moved to cover the bridge - the last thing I need is to be attacked in the rear. On the other side of the river I move the other Militia regiment in to the house nearest the bridge. I also about face on of my two crack French regiments and ready them to move.
In the British move the American artillery finally opens fire (reduced ranges because of night time and this is the first time I've had a target). No effect but its good to be hitting back..!
 More anon... stay tuned.
 Now a book review (told you I hadn't been idle) - it's been a bit of a Zulu'fest in Steve the Wargamers house recently with two books showing different approaches...
The first, and the one that started all of this, was the new novel by Saul David called "Zulu Hart". Now I've seen this in the bookshop a few times and thought it would be right up my street, so when I saw it in the library I snapped it up - hey, a free read is a free read...!
Saul David is a well known military historian with a background in Victorian colonial warfare - he's written a handful of books on the subject, including a number on the Zulu's but this is his first novel.
The main character is a chap called Zulu Hart - the illegitimate son of a half Irish half Zulu actress, and a highly placed member of British society. Due to this status Hart never gets to meet his father, and in fact only finds out he's still alive on his 18th birthday.
He's told by his mother who at the same time hands over a document from him that bequeaths Hart large amounts of money providing he fulfils a number of actions with a period of time - the end objective of these actions being to encourage a military career...
So - already armed with a sense of injustice Hart proceeds on his career to try and meet the objectives... at which point, having suspended belief enough (because I wanted to enjoy the story) I kind of gave up - though I did finish the book..
I quite expected the author to know his stuff and so it turned out to be, but the characters are right out of Victorian melodrama, all moustache twirling and wicked, or very very nice by turn... the one normal character is killed at Isandlwana, and of course despite being the most junior lieutenant in the entire army Hart knows exactly what is going wrong while no-one else has a clue (which may be quite accurate!). He then gets to Rorkes Drift and single-handedly persuades Chard and Bromhead to not abandon the post, and then shows them how to fortify it..... blah blah blah...
Disappointing I'm afraid... Steve the Wargamer gives this one 3 out of 10.
 Next up though is a book on the period that I first read years ago, and turned out to be an entirely different kettle of fish. "Captain Carey's Blunder" is one of that series of historical books by the godfather Don Featherstone that also included "Macdonald of the 42nd", "All for a Shilling a Day" etc
 The book covers the death of the French Crown Prince Imperial, Louis Bonaparte (the son of Napoleon III - full name Napoléon Eugène Louis Jean Joseph) while in South Africa "serving" with the British army under Chelmsford. At the time he and his mother were in exile in Britain (his father had died earlier) and since he had been encouraged in a military career since the moment he was born (how could he not? he was a Bonaparte.. apparently he had a full Imperial Guard Grenadier uniform including busby at the age of two!) he had enrolled in the British army.
It was quite obvious he was what we would now call a right royal pain in the ar*e - that's him to the left and I think the face gives some of it away - it was clear that the British government would never knowingly put him in harms way (it reminded me a little of the recent arguments about letting Prince William and Harry go to Afghanistan), but he did everything he could to make sure he did get in harms way.

One way or another he ended up in South Africa with the avowed aim of making his name so that it would bolster support for a return to France.
While he was there, through a quite unplanned mistake, he found himself in a mapping party with a Captain (then Lieutenant) Carey, when the party were surprised by a party of Zulu's and the Prince was killed while the rest of the party escaped.
Not surprisingly there was huge uproar in Britain with all elements of the press and public expressing their opinion about whether Carey did enough to rescue the prince, whether he should have done things differently, even whether he was in charge of the party in the first place - fresh from the debacle at Isandlwana Chelmsford was very defensive, and in the end Carey became a bit of a scapegoat until public opinion and a very poorly run Court Martial resulted in him being acquitted....
What a cracking book - I'd quite forgotten how engaging a writer Don is, and I fairly raced through this one. Huge amounts of research including lots of original newspaper and magazine articles make this a very interesting read.
Steve the Wargamer gives this one a definite 8 out of 10
Lastly - two snippets - first off I've added two new links to the War of the Spanish Succession project page. The first to "Histoire de l'ancienne infanterie française" by Louis Susane which is a superb collection of colour plates of the French Army of the Ancienne Regime. Also a link to an article on the Dutch Army in the Vae Victis magazine. My thanks to the warsoflouisxiv blog (click here) for the "heads up" on these. Lovely - look under the French and Dutch Army link sections ont he right....
On the sailing front... there was no sailing this weekend.... no wind and no time... but the new jib has been deployed and I'm really looking forward to trying it for the first time!
...and that really is enough for now...



.jpg)
.jpg)
.jpg)
.jpg)


.jpg)
.jpg)
.jpg)