Saturday, March 26

So you think you've got it hard??

Three things struck me yesterday as I read in the news of the award of the Conspicuous Gallantry Medal to Sergeant Dip Pun of 1st Battalion The Royal Gurkha Rifles...

It goes without saying that one of the things is the quite simply phenomenal bravery of the action for which he was awarded the medal. He was in a small outpost of just four troops when they were attacked by three times their number.. the Army web site being what it is, it's quite understated but other press sites indicate that he fired over 400 rounds before finally resorting to having to defend himself with the tripod of his machine gun....

The second thing that struck me about it, was the utter timelessness of this small action - over hundreds of years the British army must have thought many hundreds if not thousands of these kinds of engagements... my limited reading on the 1st and 2nd Afghan Wars back that up, my slightly deeper reading into the Sudan campaigns also back it up... what I'm trying to say is that despite the increasing inventiveness of the weapons systems (and this week we learned about the Brimestone air fired anti-tank missile) it has always been (and I suspect always will be), the bravery of the man on the spot who holds the ground... usually face to face, and often with the most basic of weapons... very humbling...

The third thing that struck me was the fact that the Sergeant was a Gurkha - the embodiment of a historical time line that stretches back to the time of Waterloo. The British never beat the Gurkha's - at the end of the Gurkha War (1814-1816) which ended in a draw we simply suggested that they might want to become a British protectorate - happily they agreed (Free Happy Smileys), and have provided supremely brave fighting men to the British Army ever since - first to the East India Company, then the Indian Army, and then the British Army... long may it continue..

“If a man says he is not afraid of dying, he is either lying or is a Gurkha.” (Former Chief of staff of the Indian Army, Field Marshal Sam Manekshaw)

Full story here: http://www.army.mod.uk/news/23796.aspx

Friday, March 25

Holding Position... Post Match Analysis

Not really working out is it...??! You'd have thought that after launching the boat earlier this week I might actually have a little more time on my hands for some little metal men action! Free Happy Smileys

Anyway - here we go.... first what the Duke (Wellington as opposed to Marlborough) was want to call the "butchers bill"..

Franco-Bavarian
SideUnitTypeStarting StrengthCasualties
Franco BavarianNo. 1Medium Artillery65
Franco BavarianNo. 2Medium Artillery61
Franco BavarianRegiment de St. PouangesCavalry61
Franco BavarianBearnInfantry61
Franco BavarianFoixInfantry62
Franco BavarianNavarreInfantry65
Franco BavarianSaintongeInfantry61
Franco BavarianToulouseInfantry60
49 (includes +1 for Guards)16 (33% casualties)


Allied
SideUnitTypeStarting StrengthCasualties
AlliedNo. 1Light Artillery60
AlliedNo. 2Light Artillery63
AlliedCadoganCavalry63
AlliedLumleyCavalry62
AlliedWyndhamCavalry64
AlliedNassau FrieslandCavalry62
Allied1st Foot GuardsInfantry61
AlliedDeringInfantry65
AlliedGoorInfantry62
AlliedHirzelInfantry63
AlliedHoweInfantry61
AlliedMeredithInfantry62
AlliedOrkneyInfantry64
79 (includes +1 for Guards)32 (40% casualties)


..all in all a lot closer than it felt at the time - but for the time constraint DG might well have been able to string another attack together - he was certainly close enough!

Otherwise...

..as ever in this game the artillery are very potent - we each had two guns aside but in my case the mediums with their extra 6" of range were very effective. DG and I have discussed this effectiveness issue a few times in the past as the mechanics are broadly the same for the American War of Independence games. In these rules we hit on a modified seven on 2D6 - at the ranges I was mostly firing on their are range penalties of -1 or -2, but plus modifiers for being on full strength that cancel these out... if I was to play this scenario again I would consider modifying the artillery on both sides so that they had less strength points and therefore lose the bonus....

..the game was not as straight-forward a win as it might have seemed - DG suffered from poor dice throws on at least three morale throws in very sticky situations for me. In effect I was winning melee's on the back of his troops failing morale, rather than my superior fighting strength!

..the eternal conundrum of how to attack an enemy in a fixed position was analysed & aired yet again... power to his elbow but DG didn't do anything that I wouldn't have done... a regiment in line up front with as many more behind it as you can get in, then as each regiment is sent back in tatters as a result of the volleys from the unit they are attacking, the next one behind is that much closer and has that much less of a beaten path to cross... from memory this almost worked at least twice.... it certainly saw off Navarre (useless buffoons! Free Happy Smileys)

...attack and defence scenario's are difficult to balance but this one has it about right, with the attacker being about twice as strong...

...refreshments on this occasion - taken as all gentlemen do at the half time, was the standard Twinings Everyday tea with some very interesting home baked biscuits made by the spuds - they wanted to make chocolate one's but didn't have any cocoa powder so they substituted instant coffee granules.... I don't know whether DG managed it, but I was sleepless most of the night due to the caffeine rush!!

Most enjoyable - here's to the next one!

Thursday, March 17

Holding Position... The Game...

...and so on to the game... just one addition to the previous post in that DG and I decided that one each of our infantry regiments could be classed as "Guard" - in the rules I use (which are the Will McNally AWI rules with suitable modifications to suit this much earlier period*) a Guard rating allows a morale modifier - we used +1 (it can be +2), which means that with each unit have 6 strength points, the Guard regiments are given a virtual strength of 7 - very handy when testing morale (which is tested against the units strength). It makes the Guard regiments a little "stickier", ie. they stay on the battlefield longer as one would expect them to.. DG chose the 1st Foot Guards (naturally), and I chose Regiment Navarre (as one of the “Vieux Corps” it seemed apt).

* If you're interested in the rules check my WSS Project Page which has a link to the rules, and the modifications I'm using)

Next, DG diced for unit arrivals and in an event that one very rarely sees on the wargame table (a definite plus for the random arrival mechanic!!) he found that all his cavalry (with one exception) was arriving at entry point #1, and all his infantry and artillery (also with one exception!) were arriving at point #2 (click here for a map refresher).. interesting times for DG! dog products

On my side I deployed most of my units hidden (not that I had many) with one regiment on the steep hill to the left of my line - overlooking the British entry point #1.

I deployed the artillery immediately as I fore saw these being my battle winners - one on either side of the gap, on first contours as I didn't think the movement penalty would be a problem - I wasn't planning on moving them!

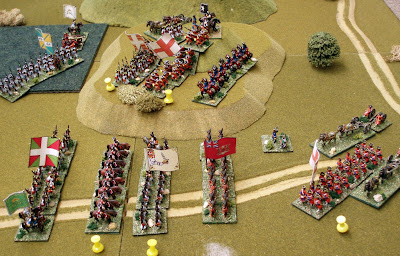
Lastly I placed Navarre bang slap in the middle of the gap, straddling the road... the other infantry regiment I chose to deploy were on the hill to the left of the road (with my senior general) - the following gives a view (as usual - click for a bigger view)...
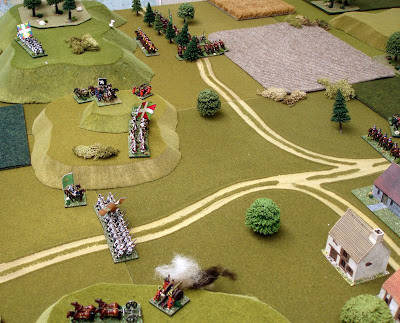
This was taken later in the game but I hadn't moved much..

So what of the game?? An interesting tussle, quite exciting as I think DG will agree, it swung both ways a few times...

DG brought all his infantry piling down the road from the entry point #2 in column - they advanced quickly! He put his artillery and the single regiment of cavalry with that force at the front of the column so as to bring them into action as soon as possible..
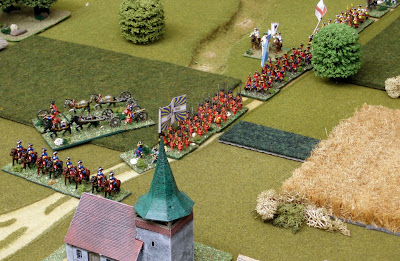
meanwhile his cavalry - in line - plus the single infantry regiment piled on at #1 - clearly DG had taken his orders to heart and was looking for a quick win...
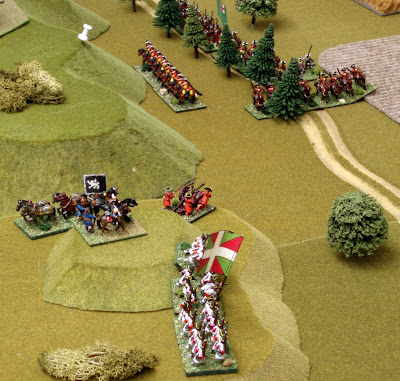
He then deployed a couple of his cavalry regiments so as to threaten the hill (a demonstration of force!) which effectively tied down my infantry regiment - he had numbers to spare and had effectively nullified one of my units without firing a shot...

Elsewhere however, my artillery had opened fire - it would be a long day for the French artillery - the first casualties were the cavalry leading DG's infantry column (the column can be seen following) - strike one for the French as they were not to return due to failed morale tests until much later in the game...
An overview of the battlefield mid-game (see following).. things were getting hot by this stage of the game.. I had already deployed one of my hidden regiments to block the hole left by regiment Foix routing (as a result of casualties from artillery fire)

On the left flank the British cavalry make it up the hill in the first of a succession of charges - little point in infantry charging cavalry, so the regiment I placed there was a blocking force... In this instance they saw the cavalry off with a volley and then subsequently a poor morale throw that caused each of the two regiments you can see to break and rout... first battle honours of the game won by the Regiment Saintonge! In the background Wyndhams are gearing up to charge the French artillery - at the moment they are clear of the beaten zone - sheltered by the edge of the hill..
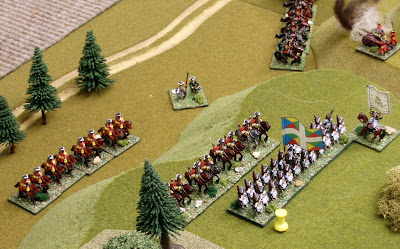
Later in the game and I have had to deploy my hidden cavalry to provide some much needed support as DG's regiments start arriving cab rank style... game hung in the balance here, and only good dice rolls by the artillery, and poor die rolls from DG's morale checks, saved me..
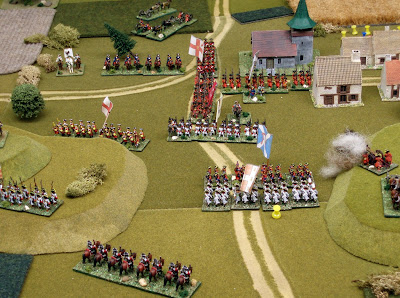
Following - Navarre have routed - not surprising as they were bl**dy useless all game! dog products The French cavalry have swung to close the gate, and happily Regiment Foix have recovered and are being brought back up post haste..
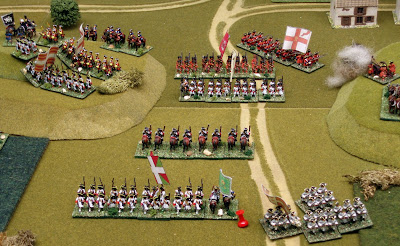
Following - Meanwhile, on top of the hill to the left of the gap DG had managed to get his first infantry into melee - the French held!
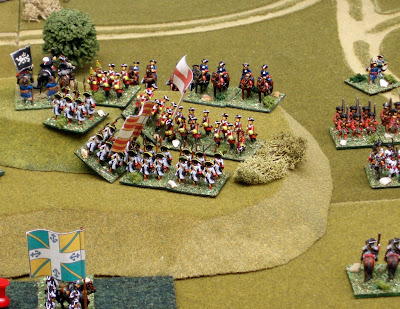
Following - End game - despite his numbers, DG's regiments are severely depleted, I have just bought out my last infantry regiment (Toulouse - the guys with the anchor on their flag) fresh for the battle, and with "going home time" fast approaching DG decided to concede... as night falls, the French remain in control of the gap, and therefore win the game. dog products

Stay tuned for some post match analysis and other thoughts...

Monday, March 14

Holding Position... Set Up...

Life is no less hectic in Steve the Wargamers life - those of you who have hung around here for a long time (in the earnest hope that there might actually be something worth reading here) will know that I also have a boat, which, although small, still takes an inordinate amount of my time at this time of the year...

The reason is that she's due for launch soon, as the new season is upon us (which if I had half a moment to think about it, would probably be the cause of some joy - warm days and all that..) and although I have/had a veritable shed-load of work to do, the end is in sight... having said that this has meant little time for wargaming and gaming..... which was why I was pleased when DG said he was down my way for a few days - nothing like a visit to give a good excuse for a game... the results of said game follows..

For a scenario I turned to my trusty "Scenario's for Wargamers" by Charles Grant, and chose by a not very scientific process (it looked interesting!) the scenario "Holding Action" - page 14 of my version, and the first of two Holding Action scenario's... In summary, think Thermopylae.. and in our case, set in the War of the Spanish Succession with the Franco-Bavarians as the Greeks and the Allies as the Persians... A smaller force is holding a gap in a ridge of hills with the intent of holding off the much larger force for the maximum amount of time...

The table top was as per my last post, but to the following I have added deployment positions... (click for a bigger view)

In the picture, the big hill on the left, and all second contours, are classed as "steep", first contours as "gentle". The woods - which in the picture are tree's placed on a multi-tree base, as opposed to the single tree's used purely for a pleasing appearance - are classed as "dense"... the intent being that the ridge is passable, but not too passable as to make it no barrier at all....

The French (ie. me) start line is the blue one - they can deploy on the ridge, or in hidden mode behind it - I marked their position on a map - DG and I have been playing long enough to trust each other implicitly, but with old age I find a map helps me remember where I have put them!

The Allied commanders (DG for this game)orders are to attack as soon as possible as the duration of the scenario was only as long as DG had available to play - if he hadn't pushed through by the time he had to leave he'd lose and I'd win.. nice and simple and the first time I've used a real-time time limit.... a very clever little ploy to add some uncertainty to the Franco Bavarian deployment was that the British could enter from either entry point, even cleverer the Allied commander wouldn't know either as the entry point for each unit was decided by dice!

Orders of battle were as follows - these differ from those suggested in the book - any gamer worth his salt needs to buy the book, so I make no apologies for not slavishly making the detail available to all for free...

Franco-Bavarian
SideUnitTypeStarting Strength
Franco BavarianNo. 1Medium Artillery6
Franco BavarianNo. 2Medium Artillery6
Franco BavarianRegiment de St. PouangesCavalry6
Franco BavarianBearnInfantry6
Franco BavarianFoixInfantry6
Franco BavarianNavarreInfantry6
Franco BavarianSaintongeInfantry6
Franco BavarianToulouseInfantry6


Allied
SideUnitTypeStarting Strength
AlliedNo. 1Light Artillery6
AlliedNo. 2Light Artillery6
AlliedCadoganCavalry6
AlliedLumleyCavalry6
AlliedWyndhamCavalry6
AlliedNassau FrieslandCavalry6
Allied1st Foot GuardsInfantry6
AlliedDeringInfantry6
AlliedGoorInfantry6
AlliedHirzelInfantry6
AlliedHoweInfantry6
AlliedMeredithInfantry6
AlliedOrkneyInfantry6


Winning Conditions:

For the Franco-Bavarians to win the game they must, at the close of play, be in a position to prevent the Allied force from breaking through the gap and continuing on. The opposite case applies for the Allies to win. The game will be drawn if the Allies are in possession of the gap at last light but are prevented from continuing by darkness (ie. end of game).

Stay tuned - game write up in the next post....

Friday, March 11

Sounds of stirring in the loft....

DG is on his way, time to end the wargaming drought/atrophy...

Feast your eyes, these are my equivalent of the lines of Brabant (there's your first clue as to the period being played this evening), and word has reached us that the Duke (second and last clue) is on the march...

Click on the following for a bigger view.. the scenario is based on "Holding Action" in "Scenarios for Wargames" by Charles Grant..