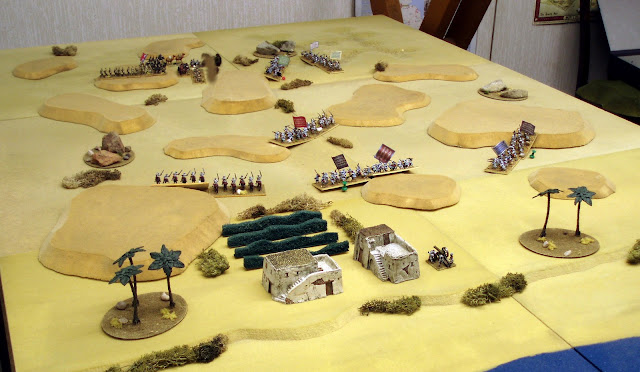
So when we left it at the end move 8 the Dervish units all over the table were now beginning to converge on the small Imperial force..
At the top of the table in the following, one Dervish force is almost within charge reach - the cavalry and Hadendowa are within sight so heading straight at them... happily for the Imperial force, the two dervish rifle armed units are throwing some particularly poor dice and their progress towards the coming battle is very slow..
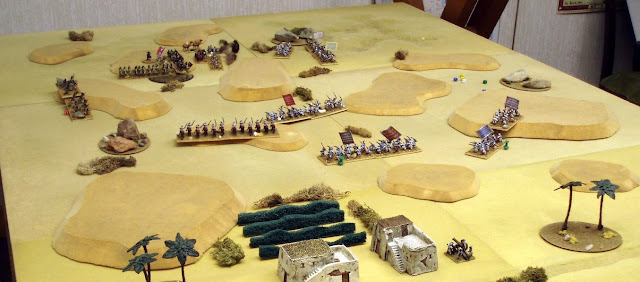
The Imperial square has stopped and the North Middlesex deploy in line to bring maximum fire power to bear on the Hadendowa who were hurtling over the dune to their front - in a truly massive volley (close range, entire regiment plus elements of the Sudanese) the Hadendowa are
completely obliterated - strike one to the Imperial force..
 |
| Move 9 - the Hadendowa have been obliterated but all is not yet over by a long shot.. |
Happily the Imperial fire power also finally makes itself felt on the charging unit tot he right and enough casualties are inflicted to cause the Dervish unit to throw a succession of "pluck" tests that slow down their advance considerably...
At the beginning of the move another Dervish unit arrives - what is scarily spooky is that they enter just by the point where the previous "rub" of Hadendowa have been destroyed.... ground hog day for the Imperial force, and Wade Smith can be forgiven for rubbing his eyes in disbelief..
 |
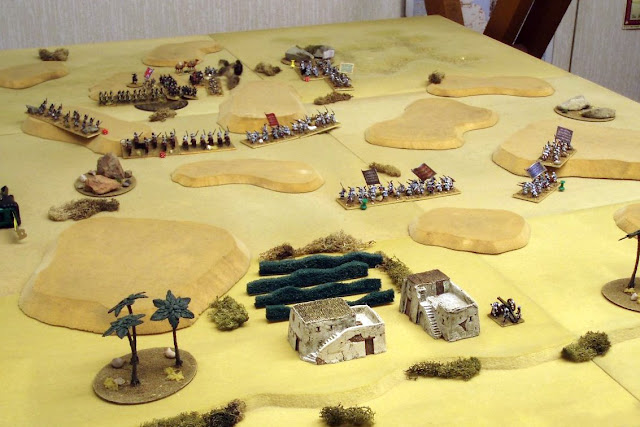
| Move 10 - further reinforcements arrive - more Hadendowa (on the left) - and spookily close to where there brethren were recently obliterated - on the right the charging Dervish unit is reduced to just half strength... |
One feels that by this turn the Imperial force might have been a little worried - the Dervish cavalry is clearly within charge reach, he Hadendowa are taering down on them like howling wolves, and on the other flank those pesky Dervish will
not go away...

Wade Smith orders his infantry to continue extending their line (not without some misgivings - not for nothing was the square the formation of choice in the desert - just because there are no Dervish behind them at the moment, doesn't mean that they won't appear behind their line at some point in time..), and directs them to split their fire between the Hadendowa and the cavalry - yet again the Martini Henry's ring out across the desert, and more followers of the Mahdi fall...
 |
| Move 11 - can't help thinking this is crunch point - the Imperial force has made very little progress but they clearly aren't going to with that lot heading their way! |
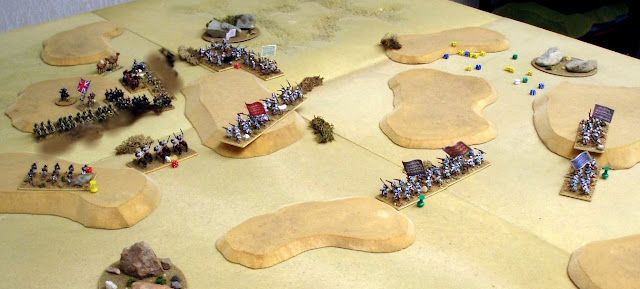
A somewhat closer view of the centre of the action - starting top right - just eleven left of the original 24 in that Dervish unit and they've failed a "pluck" test (yellow pin) so half move next turn... the cavalry have lost one stand (black flag - all my Dervish bases count as two stands) and there are only five figures remaining in the other stand, so 7 casualties all told and in rules terms these guys will now need to start testing their pluck. The Hadendowa are in a better condition - only 4 casualties so far...
 |
| A close up of the action in Move 11 |
...and so it continued into move 12 with the Imperial force continuing to spew brass cartidges over the ground like confetti... another devastating volley from the North Middlesex and their Sudanese comrades in arms severely depletes the cavalry and the Hadendowa - on the other flank the British cavalry and the screw gun have halted the Dervish in their tracks - I'm not so worried about this flank but note how the cunning Dervish unit behind are using their depleted comrades as "cover" - they are within charge reach and no damage....
 |
| End Move 12 - when will those rifle armed Dervish units get moving! You'll also note the infeasibly large numbers of dice at the top of the picture - clearly the Imperial force have just fired! |
..stay tuned - the game nears completion, the current Mrs Steve the Wargamer is on a night shift tonight, and I sense a long session in the loft is coming; the next post will document to the end of the game - whichever way it goes....!


Nice looking game - great looking figures and terrain set up. Dean
ReplyDeleteThanks Dean - appreciated...
ReplyDeleteThe wisdom and power of the Deverish god seems to be tgihtening its grip around the throat of the invading heathen Imperial forces. The end of this exciting narrative is quickly developing as warrior faces-off warrior! Great game!.
ReplyDeleteAn excellent looking game, the terrain and figures look superb!!!
ReplyDeleteLooks great, sounds like fun. Can't beat that.
ReplyDeleteWhen will a Dervish unit appear in the rear of the Imperials?
ReplyDeleteIt is only a matter of time I suspect.
More of the close-up photos please, Sir Steve.
Really like the troops here. Great game.
ReplyDeleteAh, many's the time I spent up the Nile, fighting the fierce Fuzzy-Wuzzy! A cracking little game, sir, and I'm looking forward to more.
ReplyDelete