Showing posts with label WW2 North Africa. Show all posts

Saturday, November 25

"Firing into the Brown" #30 - Malta GC, Volunteer Reviews and a Sally Port

"So Carnehan weeds out the pick of his men, and sets the two of the Army to show them drill and at the end of two weeks the men can manoeuvre about as well as Volunteers. So he marches with the Chief to a great big plain on the top of a mountain, and the Chiefs men rushes into a village and takes it; we three Martinis firing into the brown of the enemy".

Kipling "The Man Who Would Be King"

Time for another update..
~~~~~~~~~~~~~~~~~~~~~~~~~~~~~~~~~~~~~

Just finished a very enjoyable 2nd circumnavigation of the "Harry Gilmour" series, which is a fictionalised account of the life of a young guy in the RNVR in WW2 serving in submarines (very much recommended by the way)..  for a couple of the books the submarine he's on is assigned to the near legendary 10th Submarine Flotilla [clicky], who were based at Malta. 

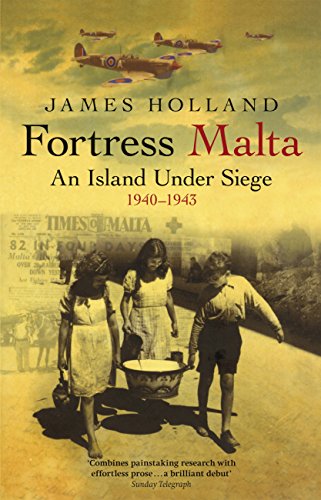
One of the books (David) Black the author quotes as a source for the stories he uses in the Harry Gilmour books was this one by James Holland - and on a whim while in town I spotted it  in Waterstone's while browsing, and bought it. 

SO pleased I did - the book is riveting and is my third "10 plus" of the year - it tells the story of the siege of Malta through the many eyes of both combatants (of both sides) and civilians engaged in the conflict. Nurses, pilots, soldiers, anti aircraft gunners, submariners, admin staff, entertainers, but also lots and lots of civilians having to live their lives in hellish conditions. 

The book is divided chronologically, and covers each of the phases of the siege (which in order very roughly were, being attacked by Italians, then the Germans, then left alone for a bit while the Germans were busy with Barbarossa, before being attacked heavily by the Germans again) and covers the air war, the vital importance of air cover for both defensive and offensive reasons, the submarines (of course), and the role of Malta not just as an island in the Mediterranean, but as the base for vital Allied operations against first, Rommel in Libya, and secondly when that campaign was won, the second front against Sicily. 

Absolutely wonderful - can't recommend it enough..  Steve the Wargamer rates this one as 10+

~~~~~~~~~~~~~~~~~~~~~~~~~~~~~~~~~~~~~ 

Little more on the Lines..  this is the Sally Port  (in blue on the map above), a 6-foot-wide (1.8 m) and 8-foot-high (2.4 m) tunnel built through the West centre curtain to act as a sally port ie. a protected entry or exit to the fortification, to save the garrison having to go the whole way round every time they needed to go to either front or rear of the Lines..

Those door hinges are serious pieces of ironmongery - the gates would have been significant. The tunnel has regular passing points built in to the sides.


~~~~~~~~~~~~~~~~~~~~~~~~~~~~~~~~~~~~~ 

Couple of fascinating contemporary prints featuring the Lines..  this time from the The Easter Monday Volunteer Review in 1868. 'Nother fascinating rabbit hole by the way, as I knew nothing about these annual events.. 

The Reviews were begun in 1861, and basically were a military exercise in how quickly volunteer troops (later these would be designated Territorial) could be concentrated in a single spot. Reviews were held in different venues, including Brighton, Dover, Guildford, Portsmouth, Tring, and Dunstable. Each “review” consisted of a march, a sham fight, and rifle shooting. 

"The Volunteer Review at Portsmouth: The First Hants Engineer Volunteers Constructing a Barrel-Pier Bridge for the Sortie at Hilsea Lines 1868" (c) Alamy

The Lines (albeit slightly stylised) can be seen in the background of the picture above, so this perspective would be from the north side of either the Creek, or more likely the moat, but in that slightly "epic" depiction the London Evening News was want to show!  😏

Picture following was from the same event, but this time taken from the Lines looking North and is a better depiction as you can see the separation between moat and creek, and up on the hill in the far distance one of the Palmerston Forts, built to negate the technological advances in artillery that had already rendered the Lines obsolete militarily by the time they'd been finished..

The Volunteer Review at Portsmouth, the Sortie from Hilsea Lines (engraving) by English School, (19th century); Illustration for The Illustrated London News, 25 April 1868.

Not an event where they just went through the motions..  these exercises were highly regarded. “The whole affair was regarded with importance as demonstrating the efficiency of the Volunteer force, which behaved itself admirably,” said Edward Farr in The History of England. 

The reviews were discontinued in 1878, largely because of the 1871 Bank Holidays Act, which gave the railroads enough civilian traffic on Easter Mondays to refuse to transport the Volunteers, who up to then travelled at a significant discount.

Fascinating, eh? πŸ˜€

~~~~~~~~~~~~~~~~~~~~~~~~~~~~~~~~~~~~~ 

 Laters, as the young people are want to say...

Wednesday, June 6

"One Hour Wargames" - Scenario 16 - "Advanced Guard" - Setup and Game

On the 74th anniversary of D-Day it seems somewhat apt to be posting a report on a series of games that DG and I fought last weekend, and which were set in WW2, albeit in the North Africa sphere..

First time I'd seen DG since Warfare [clicky] so it was doubly excellent to get an email telling me he was coming down for a visit and also did I "fancy a game"? Silly boy - must give him his arm back some time...  😁 Gave DG the choice of periods to play and so it was we headed to the desert sands of Libya

The subject of scenario however was a little more unclear - usually my rules of choice for this period and scale are Blitzkrieg Commander but it's been a long time since I used them, and in fact for the last game I'd used the rules from the One Hour Wargames book, and since they are easily assimilated fro two old codgers of limited brain power we agree we would use them again despite some misgivings (more anon) on my part...

The scenario was then #16 from the book that was the best ten quid I ever spent - "Advance Guard" - two equal sized forces are tasked with occupying a small town - they are advanced guards for larger forces, and there is only one way to win the game which is to have undisputed occupation of the town..

Table then was as follows:


A road running north and south is the only entry point for each side - forces are diced for on the random table in the book and provide the frisson each time the game is played..

The book is not incorrectly titled - DG and I played four times and at the end honours were even..  the following pictures from various of those games but don't ask me which one was which... 

Game 1 I think, as I fortuitously rolled two mortars which you can see in the foreground - my infantry is occupying the town..  DG's armour is flanking the town while his infantry takes a pummeling in the distance

In each game I played the Germans - we rolled for starting forces before each of the four games so as to try out options..

Game 2 as I recognise the forces I had

Game 3 or 4 as I had the same force in both games
 
Post Match Analysis:

  • So honours even at the end of the four games, and an opportunity to banter, discuss rule improvements, try some different tactics etc.
  • There was no way around the fact that whoever gets to the town first wins the scenario - there's no move and shoot, but the town blocks line of sight for firing, and also divides any casualties in half (because of cover) - time and again whoever started first got his infantry to the town, spotted for his mortars, who then utterly pounded the other guy..  if one side got into the town subsequently they were counted as moved and the other side pounded them anyway...
  • All the games back this up and were 10, 7 and 7 turns long - in the last game I went for an outflanking attempt but ran out of time (and troops)
  • DG and I are having a back and forth at the moment with the rules in order to make something out of them that's a little more playable/"realistic"
  • I have concerns about the strength of the mortars - they really are ICBM in these rules - anyone can automatically spot for them and they have a range of four times anything else..
  • I have concerns about the fact that intervening friendly units can be fired through, but intervening enemy units can't - and block line of sight to units behind - so it was you would send a "phalanx" of infantry forward - only the first unit was a target to the enemy - but all four or five ranks could fire back!
  • Refreshments on the evening were my latest favourite ale Wychwood Brewery's "IPA" - they're better known for "Hobgoblin" but this knocks it into a cocked hat - 5.6% but dangerously drinkable..  DG bought a present of a couple of bottles of Felinfoel "Double Dragon" which are cooling even as we speak!
Plans have been laid to reconvene on or around July 14th for a visit to the tank museum at Bovington to also attend the wargame show - can't wait..!

Monday, April 16

"One Hour Wargames" - Scenario 15 - "Fortified Defence" - Setup and Game

After a shamefully long hiatus (* .. six weeks!), so it was that the combination of a missed Salute, a rainy Sunday, a missing grandson (he was at his other grand parents before people start worrying) and various female members of the family otherwise occupied finally allowed me to give thought to dragging the loft ladder down for the walk of shame...  I was dreading the sound of the catcalls and derisory whistling from all the little metal men, but as it turned out they were quite pleased to see me... 😁

* to be fair - this is my busiest time of the year as it's launch month for my precious [clicky] and with the winter we'd had I was trying to fit a whole seasons maintenance into three days.. I've just about recovered....

I'd been sat in the smoking chair (in the garage - it's the only place I can have a beer and a cigar and be left alone) and reviewing some of the pictures from the Salute when I was overcome with an urge to push some lead...  a half an hours muse over what period to play and I decided it was more than time for me to drag the WWII North Africa forces out of their storage drawers where they have languished for far too long...

Scenario was easy - I just wanted a nice simple game to while a few rainy hours on a Sunday - One Hour Wargames it was and as I am working my way through the scenario's one by one, this time it was #15 - "Fortified Defence", a scenario, which according to the book is based on Fontenoy... so the premise is two fortified towns held by one side (I diced and they turned out to be held by Commonwealth forces) are attacked by the second (the Axis, as I fielded Italian armour and infantry). Straight out of "Crusader" or the retreat from "Beda Fomm" during 'Sonnenblum' - I went with the latter, not that it matters, but just because I wanted to give a flavour to the tabletop forces deployed....

Six units aside and after dicing the:
  • Commonwealth force comprised - three infantry, two mortars, and one unit tanks (Cruisers - A9's)
  • Axis force comprised - three infantry (one was Italian), two tanks (Pz III's, and M11/30's), and one anti tank gun
..just for look and feel I tripled all unit sizes as it looked better in the scale I was playing, so rather than one tank representing a unit I used three, etcetc

You have 15 moves to take both towns with the benefit to the attackers being that on any move they can declare "refit" - and all their remaining forces are removed, but they get a complete replacement of all starting forces on the baseline. The defenders get an additional dice of casualties as fortification support (to be honest this is such a tough scenario, I didn't use it)

Rules were straight out of the book - last game we talked about modifying the observation rules, but in this game it's a little tough for the attackers already so I dispensed with the observation test and went with the rules per the book...
Commonwealth deploy first and went as per the following...  in my trusty old Airfix Fort Sahara (doubling as an abandoned Foreign legion outpost), two infantry and a mortar..  in the village, beyond the rough ground, which is impassable to all units other than infantry, I placed the other mortar and the remaining infantry..  I had the Cruisers to act as a mobile reserve.


Mortar nice and safe in the courtyard - with the infantry acting as observers..


Axis enter the table (for the first time)


My plan then was to focus all efforts on the fort, and then swing any remaining troops around to attack the village..  the scenario calls for both to be taken for a win, anything else is a loss, there is no draw..

Start of game and the Axis forces advance and open fire..  but are met with a veritable deluge of shrapnel and explosive.


It was at this time I realised that there was no way the Axis could win this game with the forces at their disposal... through good luck the Commonwealth had rolled for two mortars, with four other units who could spot for them, and a range four times anything else on the table, the units attacking the fort were faced with four dice of casualties every turn - the three from the fort and the mortar in the village..  in return, any attacks on the fort by the Axis were at half points - because of cover...  tough, nay impossible, order...

In the following - more four or five - one Axis infantry lost already, anti tank gun and Italian armour moving on the village..


Feuer! Tirare! Another Axis infantry unit gone...


...three or four moves later and the only Axis force remaining was the German armour, so I fired and declared re-fit as per the scenario - tactics second time round were the same but with the same end result unfortunately.. managed to capture the fort, but with one unit left (the German armour again) on only five points remaining (see following) I called it - there was no way they could take the other village...


Post match analysis:
  • Despite the one sided'ness of it I enjoyed the game - it was good to be pushing lead, and it was nice to have the Desert forces out on the table again...   
  • Rules are simple but give a quick and bloody game - I don't doubt I could tinker with them more, but would the added complexity add to the game? Not sure..
  • If I was to modify anything then the mortars may need looking at - everything else has a max range of 12" they fire at 48"..  so range may need looking at..  spotting is by any friendly unit.. maybe a test to simulate radio difficulties??
  • This scenario more than any other is very dependant on what you roll on the force table..  if either side gets a mortar and the other doesn't times are going to get tough for the side that doesn't...  may be a rule to limit, or ensure each side has one? Or the side that has the mortar is automatically the attacker?
  • I dispensed with the additional firing dice for the fort/village..  the occupiers were already strong enough...
  • Side entertainment while playing was "Sea of Sand" on DVD [clicky] - most apt..

Saturday, November 27

WWII desert set to...

As promised some time ago, just a short post to describe the somewhat shambolical game that DG and I managed to get in while he was down for the Warfare show weekend..

We played using Blitzkrieg Commander ver 2, and the scenario had two forces of about 1000 points each meeting up at a village in a gorge between two dominating ridge lines.

German orbat was as follows:

1CO (CV10)Command
1HQ (CV9)Command
3Infantry UnitInfantry
1Support Unit (MG)Infantry
1Support Unit (Mortar)Infantry
1HQ (CV9)Command
3Infantry UnitInfantry
1Support Unit (MG)Infantry
1Support Unit (ATG, 37mm)Infantry
1HQ (CV9)Command
3Light Panzer Unit (Pz-II)Armour
1HQ (CV9)Command
2Light Panzer Unit (Pz-III 37mm)Armour
1Dive Bombers (Stuka)Aircraft
10Transport Unit (Trucks/Half-Tracks)Transport


British orbat was as follows:

1CO (CV9)Command
1HQ (CV8)Command
3Infantry UnitInfantry
1Support Unit (MG)Infantry
1Support Unit (ATG, 2pdr)Infantry
1HQ (CV8)Command
3Infantry UnitInfantry
1Support Unit (MG)Infantry
1Support Unit (Mortar)Infantry
1HQ (CV8)Command
3Light Tank Unit (Vickers Mk-VI)Armour
1HQ (CV8)Command
3Cruiser Tank Unit (A13) ArmourArmour
1Artillery Unit (25pdr)Artillery
8Transport Unit (Trucks)Transport
3Transport Unit (Universal Carriers)Transport

..in addition the British also had ten artillery stonks at their disposal - five of smoke, and five of HE.

We diced before the game and the British (me) ended up as defenders, tasked with blocking the gorge to the German advance.

I deployed with my tanks hidden (behind the ridge) but my infantry dug in along the ridge lines either side of the village, with the 25pds and the CO in the village - the following shows my left flank with DG's forces advancing on them..


DG largely mirrored this set up himself, with his Pz II's on the left and the III's on the right...

...and so the shambles started! 😏

I think it safe to say that the first failure was that DG's Paznzer II's never did get to the battle line - German HQ's have better ratings than the British (command roll under 8 is all that's required on 2D6!) but again and again, DG kept throwing over - that's going some!

In move two or three I threw boxcars while dicing for my firing on the the right flank - command blunder in Blitzkrieg commander terms! Checking the ensuing result ended with my safely entrenched infantry throwing themselves down the hill at the advancing Germans! See following for before..


..and after!


Next, DG diced for the arrival of his Stuka - all that infantry was far too tempting a target... 😁 He then proceeded to roll the deviation dice to see where the bombs landed only to find out that his guys were so close to mine that they got bombed as well!

Shortly after this my 25pdr started to brew up his Pz III's, and the infantry on my left flank started throwing in all the metal at their command, and before we knew it, the Germans were at breakpoint and the British (amazingly) had won!

Post Match Analysis:
  • A fun game despite the shambolical way that it played out... we blame it mostly on the lack of practice, like most rule sets Blitzkrieg Commander deserves close attention and DG and I hadn't played since April
  • Artillery and air support are powerful - everything within a 20cm square template is hit
  • We toyed with the idea of allowing casualty points and suppression to be carried over between moves - the game would be more bloody as a result
  • Something about targeting doesn't seem quite right - when we diced for hits from multiple firing stands we tended to pick one base and concentrate all the fire on it in order to destroy it quickly. Would all stands in a unit fire at the same target?? We talked about ways of dividing the shots randomly amongst all bases in the opposing unit - we might be better perhaps to use target priority rules, or fire at closes first, etc. More thought required
  • Refreshments on this occasion was a lovely glass of Badger "Tanglefoot" along with curry spiced nibbles - it seemed right given the desert theatre!

Wednesday, April 7

Action in North Africa...

I'm long overdue posting this, but the other week when DG was down visiting his (first of many?!!) grandchild we managed to convene for a quick game of Blitzkrieg Commander - the new (v2) version which we had picked up at the recent Penarth Wargame show..

DG and I have been fans of the previous version for some considerable time so we were keen to see what the differences were and how the changes actually played...

As usual, the game used my WWII figures so was set in the desert - for this game I set the period as early (June 1940) just after the Germans had arrived in the desert in fact - so plenty of small tanks, only short barrelled Pz IV's, and the British get the early pre-cursor to the Crusader tank... all in all much preferable to my simple soul than serried ranks of Panthers and Tigers - I've always preferred my games to be early rather than late war....

I set up the table and scenario - an encounter battle (always my favourite), we diced for sides and DG chose British, I took the Axis (though more properly the Germans as for this game they had no Italian allies)

German OOB:

Breakpoint is 7 (so seven units lost and it's back to Mersah Matruh for schnapps), in addition to the following I also had two air strikes, and three artillery "stonks".. (click on the following, or any other pictures in the post, for a bigger/clearer view)


British OOB:

Breakpoint is 8 (and back to Tobruk for a "gin and it"), and in addition to the following I also had two artillery "stonks" (HE)..

Table top was set up as follows - no remarkable scenic features, just plain undulating sand for the most part, the darker area's however, were declared to be broken ground (visibility blocking)..


We diced for sides, and the Germans got the left of the table (as you look at the picture above) and the British the right...

Initial dispositions were as follows:


Germans had their HQ in the centre on the large hill, along with the mortar, the small Pak37 anti tank gun (the Germans called them "door knockers") and the FOO for the artillery (I let him act for the air strikes as well though strictly speaking I should have paid the extra points for an air officer). I had both infantry company's on the far left of my line (deployed in the dry wadi), and the tanks on the right facing the more open space...

DG's advance was on a fairly narrow frontage - one infantry company on his right (opposite my infantry), one in the centre, his tanks centre left, and the other infantry on the left (opposite my tanks) - the following shows his left flank; infantry and support plus tanks..


The game was pretty quick, and dramatically skewed as a result of a mistake over how we understood mortars fired - more of that anon...

Basically, I opened the game with a push from my tanks (see below) and aimed fire from the mortar - the door knocker was out of range so played no part, and the infantry were nice and safe where they were, thank you! Basically I just continued doing that for the rest of the game - the German infantry never did move...


Blood started to get spilt almost immediately with the German mortar reaching out to deal death and destruction left right and centre, while DG's tanks took care of one of mine.. the following shows the amount of damage from the smoke blowing about!


In the near distance DG has managed to get his right flank infantry onto the hill just behind the ridge line, in the distance his transport is pushing forward with the the other infantry company..


Achtung, Stuka...!! DG looks remarkably relaxed for a man who has presented such a rich target opportunity for a passing Stuka...

As it turned out he was right not to worry, in fact I don't remember that any of the artillery or air strikes were particularly effective - the deviation dice were not kind!

...and so it came to pass, that the British were indeed thumped, and lost on the break point in about move 5 or 6...

Post match analysis:
  • We made a fairly major fubar with how we played the mortars - we both knew that something was not right, and we checked the rules a couple of times but really couldn't see how we were doing anything wrong, and then after the game we visited the Blitzkrieg Commander site to read up on the issue and found that we had been right - we were playing them wrong - mortars against armoured targets hit on a six only, not 4,5,6 as we had been assuming... noted and stored for future games...
  • We played the optional rule where suppression markers are carried over - we'd never been keen on the old system where they just disappeared at the end of the turn so it was a no brainer for us, but does make for a bloodier game - especially when allied to mistake we made in the previous item!
  • A good game though, but I want to play another soon before we forget the lessons - a solo game in the near future would assist... stay tuned for a write up when it happens..

Tuesday, December 2

WWII Germans and some painting totals..

I've just completed some much needed reinforcement for the Afrika Korps - the support weapons have finally arrived, and they'll no longer have to rely on their gallant Axis allies, the Italians, for mortars and MG's..

First off the mortars (and you can click on any of the graphics for a bigger clearer view):


Next some flamethrowers (and no - I'm not sure these were used in the desert theatre; time to do some reading)..


..some medium machine guns - spandaus on the bipod mount...


...lastly some heavy machine guns - "Hitlers buzz saw", the MG42 in it's sustained fire role on the tripod mount. This would have been the backbone of any German infantry unit and everything tactically was centred around it. As it fired 1,200 rounds per minute, every man in the unit would have carried at least one belt of ammunition. It fired at twice the rate of the British Vickers and the American Browning, and the nickname came from the fact that at that rate of fire, the human ear can't distinguish between the sound of individual bullets being fired; eye witnesses have said it sounded like "ripping cloth". A frightening thing to have to face....


This bunch also marks a new basing technique for me as I was getting increasingly dissatisfied with the basing material I was using for my desert miniatures... I've now switched to pure sand/grit and they look much better. I toyed with the idea of also painting the base but to be honest I like it as it is!

======================================================

November Totals

So how did the painting totals do in November?? Not bad I think...

I make that 63 points for the month, and I'm happy with that...

It also brings the year to date total up to 461 "Olley" painting points which has to be one of my most productive years for ages!

My thanks to you all for continuing to read the blogs as well, it's not the be-all, but it's kind of gratifying to know that people find my blitherings as interesting as I do...! This blog, and my Marlburian meanderings, both show increased numbers of readers over the previous month..


======================================================

Last of all - I've started a new blog...

I'm going to use it as the campaign diary for the campaign DG and I are currently engaged in. This will also allow me to document events in the order they happen, rather than expecting people to have to read all the posts back to front (if you know what I mean)...

...it also means I don't have to put temptation in DG's way, as he likes to read the Random Musings and is worried he'll see something he shouldn't in one of the campaign posts!

I've put a link over on the left with all the others...

Monday, November 24

The Oasis at Sidi Rezeg

Last weekend DG was down for the Warfare show (see last post) so we took the opportunity to get a game on Friday evening, and for this outing, on the back of successive black powder battles set in the War of Independence and War of the Spanish Succession decided it was time to head back to the sands of Libya - this time carried on metal linked tracks rather than shanks's pony or the four footed beasts of the Camel Corps.. yes, it was time to re-visit WWII and "Blitzkrieg Commander".

I decided that given the last few games of Blitzkrieg Commander had been relatively small, this one would be considerably bigger, so I factored in about a 1000 points a side*. I also take the opportunity to slip in an aspect of the game that we hadn't tried until then, namely off board artillery.

* I'm not bothered about points based scenario's in the slightest, but when the game involves as many different armoured and infantry based elements as WWII games (can) do it's sometimes difficult to put together a balanced game. Blitzkrieg Commander has an interactive tool called "Battlegroups" on their website (click here)that allows you to put together balanced forces quickly. The tool also allows you to pick the theatre of operations, and the fate down to the month so that the two sides are historically accurate. The thing I like most about it however, is that it not only limits you historically to what equipment you can have (so no Tigers in 1941..) but when equipment is made available, it limits the amount of it you can have based on the same time frame (so no hordes of Tigers early in their deployment...) - it's a cracking little program which I've used lots!

Scenario:

Two heavy battle groups deployed on the flanks of their main armies had both been given orders to reconnoitre and hold the oasis at Sidi Rizeg, a small village deep in the desert. The oasis is the only source of water within a 100 square miles, and ownership of the oasis will give a significant logistical advantage to the side that holds it..

OOB's:

We diced for sides - highest chose.. DG won and took the British (he was as keen as I was to see how the artillery panned out..!)

British - DG:

C-in-C - Allied Command Base .
1 FAO
1 ArtilleryUnit(25pdr)
1 Transport Unit (Trucks) - ATG
Infantry:
InfantryHQ
1st Infantry Company
3 Infantry Unit
1 Support Unit(MG)
1 Support Unit(Mortar)
1 Support Unit(ATG,2pdr)
1 Transport Unit(Trucks/Half-Tracks)-for the ATG
2ndInfantryCompany
3 Infantry Unit
1 Support Unit(MG)
1 Support Unit(Mortar)
1 Support Unit(ATG, 2pdr Chevy Portee)
Cruiser Tank Company -integral HQ
4 Cruiser Tanks(Crusader2pdr)
Cruiser Tank Company - Integral HQ
3 L Cruiser Tanks (A13)


German - myself:

C-in-C - Axis Command Base .
Infantry:
HQ
1st Infantry Company
3 Infantry Unit
1 Support Unit (MG)
1 Support Unit (Mortar)
1 Support Unit (ATG, 50mm)
1 Transport Unit (Trucks/Half-Tracks) - for the ATG
2nd Infantry Company
3 Infantry Unit
1 Support Unit (MG)
1 Support Unit (Mortar)
1 Support Unit (ATG, 50mm)
1 Transport Unit (Trucks/Half-Tracks) - for the ATG
Light Panzer Company - integral HQ
3 Light Panzer Unit (Pz-II)
Light Panzer Company - integral HQ
3 Light Panzer Unit (Pz-III short barrelled 50mm)
Italian Armoured Contingent - integral HQ
4 M13/40

The Table:

Having diced for sides we then diced for table edge I won and chose the right hand side of the table in the following pictures..


The oasis is in the centre of the table marked by the rocky out crop. On either side of this are the houses that make up the village.

All the hills are categorised as soft sand/hard going...

I'd arranged it so that both sides had a disadvantage in terrain on the shortest route to the oasis - DG on the left had a series of hills to thread through, I had some broken ground.

The Game:

Last of all we diced for who moved first - this turned out to be DG, so although I had the advantage of being able to deploy so as to face his forces as they entered the table, DG had the opportunity to move his forces on to the table far enough forward that he would be able to dominate my entrance to the table..

In terms of the table above, DG chose to use his right (ie. towards bottom of the picture) and centre flanks - with the A13's on his right, the infantry in the centre, and his Crusaders on the centre left. When I eventually managed to get on the table my plan was to face his A13's with my Pz. III's and one of the infantry company's, my other infantry in the centre, but I would try an outflanking manoeuvre with the Pz. II's and my Italian contingent.


True to form DG was most aggressive with the tanks, pushing them well forward, and fast... I was saved here by a couple of poor command throws which bought his tanks to a halt after a couple of moves. His infantry came on in two columns either side of the small hills between him and the village but made slow progress. Either way by the time he finished that first move the Crusaders were almost in the village


..and his A13's were just past the half way across the board...


It was now time to bring my stuff on to the table, and it started to go rapidly downhill from this point...

In a hideous repeat of the last game it looked again like my dice mojo had departed and left for foreign shores never to return!

I bought my Pz. III's and one of the infantry company's on, and managed to get my infantry in to the rough ground before failing abysmally on the command roll with the ATG nowhere near ready to deploy. The Pz. III's opened fire on the A13's after they had entered but I only got one round of firing off before we failed another command roll (and this was with the benefits you get in Blitzkrieg Commander for German HQ units!) This was enough to brew one of the A13's...

In the centre, unlike DG, I had chosen to put one of my infantry company's in command of the C-in-C, he ordered them forward and I managed to get all my units on to the table, with the ATG deployed just to the left of the broken ground that has "Pz. II" written over it in the map above.. so far so good.

The Pz. II's also made good progress and started to open fire on the Crusaders (looking for flank shots and not getting them) but again failed command throws 'early'. The Italians made it on to the table and that was about it!

On the next turn DG "unleashed hell" with his A13's and brewed all the Pz. III's (gulp)


On the other flank the Crusaders had similar but not quite so much success - I had the advantage of numbers.. he still managed to destroy one of my Pz. II's.


Halfway point then - and time for a much-needed cup of tea... in terms of breakpoints, DG was in the lead with five of mine to one of his and everything looked black and bleak for the Axis.

...and it was at this point my dice mojo decided to return from holiday refreshed and invigorated....! 

For ease of reading it's probably easiest if I take each flank in turn from the point, so starting off with my left flank, it was now my turn to unleash hell - and I threw everything at DG except the kitchen sink. I started concentrating my anti-tank fire on the A13's, one at a time, and in the first move after tea managed to destroy the second one - DG pulled back the remaining one to keep it safe but didn't quite manage to get it far enough back before he failed his command throw. Meanwhile with the Pz. III's destroyed I had spare HQ capacity so split the infantry company in two which allowed me to fire that half of the company separately. I used the extra firepower to start lobbing mortar shells at long range into DG's infantry, and in the same move also bought up my MG.


In the next turn DG failed to move the A13 (command blunder) and I managed to brew it - score 5 breaks to the Axis, three to the Allies. Then I turned my mortars and MG's on his infantry which were deploying into the village and destroyed a couple of them - and by that point it was all over on this flank as I started to move half my infantry company forward towards the village.

In the centre it turned into an infantry fight as you would expect - DG managed to get his infantry into the rough ground around the oasis, but as he deployed on the edge of the oasis I opened fire with my infantry and assets and successfully destroyed, or suppressed his units..

On the right the long attritional battle between the Crusaders and the Pz. II's and M13/40's, carried on. The exchange of fire was long and DG & I were similarly successful, him brewing an M13/40 while I managed to get one Crusader with the additional help of my infantry's anti-tank gun.

At which point DG finally managed to get his artillery spotter on to the table and successfully called in a 'stonk'...

Well - I for one was impressed, and I think DG was as well secretly. Part of the problem for DG was visibility - his spotter had no clear view of any soft targets, just the Pz. II's and M13/40's massed on my flank. The 25pdr is a howitzer as opposed to anti-tank weapon so any damage would be limited, but there was always the possibility of triggering a collapse of morale (called "fallback" in Blitzkrieg Commander). So the barrage was launched.. impact point was called, direction dice thrown, minimal deviation and then out came a quite unfeasibly large blast template (30cm square!). Every single one of those tanks was under it, but after DG had finished throwing dice, and I had finished throwing saves, the sole casualty was the truck that towed the anti-tank gun!

...and I think it safe to say that was about it - the remaining breakpoints went to me by way of another of the Crusaders, and then I started putting damage on the second infantry company, which resulted in the final breakpoints going to me.

See following for end of game situation:


Post Match Analysis:
  • Great fun as a game - even the beginning bit for me and the end bit for DG. I'm not afraid to admit that I waved my chubby little arms in the air at the end, but only because it was the first game I'd won in some time...
  • Blitzkrieg Commander continues to delight as a set of rules - we've enjoyed everyone so far - it has an option for an alternate move system to the one we were using and I think we might try that next time as given the variable length of the moves you can be sitting round for a long time taking damage when the other guy has the initiative. Basically you alternate commands until you've moved all of your commands and then the move starts again...
  • We discussed afterwards and agreed that one of the problems DG had was getting his infantry and support weapons into action quick enough - possibly as a result of those hills and the soft sand DG crept forward in column whereas I swept on in a loose line and deployed my support weapons as soon as I could. First lesson we took away was to remember that for the next game!
  • We think we probably didn't manage the FOO (artillery spotter) correctly, as DG had him in a command of his own - given his low command pips that meant it was difficult to get him going. We need to read the rules but our idea was to attach him to a command with higher pip's so that we could move him around quicker, but we would still have to use only use his own command pip's to call in stonks..
  • Refreshments this evening were suitably oriental being a bottle of "Old Speckled Hen" a fine IPA style ale that DG is partial too (and I never turn down an ale!) accompanied by some spicy nibbles (Jalfrezi mix). We then moved on to the PG Tips (decaffeinated naturally) and the emperor of dunking biscuits, the digestive (Tesco's own brand - they taste nicer in my view than McVities)