Being an account of my wargaming activities, a few sailing stories, some beer related anecdotes, what music I'm listening to.... oh, and anything else that knows me!
Over the weekend I finally managed to get some time to finish the rest of those trenches and redoubts that I started just before the last AWI campaign game:
I'm really pleased with these - the trenches are a touch big for the 15's (despite being a smaller diameter dowel) but not overly so, and ideal for the 25's.. these redoubts are scaled to 15mm for use in War of the Spanish Succession games:
..and now on to the next project; British cavalry for the Sudan. These are another one of those expensive units, as I'll need mounted and dismounted versions, but also a separate unit depicting horse holders to use when they're dismounted.
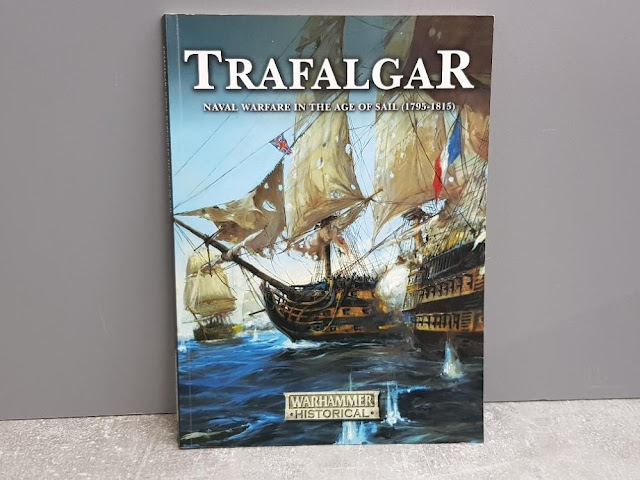
More years ago than I care to remember I painted a large batch of Airfix "HMS
Victory" and "HMS Shannon"
models (click here)
with the intent of fighting Napoleonic ship engagements using the rules from
Don Featherstone's "Naval Wargames"..
Like many such urges, I
expended a lot of energy putting the things together (I can remember the smell
of polystyrene glue even today), and painting them, but did not have the
skills to turn them into waterline models and couldn't face the thought of
playing with them still on those little stands they came with! I can't
remember what happened to them in the end, I guess they just went into the
bin...
The project may have died a death, but the interest
didn't... (as evinced by the large numbers of books on Steve-the-Wargamers
shelves by O'Brien, Forester, Llewellyn, Kent, Pope and other authors writing
in the 18th Century naval line!) so although I'm not a huge fan of Warhammer
historical (though I am more of a fan than I am of plain Warhammer!) the
following really did rather catch my imagination: http://www.warhammer-historical.com/news.asp
The paintbrushes have been flashing in Steve-the-Wargamers wargames room (which in my house is also known as the loft...), as I apply paint to some figures that have been found to be seriously missing in my recent Sudan games... Imperial command figures.
My Sudan rules allow for three levels of command, but happily only two of which need to be represented on the table, namely senior commanders (second level) and brigadier commanders (top level); the other level of command is assumed to be present within the unit as represented. Up until now I haven't had any officer figures, but the brief flurry of activity has gone a little way towards remedying this...
In my rules brigadier commanders control small groups of units (up to five usually), senior commanders command the force in its entirety. The following figures are painted to represent those officers from the British army seconded to the Egyptian army from 1883 onwards to oversee it's training, so will probably command groups of Egyptian or Sudanese troops.. ..having said that, officers in the Sudan seemed to have a fair amount of leeway in the uniform stakes, so I might very well press them into service to command British troops as well.
Together with a hard core of veteran British NCO's, these officers were so successful that they brought the Egyptian and Sudanese battalions up to the point where they could stand in the firing line and hold their own with the best of any of the British regiments.
Many of these officers were unknown, working hard behind the scenes with little recognition, but there are a few stand out names; Hunter (who commanded the Egyptian Division at Omdurman), Lewis, Collinson and perhaps the best known of them "Fighting Mac" MacDonald...
MacDonald was an amazing character - and that in the Sudan where "characters" seem to have been two a penny! Not surprisingly with that name, he was a Scotsman, and had joined the Gordon Highlanders in 1870 at the age of 17. His rise through the ranks was rapid to say the least, and during the Afghan War of 1879 (when he had already been a colour sergeant for 4 years!) he distinguished himself so much that he was given an officer's commission. He served as a subaltern in the First Boer War (and was captured at Majuba, but his bravery was such that the Boer commander gave him back his sword and freed him), and in 1885 he served under Sir Evelyn Wood in the reorganization of the Egyptian army, and took part in the Nile Expedition of that year. In 1888, he became a regimental captain in the British service (after 18 years service), but continued to serve in the Egyptian army concentrating on training Sudanese troops. In 1889, he received the DSO for his conduct at the Battle of Toski and in 1891, after the action at Tokar, he was promoted major. In 1896, he commanded a brigade of the Egyptian army in the Dongola Expedition, and during the following campaigns he distinguished himself in every engagement, especially in the final Battle of Omdurman (1898) where his Sudanese brigade repulsed a determined attack from the Mahdists. The actions of the brigade "manoeuvring as a unit with the coolness and precision of the parade ground" were witnessed and reported by Winston Churchill. Kitchener acclaimed MacDonald as "the real hero of Omdurman". After the Sudan he went on to serve further, but died tragically, and in somewhat sad circumstances...
Whew... these guys have a job to do to stand up to a reputation like that! At the same time I also painted up two stands of infantry, as I'd found myself with a half company of Sudanese, and a half company of British left over after my last reorganisation.
First off the Sudanese: According to my copy of "The Mhadist Wars Source Book" (click here) the Sudanese battalions were recruited from the Southern Sudan and the Nuba Mountains. Many of them were already veterans of the old Egyptian Army who had fought in Mexico and Turkey. Some later served with the Mahdists in the Jihadiyya (the riflemen) under Hamdan Abu Anja, the greatest tactician and general of the Mahdist army.
The first Sudanese battalion, the IXth, was raised from ex-soldiers still in Egypt. The next two, the Xth and XIIIth, were drawn mostly from the survivors of three Sudanese battalions in the Eastern Sudan who had escaped, en masse, from the Mahdists in 1885.
Mine are painted to nominally represent units of the 10th, but the uniform for all the Sudanese battalions were the same so they are interchangeable... figures are 15mm Essex.
Last, and probably least in terms of the picture (they look considerably better on the tabletop) a half company of British regulars to join the ranks of the mythical North Middlesex regiment: A close up of the paint job doesn't do them any favours - I'm also not a huge fan of the figure either as the pose seems a little stiff and they also have thin ankles...! Figures are 15mm Lancashire.
Having left you Colonel Pettygrew style, hopefully champing at the bit to find out how the game turned out, I guess you're now wondering what happened...
The Game
First things first - I as the British had to throw for the arrival time of the troops arriving at point D. These were a not insignificant force as they were comprised of some good, solid, British infantry, my only Guards unit and also my only artillery... almost half my entire force.
With some trepidation then, the D6 was thrown and came up a "3" - not good, but not bad either....
DG and I then threw for who was first to move, and DG having won, he proceeded to march his units on to the table via their respective entry points, and in the order he had previously documented. The rule was simple, the units could only arrive in column of march, could not enter the table except behind the previous unit, and could not deploy until the move after they had completely arrived on the table...
Not surprisingly there was a fair amount of marching in column, as speed to the bridge was of the essence and a change of formation would entail unnecessary delay.. The picture above, and at the top of the page, is of DG's column entering at point B, following are my troops entering at point C - you can see that I'd taken the time to shake the cavalry (Nassau-Friesland - Dutch and behind them Alt-Hanover Cuirassiers - Austrian) into line once I'd got far enough on to the table not to impede the infantry marching behind.
Using his Cuirassiers to the full, first blood in the game went to DG, with a full squadron over the bridge, and a second squadron actually on it, well before my guys had even managed to put in an appearance - see picture below - you might imagine that at this point I was getting a bit worried that my column arriving at "D" would have to fight it's way on to the table!
Happily, just as the Cuirassiers exited the bridge, the first of the British column at "D" entered, and I had opted for my cavalry to lead - there then ensued a truly comical comedy of errors as both DG and I threw lousy dice to manage the formation change of our respective squadrons to line (see the blue dice which we use to mark disorganisation in the following!!) and failed completely:
Eventually however, "good training" will out and the first engagement of the game was between the now organised British cavalry and the first squadron of Cuirassiers. Being still disorganised the Cuirassiers didn't bother to fire... and in the subsequent test the Bavarian's threw high, and broke from the melee so badly that they took casualties - score one to the Allies as the cuirassier squadron routed towards "B".
Leaving my units at "D" to make their way onto the board and face off DG's units arriving from "B", I decided to try something a little different on my left flank, and with all the forces having arrived on the table from entry "C" I sent them across the river, fording just by the church - in retrospect this was a foolish move, but at the time it seemed like a sound plan to break the deadlock of trying to fight on narrow frontages across the bridge.
Unfortunately the attack came to nothing, and I guess it was from this point that the British dice started to turn against them... firstly, I had sent too few units - an attack of that type really needs some weight behind it, and three battalions was not enough.
One of the regiments (Rechteren - first battle and suffering from "new unit" syndrome!) was hit by the French artillery, was pushed back, and then routed (could I throw under 5 on one D6?? Could I heck as like....)
The second unit was then hit by the artillery, made it to the church wall, but was faced by overwhelming French units - including the wild geese who were definitely not suffering from "new unit syndrome"! Cue them to break as well.....
The third unit (Stirler's - Swiss in Dutch pay) occupied the church and then came out to face the hordes - surprisingly they drove the French regiment directly to their front off with casualties - but by the time this happened it was too little too late...
Rechteren take cover in the church yard
End of the battle and Stirler's stand proudly in front of the church - the French regiment they had driven off can be seen at the table edge, but now recovered and ready to come back at them..
The main focus of the battle had shifted to the British right flank and the open area between "D" and "B" - DG and I battled for some considerable time in that little part of Flanders!
First success went to the British (this was just before the turning point mentioned above!) with the British cavalry (fresh from their success against the Cuirassiers) driving off the French cavalry (De Montreval).
The Foot Guards who had come up with the cavalry to help provide an overlap, then charged and drove off the first of the French regiments (Toulouse). Unfortunately any further success, however, was not to be...
First the cavalry were driven off by one of the French regiments and then the Guards began to slow down - good as they were they couldn't take on the whole of the French army on their own, and Ingoldsby's who had come up in support were also driven off in rout following some devastating shooting. Three prime units all running for the board edge, and could I still throw under 4 or 5 for a morale recovery? I refer you to my previous response....!
The Dutch cavalry seeing the previously routed cuirassier squadron forming then launched a ferocious charge while still in column and contacted them on the flank - unable to return fire the Cuirassiers were routed for the second time, and the Dutch pursued inflicting further damage until they in turn were attacked by the now recovered De Montreval and driven off in their turn..
British morale was now at a considerable low - the dice were definitely not playing ball, and I could not get any momentum going in the attack. In such situations there's only one thing to do - so I put the kettle on...
Following refreshments and reflection I decided the next steps - the objective was the bridge and I was going to make damn sure I got to a point where I could deny the dastardly French the victory...
By this time the last British battalion had come on, with the artillery just in front of them. The artillery deployed, opened fire, and then proceeded to hit very little (damn dice again), but the one bright spot in the British firmament was the attack by Meredith's across the bridge.
DG had finally managed to get the second squadron of Cuirassiers off the bridge and had brought up the Royal Italien to hold his end of the span - up came Meredith's, flags flying, drums and fifes going for all they were worth. Marched across the bridge, and a devastating volley from the French sent them back... pausing only to recover their morale, shake themselves down, pick up their brigadier for additional moral support, and strike out again - back over they went...
This time the Royal Italien missed, but not only that, so did the French artillery.... even more unlikely, the Royal Italien then failed their test to stand and routed away!! Meredith's proudly marched over and took ownership of the inn.... now that's a battle honour in anyone's book!!
Meredith's charge across the bridge..
Unfortunately - that was the end of the battle, with most of my forces scattered DG had ignored Meredith's and sent the wild geese (Lee's) across the bridge to support his other regiments, and I decided that honour was the better part of valour and that I would surrender....
Final situation - Lee's are crossing the bridge to help out the French line, my only available troops are the half strength squadron of horse, and Orkney's who were also under strength...
Post Match Analysis:
The game played well but with some huge swings in luck to DG and I; I definitely had the first third of the game, but after that it went wholly DG's way - in one of my moves I threw three separate dice looking to score under 4 or 5 and failed them all - three regiments failed morale! Ah well, such is life when you trust to lady luck to keep an eye on your little metal men.....
This is about the eighth or ninth game we've played with these rules now and we didn't have any glaring issues with them - two things I will look into are:
Army break points - I think both DG and I are a long way past fighting to the last man. We both agreed that in a scenario like this then my army should have broken a lot earlier than it did - one of the idea's we have is to steal the simple mechanism they use in the Blitzkrieg Commander set... a break point that is a proportion of the army's strength, with the breakpoint set high or low depending on the level of training of the army..
Attacks/melee's when in column of march - it seems strange that we don't consider the frontage of the attacking unit in a melee situation - one for some further thought..
Tea on this occasion was the excellent PG Tips de-caffeinated; I'm now a fan, and am quite willing to admit I was in the wrong about de-caffeinated! The biscuits were a triumph being McVities Oat and Chocolate Chip cookies - and very nice they were as well!
An impromptu visit by DG this weekend lead to the possibility of a quick game yesterday evening, so while waiting for littlest'un to finish her ballet class, a quick browse of "Scenario's for All Ages" (which I would recommend wholeheartedly to any gamer for a positive feast of game idea's) highlighted "The Important Bridge" (scenario number 10) as looking particularly interesting..
The name of the scenario is a give away, but it turned out to be even more interesting to play than the preliminary reading would lead you to believe!
In summary, two forces have two advance guards (so four forces in total), with orders to capture and hold a bridge at all costs. The four forces come on the table at separate points, and one of the forces is delayed slightly (throw 1D6 for the entry move) to put a little bit of chaos into the mix.
The table therefore looks as follows (please click as usual for a bigger, clearer, view):
The French entry points for this game (they took the part of Blue Force) were A & B, the British (Red Force) entry points were C & D, with the force at D being the one delayed.
The forces for each side were pretty similar - I had to modify the suggested forces as listed in the book as I don't have any dedicated light infantry, so I substituted Guards for Lights (one a side); I also don't have any light cavalry (yet), so substituted mediums for light. Happily I had enough heavy cavalry (thanks to Alt-Hanover's arrival) to field the recommended numbers of heavy cavalry..
Both forces therefore ended up with 56 points a side (using morale points as defined in the rules I use), with:
Red force fielding seven battalions of infantry (one of Guard), 3 squadrons of horse (one Heavy), and one medium artillery piece.
The French had a slightly different composition as they fielded seven battalions of infantry (one Guard), but two of the three cavalry squadrons were heavy, they also field a medium gun.
Where the difference really came in was the way that these forces were then divided between the two advance guards.
The French had their main strength in the force arriving at point "A" - four battalions, both heavy cavalry, and the gun - this then left 3 battalions and the remaining cavalry to enter at "B".
The British also had most of their strength arriving at the river entry point - 3 battalions of foot, 2 of horse (one heavy) and the gun - with the force entering at "D" comprising the remaining infantry and cavalry unit. It was this latter force that would throw for entry time...
So - with the columns of march for all four forces documented (so that there wouldn't be any argument about which units arrived when), and the delaying dice thrown - let the game commence...
..which of course will be the subject of the next post! :o)
I seem to have been reading quite a lot at the moment - I can only blame it on the absolute crackers that are currently hitting the book shelves...!
This one is no exception - I've been reading Mr. Cornwell's output for years now, and have probably read every book he's ever written (including one or two he wrote with his wife) but I can absolutely and honestly say that this one is up there in what I consider to be the top 5, and possibly top 3, of his books. It is absolutely un-putdown-able!
The book is set in the Hundred Years War, and marks a return for Cornwell to the same period he depicted in the Grail series, but not the same characters. The book traces the story of one Nicholas Hook, who is branded an outlaw for helping free a Lollard girl due to be executed, and escapes to France to fight in a mercenary company. Following various adventures in France he eventually narrowly escapes death during a siege when the victorious French troops run riot. He evades capture and returns to England with news of the siege, and having had an audience with the king (Henry V) he is given a place in Sir John Cornwaille's company of bowmen, that he is preparing to take to France.
I'm not going to spoil the rest of the book by telling you what then happens, but a goodly part of the book is about the siege of Harfleur, and the battle of Agincourt (Azincourt).
When Cornwell succeeds is in his depictions of battle, and while you would normally describe him as an exponent of black powder battles (Sharpe/Starbuck) he is without a doubt equally adept at describing what might have gone on, on a medieval battle field. In a word.... unpleasant
His descriptions of the attacks at Agincourt are particularly descriptive, the effects of the arrow storm, what happens when a fully armoured man hits another similarly protected man with a variety of very heavy weapons, human frailty's, it's all there....
I was beginning to get a little underwhelmed by his Alfred series, this book is his best in years, and despite what I said in the last book review about allowing room for improved scores, Steve-the-Wargamer rates this unequivocally as 10 out of 10.... :o))
Time to get back to fundamentals, so may I present for your pleasure a new unit of the Imperial Austrian army, ready to join the forces of the coalition and fight against the perfidious French and their abominable allies the Bavarians...
These guys are painted to represent a squadron of the Alt-Hanover Cuirassiers, my sources tell me that this regiment had a total of six squadrons present at both the assault on the Schellenberg, and at Blenheim.
I can't give you a unit history I'm afraid as I can find absolutely nothing about them, but I can tell you that at the Schellenberg they served on the right of the attack, in the fourth line, in the brigade of Prince von Wurtemburg under the Count von Styrum.
At Blenheim they were re-organised and served in Fugger's Brigade with compatriots Lobkowitz's Cuirassiers.
Reading my copy of "Blenheim 1704" Fugger was a player in the assault on Oberglau - he had earlier refused to support the Prince of Holstein-Beck who had been given the task, arguing that he could not move without the express orders of Eugene.
Later however, when the..
"battle was now in the balance. If Holstein-Beck’s Dutch column was destroyed, the Allied army would be split in two; Eugène’s wing would be isolated from Marlborough’s, passing the initiative to the Franco-Bavarian forces now engaged across the whole plain. Seeing the opportunity, Marsin ordered his cavalry to change from facing Eugène, and turn towards their right and the open flank of Churchill’s infantry. Marlborough (who had crossed the Nebel on a makeshift bridge to get a closer view), ordered Hulsen's German battalions to support the Dutch infantry. A Dutch cavalry brigade under Averock was also called forward but soon came under pressure from Marsin’s more numerous squadrons.
Marlborough now requested Eugène to release Count Hendrick Fugger and his Imperial Cuirassier brigade to help repel the French cavalry thrust. Despite his own desperate struggle, the Imperial Prince at once complied, demonstrating the high degree of confidence and mutual co-operation between the two generals. Although the Nebel stream lay between Fugger's and Marsin's squadrons, the French were forced to change front to meet this new threat, thus forestalling the chance for Marsin to strike at Marlborough’s infantry."
These guys will provide some much needed heavy cavalry for the Allies, and will help balance the heavy cavalry advantage the Bavarians currently enjoy in my armies..
Figures are Peter Pig 15mm's from their English Civil War range.
"The greatest pleasure is to vanquish your enemies, to chase them before you, to rob them of their wealth, to see their near and dear bathed in tears, to ride their horses and sleep on the white bellies of their wives and daughters." Genghis Khan, advice to his generals, 1224
Having just finished the final part in Conn Igguldens monumental (my opinion!) trilogy on Genghis Khan, by way of a small post, I thought I'd provide a review of sorts...
The book pictured is the third and final part of a trilogy giving a fictional account of the life of Genghis Khan. Iggulden previously gave us a trilogy on the life of Julius Caesar which I also read - but in my humble view, as good as that trilogy undoubtedly was, this one knocks it into a cocked hat.
I've read all three now (the others being "Wolf of the Plains", and "Lords of the Bow") and in my view, each of them has been better than the previous. So what's so good about these books? Firstly the subject matter - most of us have heard something about Genghis Khan and the Mongols, very few have a good understanding of what he did in his life; where he was born, how we was bought up, what were the causes that lead to him being the commander he was, etc etc.
These books provide this information in a fictionalised way, but in a way that is very readable - but the benefit is that you learn not only about Genghis, but you also get to understand how the Mongols lived, their lifestyle, Genghis's reliance on his commanders - Subodai, Jelme, his sons Jochi, Chagatai and Ogedai (who was his eventual successor), and his brother Khasar.
The first book describes his early life - outcast from the tribes, how he became a member of one of the tribes, and through pure ferocity and iron will overcame the other tribes to eventually join them all into one Mongol nation. The book finishes with him taking them to war with their hereditary enemies the Tartars, who he defeats. A fantastic book, I learned a lot about Mongol tactics, and the surprising level of command & control in Mongol armies. Tactically, they were way in advance of other armies they met; but more than anything else these guys were hard. Iron rations was mares milk mixed with blood they took from their horses......!
Having forged the Mongols into a single nation, with an army of quite astonishing technical ability, the second book describes his war with the Chinese and is about how he conquered huge area's of China (more correctly the Xi Xia and the Jin) - in the process it describes how he would have come to terms with the intricacies of siege warfare, and how he learnt to adapt the tactics and techniques of the Chinese. He was undoubtedly helped in this by having some quite outstanding generals; Subodai (mentioned above) in particular is a tactical genius and like Genghis understood the importance of siege craft very quickly, but Genghis's own sons/brothers are not bad either! The book describes the relationship between Genghis and his subordinates - he was undoubtedly a complicated character and I think Iggulden manages to put "flesh on the bones" really well. The book ends with the battle at the splendidly named "Badger Pass".
This last book is set against the campaigns that Genghis fought after he he had finished with China and is about his conquest of the Khwarezmid Empire (roughly modern day Iran, Turkmenistan and Khazakstan) and his first campaign in the west. In it the Mongols meet their first elephants in battle, there is a brush with the Assassins, and Genghis faces possibly the largest army he has ever had to face under Shah Ala ad-Din Muhammad.
The book deals with the increasing difficulties of campaigning in a hot environment, but mostly Genghis's increasing difficulties in accepting his eldest son Jochi (there is some doubt that he was actually Genghis's son) and the tensions this leads to among his family (bitter rivalry between Jochi and Genghis's other son Chagetai), and his generals - especially Subedai who had trained and practically bought up Jochi from birth.
Having defeated the Shah, and eventually the Shah's son (after a very hard campaign), Genghis orders Jochi killed by Subedai, and names his youngest son Ogedai as Khan - as he is about to return to China to finish some business with the Xi Xia however, he is killed by his second wife (who is a Xi Xia and concerned about what will happen to her family) and this ends the book.
Whew......!
Steve-the-Wargamer rates this trilogy 9.9 out of 10 (you have to allow some room for improvement!), and wholeheartedly recommends all three without any hesitation to anyone who enjoys good military historical fiction.
The pictures by the way are of my DBA Mongol Army - figures unknown but I think Essex, and in 15mm. The army represents how the Mongols would have been much later than Genghis hence the increase in foot troops... I have a DBA Samurai army I use to oppose these guys, and that campaign was 50 years after Genghis died. The Chinese Rocket gun was scratch built by "Lofty C" to meet the DBA army option for artillery.... can't think how old these figures are - I reckon at least 12 years. DG and I used to play loads of DBA but I haven't played in years now... too little time, and I can't get excited about pushing 12 elements around a 2' tile any more, when I can deploy big battlaion on a full size table!
Background to the battle - the Campaign for the South 1643-1644
The following may help when tracking the locations mentioned in the following - click on this (or any of the other pictures in this post) for a bigger view...After the failures in the summer of 1643 at Lansdown (Bath) and Roundway Down (Devizes) both which I've visited but not got round to blogging about, Parliament ended up losing Bristol (a triumph for Rupert as I remember).
The Parliamentary commander, Sir William Waller, had fallen back towards London while the Royalists established additional garrisons at Donnington castle near Newbury, Basing House near Winchester, and Arundel (which Parliament promptly besieged). The general view is that during the winter of 1643-4 neither side had an advantage. Royalist and Parliamentarian command centres were in Oxford and London respectively, and capture of either one of those cities would give either side a distinct advantage, as it could bring about the end of the war by negotiation rather than force.
Charles looked to his Western Army commanded by Sir Ralph Hopton to secure the counties of Dorset, Wiltshire and Hampshire and advance as close to London as possible - this (gigantic!) task was to be accomplished with little more than 3,500 troops. After reverses during the previous December culminating in the Battle of Alton, Hopton had withdrawn to Winchester to regroup and recruit. He was joined here by a detachment from the King's main "Oxford Army" to bring the strength of his army at Winchester up to around 3,500 foot and 2,500 horse. The reinforcements were led by the Earl of Forth, General-in-Chief of the King's army and Hopton's senior officer, perhaps indicating that the Oxford commanders had lost confidence in Hopton after the setbacks of the previous winter. Either way Forth was badly afflicted with gout so in effect command fell to Hopton.
Parliament had also formed a new army, the South-Eastern Association, Waller's Army had been reinforced by detachments from the main Parliamentarian army under the Earl of Essex, and the London Trained Bands, to bring its strength up to 6,500 foot and 3,500 horse, so they significantly outnumbered the Royalists. This army was advancing westward from their winter quarters near Arundel (which we've heard of before as part of the post I did on my local castle at Warblington).
By March 1644 the weather had settled sufficiently to allow both armies to resume actions in the field. Forth and Hopton determined to seize New Alresford, thus placing themselves between Waller and London. Waller with some 10,000 troops advanced towards Winchester, which had been taken by the Royalists in October. On learning of his enemy's movements Hopton moved quickly to intercept him and finally bring him to battle. Sir Ralph Hopton's Royalist army reached Alresford, to the north east of Winchester, on 27th March. Hopton deployed his troops (technically they were under the command of Forth) on the downs south of Alresford, approximately one mile to the east of the village of Cheriton. Waller's forces camped for the night close to Hinton Ampner, just to the south of Cheriton.
The Battle
It's worth noting that there's some doubt about the actual site of the battle - in total there are three ridges running east/west; some sources say that it was south of the middle ridge, some say it was north of the middle ridge. The Battlefields trust site (see URL at the end) have gone for the northern battle position; the local information boards have gone for the southern position. I've read that some battlefield archaeology shows evidence of large quantities of musket balls on the northern/traditional site so that's the one I (and the Battlefields trust) go for - it also seems to make more sense to me terrain'wise… so the following is described from that view.
The two armies drew up facing one another on opposite sides of a horseshoe-shaped ridge near the village of Cheriton in Hampshire. Forth and Hopton occupied the northern ridge:
This is a panoramic shot I took from roughly the centre of the Royalist position, looking first at Cheriton Wood, and then swinging round to the Royalist right - with the Parliament held ridge in the far distance.
Cheriton Wood:Parliamentary position:Waller occupied the slightly lower southern ridge (I took this from the bottom of the valley, midway between the two positions): This is their view of the Royalist position, which was on the far ridge: The Parliamentarian troops were deployed just behind/on the ridge line with a hedge along their front - these are the positions they held - just behind the hedge line on the ridge - first picture is looking west: ..second picture is looking east, just behind Cheriton Wood: The ground between the two armies sloped down into a bowl-shaped hollow with the extensive woodland of Cheriton Wood on higher ground to the east. These three pictures show the "bowl" - left, center & right respectively. The one showing the right shows Cheriton Wood in the distance and clearly indicates what a threat it was to either side if there were enemy troops in there: The battle was divided into clear phases (and I've numbered them on the map): 1. The Fight for the Wood The first stage of the battle involved attempts to secure Cheriton Wood, which potentially provided an approach to the enemy's lines that didn't involve having to cross the bottom of the bowl. At dawn, under cover of mist, Waller sent an advance guard drawn from his London regiments under Colonel Walter Leighton to occupy the wood - they drove back a Royalist outpost under the command of Colonel George Lisle. Hopton also realised the importance of the wood though and positioned artillery to cover its edges and fire on the Parliamentarians as they emerged, which forced them back under cover of the trees. As the rising sun burned off the mist, Hopton then sent in Colonel Matthew Appleyard with 1,000 musketeers to clear the woods. The fighting was fierce & confused as both sides wore a scrap of white in their hats as a mark of recognition, and both had adopted the cry 'God with us'! In the end Lieutenant-Colonel Edward Hopton (was he a relation to the commander I wonder??) led a column of Royalist musketeers, supported by artillery, in a flanking manoeuvre that succeeded in driving the Parliamentarians out of Cheriton Wood.
2. The Unplanned Royalist Attack Hopton was now anxious to attack the vulnerable Parliamentarian right flank (presumably via the wood), but the Earl of Forth preferred to stand on the defensive and wait for the Parliamentarians either to attack the strong Royalist position or to retreat. As Forth was senior to Hopton, his plan prevailed.
It seems like the tension of waiting was too strong for some - either out of eagerness, or something else (artillery fire??), Sir Henry Bard *, acting without orders and for reasons unknown, led his infantry regiment (Pinchbeck's) in an unsupported charge down into the hollow towards the Parliamentarian left flank. In response, Sir Arthur Haselrig led his regiment of cuirassiers (the lobsters) in a well-timed counter-charge that blocked the Royalist retreat and quickly overwhelmed Bard's regiment, so that every man was either killed or captured. In the pictures of the bowl above, the tractor would have been about where the engagement took place - I would have wandered down for a closer look but he was muck spreading!! :o)
The Royalist cavalry on the right wing tried to provide support, but were forced to make disjointed attacks along narrow lanes and were defeated in turn. Witnessing the fight from the ridge above, Forth sent a second regiment to help Bard, which met with a similar fate.
3. Out of Control
From this point, the battle appears to have spiraled out of Forth & Hopton's control, with Royalist regiments making uncoordinated charges down into the hollow without mutual support, only to be overpowered one by one. The confused fighting continued for several hours with Parliamentary infantry regiments also being drawn in. The fight for control of Cheriton village was particularly fierce amongst the lanes and hedges (both sides going for the covered flank again - opposite side of the battlefield this time).
Hopton sent some Royalist horse from the left wing under Sir Edward Stawell to make a better prepared attack, but they were also defeated.
Haselrig's regiment now attacked the Royalist foot moving up in support, and drove them back. The Parliamentarians also attacked the Royalist left, which had been denuded of its horse, and regained Cheriton Wood.
By mid-afternoon, the Parliamentarians' weight of numbers and defensive advantage were telling. The decisive blow was struck when an enterprising Parliamentarian colonel led his regiment in an outflanking manoeuvre (via Cheriton?) against the Royalist right flank on the northern ridge, which was weakened after so many troops had gone to join the fight in the centre.
With the cavalry shattered and the infantry under severe pressure, Hopton and Forth broke off the action and ordered a withdrawal towards the village of Alresford. Under Hopton's direction, the Royalists succeeded in escaping from the battlefield with most of their artillery and baggage, and Alresford was set on fire to cover the retreat. Despite being in combat for over eight hours, the Royalists made Basing House that night largely unhindered. The following day, Hopton and Forth retreated to Oxford while Waller advanced to Winchester where the city, though not the castle, surrendered to him.
Aftermath:
Casualties were fairly light, around 300 Royalists were killed, including the King's cousin and several senior officers. Sir Henry Bard lost an arm and was taken prisoner. Parliamentarian losses were reported as being around 60! The general view is that the victors also issued the casualty numbers, and that this is early propaganda - it was more likely to have been about 300-500 a side... :o)
The remnants of Hopton's army were subsequently absorbed into the King's Oxford army as Waller's victory at Cheriton ended all hopes of a direct attack on London. The Earl of Forth returned to the Royalist capital at Oxford, but in November Prince Rupert finally superceded Forth as commander of the King's armies.
* An interesting character. In the attack most of his regiment were killed, and Bard lost an arm and was captured by the parliamentary forces. He was given the title of 1st Baronet Bard of Staines in October (one wonders why!). On securing release from Parlimentary custody he returned and took command of his regiment again, being appointed the governor of Campden House, in Gloustershire. When the garrison was withdrawn from the house it is probable that Bard ordered the house to be burnt down, to deny its use to enemy. Following this, Bard was at the storming of Leicester in May 1645. Apparently he was the first man over the defences - not bad for a man with only one arm! He's also credited, somewhat less honourably, with ravishing two women of the town, still with only one arm, but there's some doubt about this. Bard's war ended in June 1645 when his regiment was destroyed (again) at the battle of Naseby. He was elevated to the peerage in July 1645 when he was made 1st Baron Bard of Dromboy, and the 1st Viscount Bellamont - Irish peerages.
You've got to love the internet for turning this stuff up!
Just a short update to put up some blog hit totals and stuff... My background is managing networks so I'm kind of interested (in a geeky way) in statistics ... :o)
First the blog hits (click for a bigger view):
Blimey! Look at those visitors for this site.... anyone would think there might be something interesting to read here*... how does it go?? Ah yes, "His men would follow him anywhere, but only out of morbid curiosity" - bit like this blog really.. :o))
Then the painting totals (click for a bigger view):
Bit disapointing really - need to get a drift on but I have managed to put out a minimum of one unit a month all year, so I'm not a complete waster. Sitting on the painting table at the moment are a squadron of Austrian Cuirassiers (Peter Pig ECW range) for the War of the Spanish Succession..
Next...
~ have just finished doing some updates to the AWI and Sudan project blogs (links to the left) to bring them up to date following recent units being completed, battles fought, links found etc. I'll do a comprehensive clean up of all of them soon and announce it here... I see those project pages as being "scrapbooks" that contain anything and everything I find interesting with regard to the periods in question.
~ Those of you who blog, enjoy blogging, and worry about losing the contents may be interested in this little tool that I found when searching for just such an application WinHTTrack (click here). WinHTTrack is a website copier - basically you download it, install it, fire it up, give it the title of your blog, and it goes off and downloads everything it finds! If it's a big blog you may have to leave it to do it's business for a while, but to give you an idea - my WSS Project blog came out at about 13Mb, this blog however, came out at 250Mb! The tool works by downloading each post as a discreet web page (HTML file) with all the pictures etc in a supporting directory... there's no option (I've seen so far) for taking this data and uploading it (ie. to restore a completely lost blog) but to be honest, if I ever lost the whole blog I wouldn't be too worried as at least I have all the old stuff backed up and safe... Steve-the-Wargamer rates this little tool 9/10 (be even better if you could also do uploads!)
~ Last of all Steve-the-Wargamer has the day off, so i'm just packing the binoculars and camera for a visit to the Cheriton (click here) site. More when I get back....
* Either that, or you all suddenly came back from holiday... :o)

 ..and now on to the next project; British cavalry for the Sudan. These are another one of those expensive units, as I'll need mounted and dismounted versions, but also a separate unit depicting horse holders to use when they're dismounted.
 ..and now on to the next project; British cavalry for the Sudan. These are another one of those expensive units, as I'll need mounted and dismounted versions, but also a separate unit depicting horse holders to use when they're dismounted.

 ), as I apply paint to some figures that have been found to be seriously missing in my recent Sudan games... Imperial command figures.


