Showing posts with label Chiraz. Show all posts

Tuesday, March 17

The year is slipping away...

..as if....

...and there are precious few updates here because of the time of the year.. 

...if you want updates you need to go to the boat blog [clicky], because with just over 4 weeks to launch all available resources are currently focussed there.... 

...which isn't to say that thoughts don't still stray towards things soldierly, and wargamingly, but that's all they are - thoughts...

On the paint table I have the Minifigs Sikh infantry and the Bengal Lancers waiting to complete before shipping to Suakin on the Red Sea coast of Egyptian Sudan

Along side them there is also a battalion of CP Models infantry waiting for uniforms and standards of a yet to be decided British or French regiment before they march to the sounds of the guns in Flanders in support of, or against, The Duke of Marlborough

DG and I are long overdue to refight the last battle in the Chiraz campaign - the table is still set from the last game, we will swap sides and 'set to' just as soon as I can find some time...

I have also just completed the second volume of the David Gilman "Thomas Blackstone" series - almost as eagerly awaited as the newest Mallinson/"Hervey", it met all expectations - I will review it separately I think...

Monday, February 16

Annexation of Chiraz - Game #5 - The Defence of Cressay - Game - Part 2

...and so to more pleasant matters than the previous post (for which apologies but they got my goat!), namely a conclusion to the game .. 

...you may remember that at the end of the last post (ha..  a Freudian slip perhaps?? ) on the battle, we had left the game at a slightly parlous stage for the French/defenders/me...

...after a good start where I'd 'tonked' the Allied assault columns very nicely (and which we shall call, rather grandly, "stage 1"), DG had sent his forces over the top of the hill to his right, in a partial envelopment with far more success ("stage 2")...

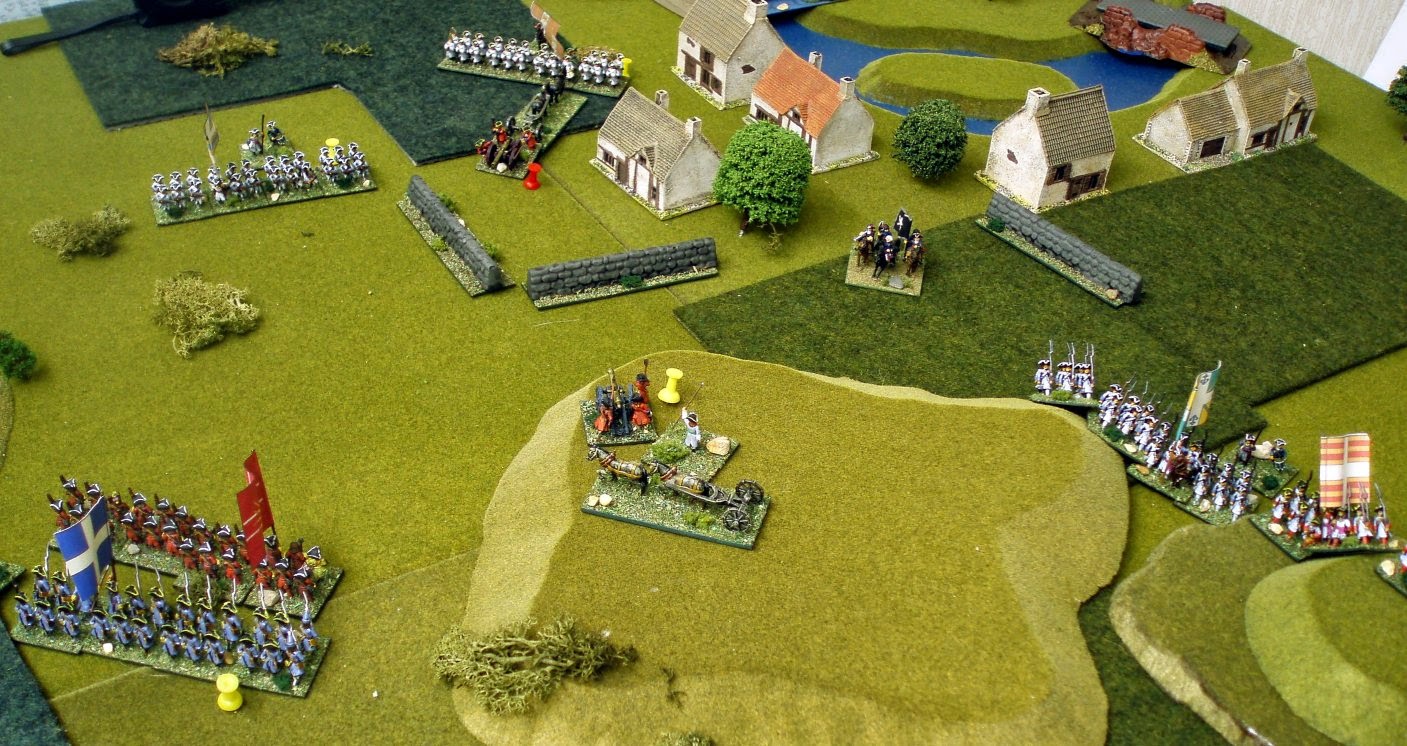
...the following is taken at the end of "stage 2" - my cavalry has departed the field - you can see my cuirassiers charging off through the village with DG's Austrian heavies following up -  he has his other cavalry pinning two of my infantry battalions, and his artillery on the hill has started to pound mine with some success...  the one bright spot for me is that I have 'seen off' the Dutch Rechteren regiment (blue flag white cross) but having done that, I now need to get the regiment that did it (Nivernais, in the foreground with their backs to us) back in line before those Allied assault columns take them in the flank..


...and so on with the game, and in retrospect this was the end of "stage 2" - we are about to start "stage 3" (forsooth)....

Almost immediately I started withdrawing my flank on Nivernais pulling them back so as to be at right angles to the wall (see following a few moves later)...in the meanwhile DG has rallied Rechteren only to see Lord North and Grey's Regiment turn tail (red flag, white outlined cross)

High water mark of the Allied attack

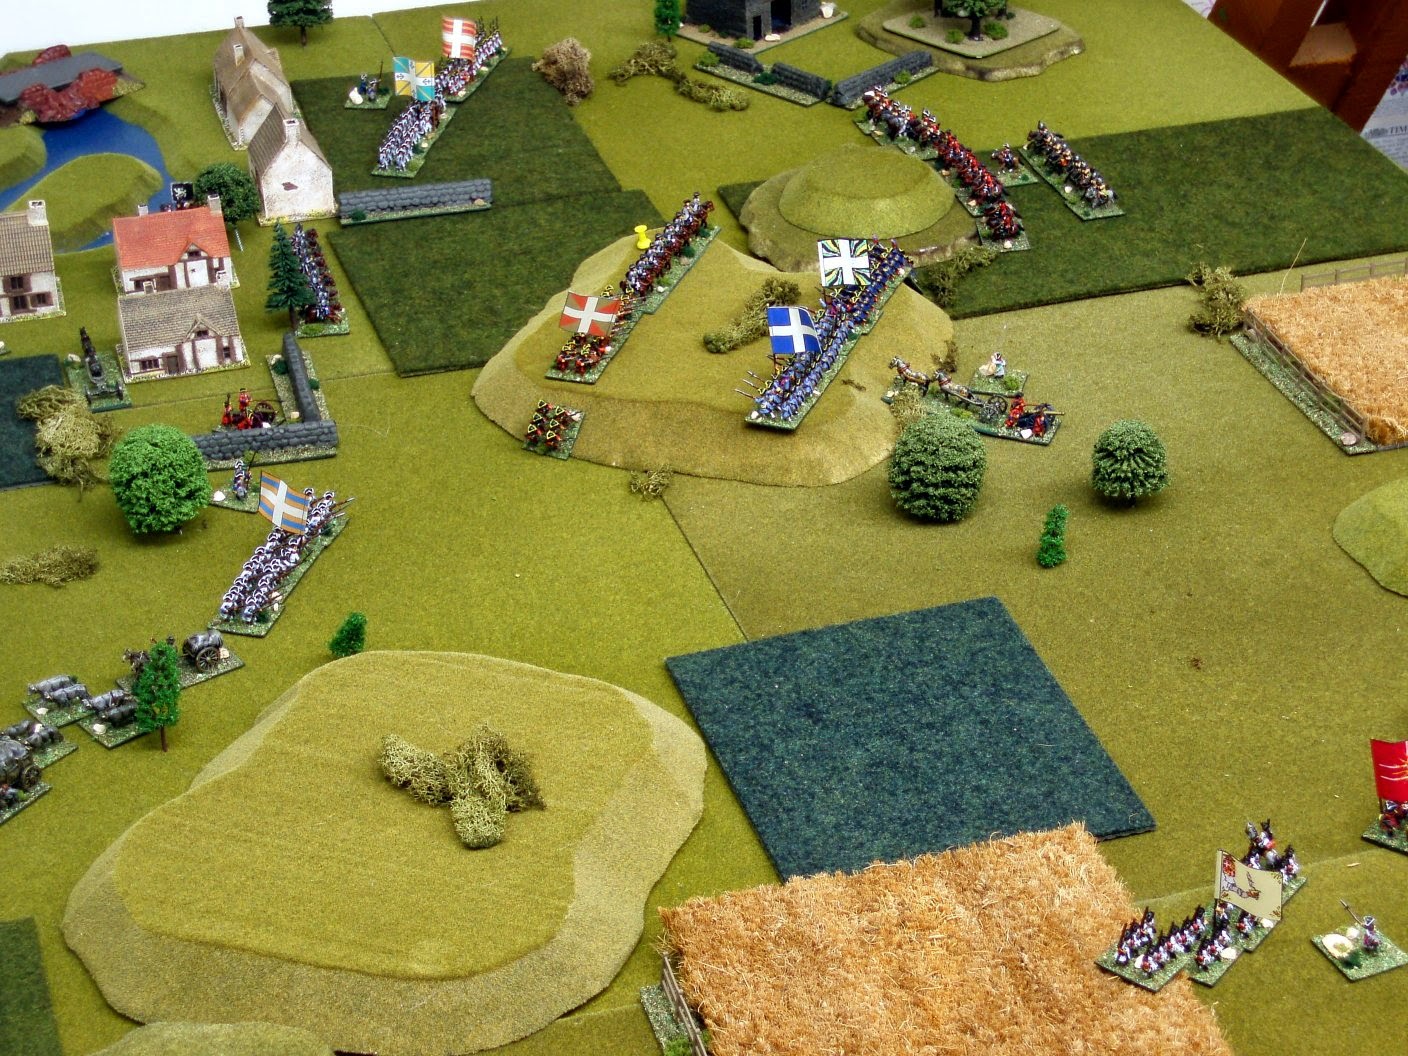
DG has launched the assault column over the hill (Goor in advance followed by Derring's) while bringing his cavalry back on to the other hill - those two cavalry units of DG's had pinned my entire flank for almost all the game, so something (eventually) had to be done in order to allow me to reinforce the other flank in the face of the attacking column..

Advancing both my battalions in line towards the cavalry I sought to bring them within musket range - DG kept retiring, but in the end resolute musketry was enough to see the Austrian Cuirassiers off.

Cadogan's - DG's other cavalry unit - attempted to melee but were again and again held from closing by more musket fire and after the Austrians were gone were faced by two infantry battalions.The writing for them was also on the wall, and they too broke (see following)....


So from a position of some concern at this stage I was relatively happy - just the assault column to fight off, which, with effective artillery fire, I finally managed to do - but not before I'd had to reinforce my centre with the reserves (Navarre) - at this point (following) the break point was reached for the Allies, and DG gracefully conceded...


Post match analysis:
  • A decisive French victory - I held both bridges at the end of the game and had not met my army break point. I have to admit to a palpable sense of relief as at the end of the first part of the game I though DG had me...
  • Game was played via Skype using a new HD quality web cam which originally I had mounted on a 6 foot pole (for a better/bigger view), but which for the second game I mounted on my camera tripod - much more flexible and a much better solution - DG advised that the view was good, and we paused often for close up on specific parts of the battlefield..
  • The game took about 7 hours all told
  • DG was of the view that this is a difficult battle to win given the table set up and the purely nominal increased OOB as attacker - I would agree that the large gap in the hill line is a powerful attraction, and we have agreed to play the game again, but this time reversing the positions (so I will attack)....
  • ..and so the Campaign draws to a close...   thoughts....
    • we started in September 2013, but DG and I don't get to play many games face to face and the third game, which we played via Battle Chronicler [clicky], took at least 6 months of last year....  
    • there are five linked games in the campaign and we used the stand alone options purely because tracking casualties over 16 months was too complicated... 
    • in terms of scenario types the first game was an attack on a fortified building (the arsenal), game two was a river crossing, game three was a capture the bridge scenario, and games four and five repeated the first and third games.. I think we had some good games, some of which were close, but I'd say that the scenario repetition was a shame....
    • the back story was fairly imagination (which I'll admit is not my cup of tea) and irrelevant on the whole 
    • Overall 7 out of 10 - but not as good in my view as the first one (the Raid on St Michel)..

Final butchers bill as follows:

Country Unit Type Unit Name SP SP 
left
MP
French Cavalry Souastre 5 0 5
Bavarian Hvy Cavalry Arco 5 3 5
French Infantry Bearn 5 5 5
French Infantry Navarre 5 5 5
French Infantry Toulouse 5 1 5
French Infantry Nivernais 5 5 5
French Infantry Royal Italien 5 0 5
French Artillery Medium Artillery 5 2 5
Country Unit Type Unit Name SP SP 
left
MP
Allies Cavalry Schomberg 5 0 5
Allies Cavalry Cadogan 5 5 5
Allies Hvy Cavalry Alt-Hanover Cuirassiers 5 5 5
Allies Infantry North and Grey 5 5 5
Allies Infantry Dering 5 2 5
Allies Infantry Goor 5 5 5
Allies Infantry Beinheim 5 0 5
Allies Infantry Rechteren 5 2 5
Allies Infantry Sturler 5 4 5
Allies Artillery Medium Artillery 5 5 5

Sunday, February 8

Annexation of Chiraz - Game #5 - The Defence of Cressay - Game - Part 1

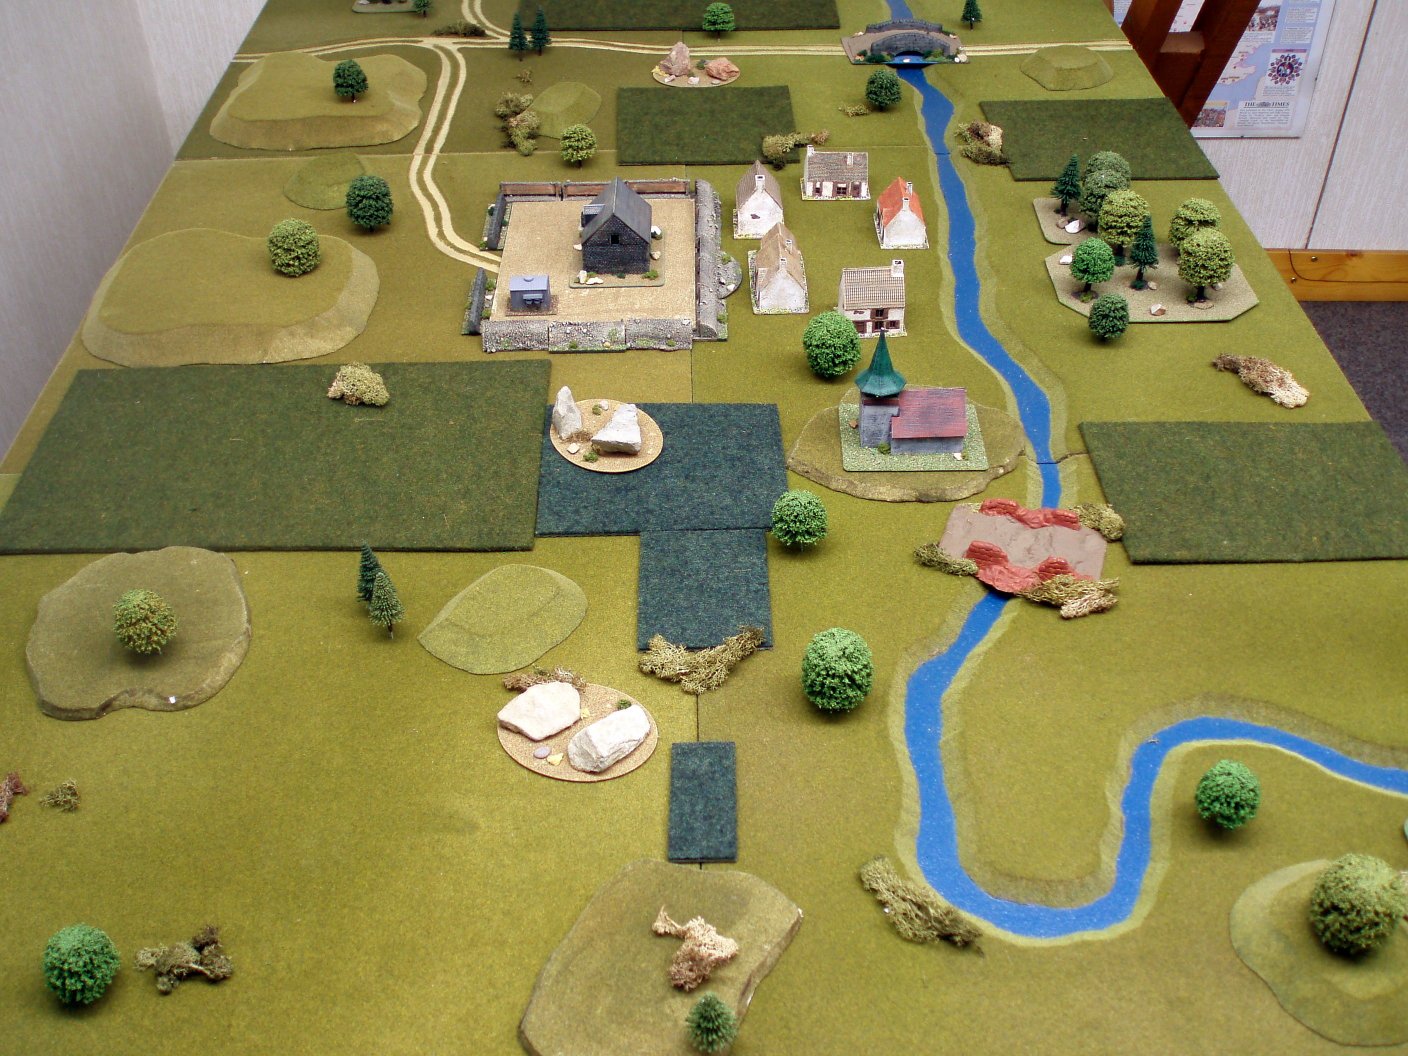
..and so on to the game which was played out in two parts via Skype - just as a reminder here's the table (below) from a slightly different angle.

We diced before the game started for sides, DG won and chose to attack as the Allies.
 
As a further reminder the Allied entry is bottom right.. As the French, I took the decision to deploy fairly close to the village rather than further out, in a broadly L shaped disposition matching the line of houses. The main approach was clear to see, so I deployed my artillery behind the wall you can see in front of the nearest house.


DG bought his troops on in 3 columns to support his plan which was to attack through the gap with his infantry, and with the remaining infantry and his artillery immediately to their right. The cavalry were going to the far right flank by the barn.

In the following the main attack can be seen in two columns approaching the gap - to their right the cavalry brigade lead, following by the remaining infantry/artillery. I had deployed my cavalry in column thinking DG would attack down that flank - so I'm already having second thoughts!


A few moves later (following), and DG's main infantry force has deployed for attack - in the distance his cavalry are also deployed - at this stage (the first stage) things are going well for me as I start pounding his infantry with my artillery (I fired seven times and didn't miss once - the dice gods were definitely on my side!) but I have also bought Royal Italien out (in line) in case. You'll note my cavalry is in transit!


A few more moves later (four or five) and in the following the next stage of the battle has started.. having given DG's main infantry assault a right thumping they had withdrawn (in a couple of cases with seriously depleted strength) his next assault is shaping up.

Stirler's (Swiss) and Rechteren (Dutch) are facing off my cavalry (Souastre) and the Royal Italien on the hill... Shortly after this Stirler's made the mistake of charging Souastre, but were very badly handled and sent bundling, before having the same done to them by Schomberg's when DG bought his cavalry up in support....


A few moves later though and it is clear DG is making progress - he's clearing the hill nicely - Sousatre has now routed, I've bought up the Bavarians to cover the gap..


In the following, busy move!
  • DG's artillery has opened counter battery fire (yellow shaken pin on mine), 
  • in return I have sent Rechteren packing (red pin) following a well timed bayonet charge by Nivernais...  
  • Ominously, though, DG has managed to regather the reins in the centre and things are beginning to look hard pressed.
  • So I have ordered Navarre (my reserve) forward to the centre - you can just see them crossing the bridge..


...at which point, it being late, we went in for tea [ckicky].. more anon, but in the meanwhile here is the butchers bill to date..

Country Unit Type Unit Name SP SP 
left
MP
French Cavalry Souastre 5 0 5
Bavarian Hvy Cavalry Arco 5 3 5
French Infantry Bearn 5 5 5
French Infantry Navarre 5 5 5
French Infantry Toulouse 5 1 5
French Infantry Nivernais 5 5 5
French Infantry Royal Italien 5 0 5
French Artillery Medium Artillery 5 2 5
Country Unit Type Unit Name SP SP 
left
MP
Allies Cavalry Schomberg 5 0 5
Allies Cavalry Cadogan 5 5 5
Allies Hvy Cavalry Alt-Hanover Cuirassiers 5 5 5
Allies Infantry North and Grey 5 5 5
Allies Infantry Dering 5 2 5
Allies Infantry Goor 5 5 5
Allies Infantry Beinheim 5 0 5
Allies Infantry Rechteren 5 2 5
Allies Infantry Sturler 5 4 5
Allies Artillery Medium Artillery 5 5 5

Wednesday, February 4

Annexation of Chiraz - Game #5 - The Defence of Cressay - Set Up

First game of the year for DG and I, albeit by Skype.. 😏

..in this scenario, the fifth in the campaign, an Allied force has arrived to try and take the two bridges in the town of Cressay, and bring the campaign to a triumphant end. The French of course will be trying to stop them..

Previous battles can be found here:
OOB:

As attckers the Allies have an extra infantry battalion, and an extra regiment of horse..

Country Unit Type Unit Name SP MP
French Cavalry Souastre 5 5
Bavarian Hvy Cavalry Arco 5 5
French Infantry Bearn 5 5
French Infantry Navarre 5 5
French Infantry Toulouse 5 5
French Infantry Nivernais 5 5
French Infantry Royal Italien 5 5
French Artillery Medium Artillery 5 5
Country Unit Type Unit Name SP MP
Allies Cavalry Schomberg 5 5
Allies Cavalry Cadogan 5 5
Allies Hvy Cavalry Alt-Hanover Cuirassiers 5 5
Allies Infantry North and Grey 5 5
Allies Infantry Dering 5 5
Allies Infantry Goor 5 5
Allies Infantry Beinheim 5 5
Allies Infantry Rechteren 5 5
Allies Infantry Sturler 5 5
Allies Artillery Medium Artillery 5 5

Set up notes:
    • Allied entry is bottom corner, French/defenders deploy 'behind' the red line; for the French hidden deployment is allowed (but not used for this game, but if they were, use the usual methods i.e.. map where units are, reveal when they could be seen etc..)

    • It’s a 6’ x 4’ table and we used our usual WSS rules (a modification of the Will McNally AWI rules - details on my project page [clicky])
    • Both sides can deploy on to the table in any formation they prefer - the French may start the game inside the buildings if so preferred. 
    • Woods are 'open'; all hills are 'gentle'; the river not crossable except at the bridges (which are wide enough for one base width column); houses will hold one unit each/the church will take two
    Winning conditions:

    The winning side needs to ‘hold’ both bridges at the end of the game - hold meaning that both ends of the the bridge are controlled. If  each side only holds one bridge then it is a draw.
    In the last game DG came up with a 'hideously complex formula' (trademark DG ) for working out the end of the game and it worked so well I thought we'd use it (slightly modified) in this game as well - in fact, I think the army breakpoint rule works so well it could feature permanently...
        • Game ends when at the end of a Turn one side
        • 1] Has 68%* + losses (that is the Allies have 16SP left; the French have 13SP left)
          and
        • 2] Does not control both bridges
          or
        • 3] Concedes

        That side is then obliged to quit the field
        . So, as long as a side controls both bridges they can't lose
      * why 68%?? DG originally came up with the number for the last game, as in that game it represented a round number of SP's lost - he subsequently did some research and found out that French casualties at Blenheim were about that, so it has some verisimilitude..

      Stay tuned for the game report which will, somewhat amazingly, be post number number 700 (!)

      Tuesday, October 28

      Annexation of Chiraz - Game #4 - Return to the Arsenal - Set up and Game

      At last you breathe, some table top action.. well,of a kind.. this one was played out over 13 or 14 moves... on Skype!

      You may remember that the campaign started with the attack on the gunpowder mill and arsenal at Petreville – which DG won :

      Set Up/OOB
      The Game

      ..in this scenario, the fourth in the campaign, an Allied relief force (me) has arrived to attempt to take back the mill..

      Forces are as per the following (NB. No artillery - the chance of stray cannon balls is still to horrible to even contemplate... )

      Country Unit Type Unit Name SP MP
      French Cavalry Souastre 5 6
      French InfantryBearn 5 6
      French Infantry Navarre 5 6
      French Infantry Toulouse 5 6
      French Infantry Nivernais 5 6
      CountryUnit TypeUnit NameSPMP
      AlliesCavalrySchomberg56
      AlliesInfantry North and Grey5 6
      AlliesInfantry Dering 5 6
      AlliesInfantry Goor 5 6
      AlliesInfantry Beinheim 5 6


      Set up notes:
      • As the forces are small, no Brigadiers were allocated, just the C-in-C..
      • French will be defending the arsenal, and can deploy anywhere on the table below the road running across the top of the following; the Allies (me) enter the table from the edge at the top of the following:
      • You'll note that the forces are equivalent (even down to morale bonus), but that the French start the game in control of the (fortified) mill; the Allies get the traditional weighting in favour of the attacker from the fact that in my rules British and Dutch troops get a firing bonus (it emulates firing by platoon)
      • It’s a 6’ x 4’ table and we used our usual WSS rules (a modification of the Will McNally AWI rules - details on my project page [clicky])
      • Both sides can deploy in any formation they prefer - the French may start the game inside the buildings if so preferred. 
      • Wood is open; all hills are gentle; river not crossable except at the bridges (which are wide enough for one base width column); rocky outcrops are rough ground; the mill has a surrounding wall; houses will hold one unit each/the mill and church will take two
      • Winning conditions: The winning side needs to ‘control’ the mill at the end of the game… DG came up with a hideously complex formula for working this out - I agreed to it of course, but put him in charge of counting the casualties and working out if any of the conditions in the formula had been met! (For the record they worked out quite well.. )
         
        • "Control" means sole occupancy of the mill
        • Game ends when at the end of a Turn one side
        • 1] Has 8 or less SP remaining [68% + losses]
          and
        • 2] Has a negative 2+ SP difference from the other side
          and
        • 2] Does not control the mill
          or
        • 3] Concedes

        That side is then obliged to quit the field
        . So, as long as a side controls the mill they can't lose  Hint: Read the following slowly and carefully :o)))))) (he knows me so well )

      • EG1: Side A 7 SP, Side B 8 SP Mill control N/A; Game continues [1 SP difference]
        EG2: Side A 6 SP, Side B 4 SP Side B controls mill; Game continues [Side A has a positive 2 SP difference, but Side B controls the mill]
        EG3: Side A 4 SP, Side B 6 SP Side B controls mill; Game ends [Side A 4 SP
        Side B 8 SP, negative 2 SP difference,Side B controls mill. Side A quits the field]
         
         .. and finally :o)
        EG4: Side A 7 SP Side B 4 SP Mill uncontrolled; Game Drawn [Both sides <= 8 SP, 3 SP difference, Mill uncontrolled, Both sides exhausted and quit the field]
      The Game:

      The game started with French deployment and DG chose to garrison the two houses faving my entry with a regiment apiece, and two regiments in the mill ..  he positioned his cavalry by the church bridge to act as a mobile reserve

      I chose to bring all of my forces on in column, from the road top left of the map above..  just for once I had a plan..  frontal assaults are deadly and I was hoping I could string DG out enough that I could force an entry...  and it worked... leaving Goor as a reserve, I marched with the rest of my force quickly down the mill access road; DG had to move Toulouse to cover, but wasn't quite quick enough with Nivernais, and Schomberg's dashed at the wall in column, and charged over it into their flank and routed them... now isn't that a cracking mental picture..

      Schombergs have charged over the wall- Nivernais can be seen "departing" to the village - red pin - Toulouse remain but are looking perturbed.. On the road, Beinheim are far right, Derings (green flag), and at the back North and Greys regiment
      Now I'll admit right here that I had some amazing dice throws on the evening and that was just the first.. pausing only to gather their horses however, Schomberg weren't finished, and wheeling right they then proceeded to do the same to Toulouse!

      Things were not going all my way however as DG had bought his cavalry up - Beinheim deployed to line, fluffed it, and were caught mid manoeuvre and sent running... Derings came up and sent the cavalry running with a well aimed volley, and also saved the day..

      A few moves later - Toulouse have been sent packing (far wall) - Derings (green flag) have stabilised the flank, Beinheim (centre bottom) have recovered and are getting a good talking to from the C-in-C. On the other flank Goor are sending out crashing volleys while retiring slowly (and single-handedly keeping half of DG's infantry otherwise occupied!). North and Greys regiment has entered the powder mill to consolidate gains
      ...and so to the next phase of the battle as DG fought manfully to regain the upper hand...

      Gathering Toulouse he put them into the mill building, and a move later they were joined by the now recovered, Nivernais - North and Grey were too slow and Toulouse just beat them to it

      I bought up Derings and both sides then started exchanging volleys... two crashing volleys (two double sixes, successive moves!) from Derings did for Toulouse; cover or no, they routed - Derings then followed up with a successful assault on the mill - they were in!

      North and Greys were not so successful however, and a failed assault, followed by a failed morale throw saw them heading off for safety in some discomfort..

      In the meanwhile Schombergs had followed up on their earlier success and routed DG's cavalry - at this point the picture was as follows:

      Derings enter the mill... Brave boys!
      ...and on the other flank (following), Goor continued to do sterling service, alternating musketry between DG's regiments so as to save themselves from direct assault, while continuing to retire slowly...


      Couldn't go on forever though and in the end DG got them (following) too late to change the overall picture though...


      Back in the mill and a ferocious fight ensued within the confines of the building with Derings eventually victorious and expelling Nivernais for good (picture following)..


      At which point DG told me that his complex formula had resulted in a victory for me as he was below 8SP's in total, with me having a positive 2 SP difference and also being in control of the mill.. hurrah!!

      Post match analysis:

      First the butchers bill..

      Country Unit Type Unit Name SP MP
      French Cavalry Souastre 1 2
      French InfantryBearn    23
      French Infantry Navarre 3 4
      French Infantry Toulouse 1 2
      French Infantry Nivernais 1 2


      Points remaining: 8/25
      CountryUnit TypeUnit NameSPMP
      AlliesCavalrySchomberg56
      AlliesInfantry North and Grey2 3
      AlliesInfantry Dering 5 6
      AlliesInfantry Goor 3 4
      AlliesInfantry Beinheim 4 5


      Points remaining: 19/25

      So the French got a right thumping - the points lost is slightly misleading, as a fair amount of them were as a result of my outrageous dice rolls - four of them were lost just as a result of those two double sixes! Having said that I was most chuffed with my plan..

      Laurels and battle honours go to Derings and Schombergs (who continue to be my favourite cavalry regiment), and I think possibly Goor as well for holding that flank on their own-some for so long..

      Playing via Skype worked out reasonably well but there is no doubt that the remote player suffers from having to see everything via the camera - going to see if for the next game I can suspend the camera above the table to give DG a better view

      This one played out in about 3 and a half hours, which is better than 6 months plus...

      Cheers DG!

      Thursday, October 16

      Annexation of Chiraz - Game #3 - Incident at Drew - Game Moves 11 to End

      I'll keep this short as the look of an online computer game can never compare with moving the little lead men, but DG and I have had no opportunity to game for some time, and given we live 2 or 300 miles apart this is the only quick option... it's even worse this year as Colours was cancelled, so my three guaranteed games a year were cut to two straight away...

      So I would refer you to this post [clicky] for the setup - which was back in March - yep - we've been playing this game for over half a year, and this post [clicky] for the first dozen moves...

      At the point the game ended, we were on move 57, so you can see we went on for some time!

      In summary then - the winner of the game needs to control all four bridges - any less than that is a loss...

      In the screen shots - the following will be useful when identifying units...


      I think it safe to say that strategies changed throughout the game, but for the first 15/16 my aim was to consolidate ownership of the bridges, and then to launch a flank attack from my left (the furthest from my entry point..)

      Goor and Beinheim try the flank attack (top left) but DG is rushing troops to counter - I have holding forces on the other three bridges....  the old "pin him and strike" routine (he thought hopefully).. The move after this Schomberg broke and ran for a while as a result of the pounding from DG's artillery..

      Four moves later and we have stalemate - DG has managed to conter the attack and is digging in against all the other bridges - turning into a WWI scenario - neither if us wants to attack as we know the casualties will be great...

      Five moves later and both Schomberg and Chartres have been battered into submission - so the right bridge/flank is largely open - for the rest it was all artillery fire and a stately minuet as units danced round each other looking for an opening... my left flank (right of the picture) is still stalemate...

      Five moves later and I am withdrawing troops on my left to bolster the centre - the action on my left has not been without some success however, as I managed to drive off the Royal Italien with a bloody nose (bottom right of picture)...

      At this point in the game the Allies have lost both allied Chiraz units, Schomberg's, and North and Grey's..  the French have lost two cavalry units (Chartres and Orleans) and infantry regiment Bearn - fairly even after a little over 30 moves - 5 hours in real time... a bloody struggle with no clear winner yet

      Five moves later and both sides have withdrawn to their own sides of the river - but now it's time for DG to go on to the offensive - not looking good for me on my right..One good piece of news - I've driven off his artillery, and in hindsight I think that was the game changer...

      Five moves later, and between move 35 and now, things begin to come round to me.. on the right, where it had looked so poor, DG had sent both Navarre and Bourbonnaise across the bridge, and my Dutch regiment had seen them both off with musketry beofre they could close..  after that though the morale dice gods were with me and they both routed away => flank safe...  Shame I couldn't say the same on my left flank!
      Five moves later and those two poor French regiments have routed to destruction - flank is safe. On the other flank DG has gone defensive and occupied the built up area - he's bought up the poor benighted Royal Italien but they're facing off steady muskets and artillery, and won't be long for this game...

      Mexican stand off - no way I'm attacking him in the built up area - but if he stays there he can't meet the victory conditions..
      End of the game - I have sent my cavalry on a long sweep round the flank..  DG's infantry is isolated - he offers to surrender in return for the right to march away with colours flying, and muskets shouldered..  I gladly accede...

      ...and so we got to the end of the game...

      Post match analysis:
      • Both sides had huge casualties - one of the problems we've identified is that the rules we use are largely tactical in focus and there are no such things as army level morale/break points. For the next scenario DG has suggested some we can use...  this game lasted about 10 or 15 moves longer than it should have - one of the reasons for this I think is the way that the game was played..  with a day between each move there was none of the immediacy you get in an across the table game where player morale is as important as troop morale
      • We had some interesting "discussions" throughout the game - as DG and I are want to do - some of these will make it to the next version/iteration of the rules. We had at least a weeks worth of discussion on whether DG's units should be allowed to enter a building backwards...until DG pointed I had done it myself earlier in the game!
      • Have to say that my opinion of the campaign as a whole has not changed much - and I still think this is a much poorer show than the first campaign book...
      Onwards and upwards...  DG and I have already discussed the next scenario, which features a return to the powder mill, and a relief force! This game will be over Skype, but I have some prep to do first...

      Monday, April 28

      Annexation of Chiraz - Game #3 - Incident at Drew - Game Moves 1 to 11

      I'll keep these short as the look of an online computer game can never compare with moving the little lead men, but DG and I have had no opportunity to game for some time, and given we live 2 or 300 miles apart this is the only quick option...  😀

      So I would refer you to this post [clicky] for the setup

      Here's the position at move 11- please click to embiggen....


      Red units are the Allies and their Chiraz'ian allied contingents - Blue are French

      As you can see - both sides have marched hard for the bridges and I think it fair to say that the tussle is coming to the boil. In the middle DG has attacked my holding force (but in the next move I see them off in a most pleasing manner).

      The Chiraz infantry section by the first bridge has been roughly handled by DG's artillery and are also about to break (due to casualties).

      Saturday, March 22

      Annexation of Chiraz - Game #3 - Incident at Drew - Set Up

      Time to get the wargaming mojo working again..

      With Salute looming on the horizon, DG (my trusty opponent) is making his way down from deepest darkest Wales to attend, and usually we take the opportunity to fight one of my far too infrequent games.. this time however, my Dad is also down visiting for a few days, and given I am already planning to disappear for an entire Saturday, a game evening as well might be pushing it too far...

      So, quoth DG, why don't we get one of our 'virtual' games on the go? So is born the third game in the mini campaign that is the "The Annexation of Chiraz"... we'll use Battle Chronicler to play this game, exchanging turns via email in the best Old School traditions of correspondence chess...

      Background:

      At the same time as the French (DG) invaders were forcing a crossing of the Cressay at Morteau (which was our last game [clicky]), the other half of their army has arrived at the small town of Drew looking to cross the Cressay via the four bridges* in the town.

      At the same time the Allied (me) powers have sent a blocking force to deny them the opportunity.

      Scenario Specifics:


      The table is a virtual 6’ x 4’ and we will use standard movement distances as per the usual WSS rules [clicky]

      DG and I are currently deciding:
      1. our force organisations – I have suggested no more than 3 Brigades (+ CinC)
      2. our column of march - we start the game off table entering at the points marked..
      3. our force will enter the table in column of march, but can then deploy as we see fit once they have fully entered.

      General notes:
      • All woods are "open"
      • All hills are "gentle"
      • River is not crossable except at bridges
      • Entry points are labelled
      Winning Conditions:

      The winning side needs to ‘control’ all four bridges at the end of the game – this isn’t defined in detail but I feel sure DG and I can come to an agreement…

      Orders of Battle:

      French (playing as Lorraine)

      Unit Type Unit Name SP MP
      Cavalry:
      Souastre56
      Orleans56
      Chartres56
      Infantry:
      Navarre56
      Bearn56
      Nivernais56
      Toulouse56
      Bourbonnais56
      Royal Italien56
      Artillery:
      Light ArtilleryNo.156


      Total Strength: 50 points

      British (playing as the VFS)

      Unit Type Unit Name SP MP
      Cavalry:

      Schomberg56

      Cadogan56
      Infantry:

      North and Grey56

      Dering56

      Goor56

      Beinheim 56
      Artillery:

      Light Artillery No.156
      Chiraz Home Guard:

      Cavalry56

      Infantry56

      Total Strength: 44 points

      *The story goes that some time ago the goldsmith’s guild in Drew built a bridge and then charged everyone an exorbitant amount to use it. The other guilds in Drew were so incensed at this that three of them built their own bridges… hence the four bridges...