Tuesday, May 29

"Beat your drums, the enemy is come. For the Lord’s sake, beat your drums" - The Battle of Sedgemoor

Without a doubt the best online account I’ve found for the actual battle is the Battlefields Trust website - the battle is described in detail here.

In summary, however, and at the point where I left off with the stage set, during the night of the 5th/6th, Monmouth decided to launch a surprise night attack across the marshy wastes of Sedgemoor.

It's difficult to say why he decided to do this but at least one account believes it was because of precise intelligence from local supporters on the deployment of the Royalist army, along with offers to guide the Rebel army across the moor which lay between Chedzoy and Westonzoyland. Given his problems at Bristol however, it's also probably fair to say that the army was not in the best of morale, so he would have been aware of the need for positive action, as opposed to upping sticks and moving away... one way or the other he was going to have to fight a battle, and my guess is that the decision was made as a result of a bit of both arguments...

Anyway the Rebel advance would be long (approx. 5 miles), and also at night - Monmouth’s army was based at Bridgewater and the planned advance skirted north and then east of Chedzoy, approaching the Royal Army’s camp from what was hoped was it’s least protected side.


The plan was:
  • The rebel Cavalry would continue west of Westonzoyland so as to attack the Royal artillery train from the rear as this would remove a significant advantage the Royalists had.
  • The Rebel infantry would form up to the north of Westonzoyland and attack the Royal camp, wading across the Bussex Rhyne (a Rhyne - and I wonder if that’s the same derivative as the Rhine River - is “a drainage ditch or canal, used to turn areas of wetland at around sea level into useful pasture” according to Wikipedia!) to hopefully catch the enemy unawares.

The Royal cavalry was in quarters some distance away in the houses in the village, so this also removed the other main royal advantage, its experienced cavalry. (NB. It may well be that this distributed organization of the Royalist army was the main reason Monmouth decided to attack???)

The rebel force marched at about 10:00 or 11:00pm, and the march was expected to last about 3 hours…

The first part of the advance was successful, and they arrived undetected north east of Chedzoy, but unfortunately the guide they were using couldn’t find the crossing point over the Langmoor Rhyne in the map. Time was lost finding the crossing, but once over they were discovered by a royalist scout who let off his musket to alert the Royalist army and then legged it back to the camp (apparently with the repeated call of: "Beat your drums, the enemy is come. For the Lord’s sake, beat your drums"!) Within a short time each of the royal foot regiments were deployed and ready for action, although the fact they deployed so quickly, and at night, shows their level of professionalism and is an ominous pointer to the possible outcome of the battle…

At Westonzoyland the Royal Army consisted of six infantry regiments each in their own camp, along the moor edge north of Westonzoyland. The camp lay within the loop of the Bussex Rhyne but there was sufficient space for them to be able to draw up in battle formation.

The Royal artillery was west of Westonzoyland - also within the loop of the Bussex, but was deployed facing west (towards Bridgewater as that was the direction the attack was expected from)

First exchange
The Rebel cavalry (under Lord Grey) was sent ahead in order to take and hold one of the two main crossings over the Bussex - these were known as the upper & lower plongeon, and his target was the Upper Plongeon ie. the north east of the two. As per the delay at the Langmoor Rhyne, however, he seems to have rushed off without a local guide and in the darkness failed to find it. (NB. Terrain comment: At no point during the action did cavalry or infantry cross the Bussex other than at the plongeons - in fact Grey rode along the north side of the ditch right across the front of the royal infantry deployment looking for a crossing, so it was obviously deep/impassable to cavalry, but the later attack by the rebel foot was to be through it, so passable to foot?).

Once the royal infantry realised that this was the enemy they opened fire and Grey’s cavalry were soon put to flight.

By the time the second division of cavalry arrived, under a Captain Jones the ford was already defended by about 150 Royal cavalry (under Compton). Jones then tried either to take the ford, or to hold back the royal cavalry from advancing across it. (He sounds like a very brave man; a veteran of Cromwell’s Ironsides he was later spared from execution because of the great courage he had shown leading his men in the cavalry engagement) but the opportunity was now passed. This was disastrous as it meant the royal artillery were available for the battle.

Main battle
The royal infantry had all by now deployed between the two plongeons, a distance of probably about half a mile (800 metres)? When the rebel infantry arrived they mounted their attack on the right flank of the royal army at Dumbarton’s regiment, apparently because these were the only royal troops using the old matchlock muskets, and could be seen in the darkness by the glow of their lighted match!

The intent was for the first rebel regiment to cross and attack, supported by successive regiments, but when the rebel infantry arrived, rather than crossing into the attack they got caught up in a fire fight and couldn't be persuaded to move forward. This was undoubtedly a catastrophic error for the rebels; given their level of training, and their comparative lack of firearms, Monmouth's best chance lay with getting his troops at close hand to hand with the Royal army.

The one up side for the rebels lay in the fact that at least early in the engagement they still had the advantage of three artillery pieces, which they deployed about 100 yards back from the Rhyne on their left flank. The fired case shot causing significant casualties in Dumbarton’s regiment, but with their ammunition wagon more than 2 miles away, and with the limited numbers of muskets, the rebel force would never win a fire-fight against the far better equipped, supplied and trained royal infantry.

Last exchange
Churchill commanded the Royal infantry for the most of the battle, transferring regiments from the left to the right flank to support Dumbarton’s. Finally also six of the heavier royal artillery pieces were brought up, three on the right and three in the centre. First they destroyed the rebel artillery and then the royal artillery began to cut through the rebel troops.

When the royal cavalry arrived, with no rebel cavalry to worry about, six squadrons (under Lord Oxford) were sent north (ie. to the royal right) and the King’s four troops of horse to west (the left) across the plongoens to attack the rebel infantry.

When daylight arrived and Feversham (the Royal C-inC) could fully assess the situation he ordered the cavalry to attack (supported by an infantry advance across the rhyne but these were largely not required).

The rebel regiments deployed and met the cavalry attack with pike and musket, and the first cavalry attacks were driven off, but the infantry was in the open, unsupported by cavalry or artillery, and in the end the inevitable occurred and the rebel soldiers began to break and run. As the royal infantry attacked, the troops broke in increasing numbers, seeking the relative protection of the hedged fields. The rebels units were driven back in chaos, and it was now that the majority of casualties were caused..

Aftermath

  • The battle lasted about three hours, by 5:00 or 6:00 in the morning the rebels had all fled or been killed or captured - the rebel army was totally destroyed. Monmouth lost approx. 1500 (1000 killed/ 500 captured) from a total force of approx. 4000 men, the Royal army lost 300 from a total force of approx. 3000.
  • Monmouth attempted to reach the coast to take ship to the continent, but both he and Lord Grey were captured on the 9th. While Grey was able eventually to pay for his freedom, Monmouth was taken to London and executed on the 15th July on Tower Hill. Apparently it took “several” attempts to behead him according to this website
the Duke had paid the axe man - Jack Ketch - to do a swift and clean job, but the axe man lost his nerve and took five strikes to relieve the Duke of his life, much to the outrage of the massed crowd. Even after those five strikes the Duke's head was still attached to his twitching body, finally separated from his shoulders with a knife, on the order of the Sheriff.
  • James II was overthrown in a coup d'état three years later.. if Monmouth had waited just a little longer......
  • So - an interesting battle for a number of reasons… first major success for a certain royal commander of infantry - John Churchill - later to distinguish himself at Blenheim/Ramillies and Oudenarde where he was better known as the Duke of Marlborough. Sedgemoor was also the last pitched battle fought on English soil, although there were some later skirmishes (the Battle of Preston in Lancashire was fought on 14 November 1715, during the First Jacobite Rebellion, and the Second Jacobite Rebellion saw a minor engagement at Clifton Moor near Penrith in Cumbria on 18 December 1745). Culloden was fought in Scotland..

    Looking forward to my visit to the battlefield now...!

    Links:

  • T.B. Macaulay: History of England: Chap. V, The Monmouth Rebellion: https://web.archive.org/web/20190915171914/http://www.strecorsoc.org/macaulay/m05d.html
  • Myth of the Pitchfork Rebellion: rebweb (archive.org)
  • Sunday, May 27

    An excursion in the colonies....


    Wet and drizzly weekend here in the UK, must be a public holiday weekend… oh, it is! J Not complaining though - weather like this is perfect for wargaming (when isn't it though??!) so not having played for sometime I set up the table for a re-fight of a little set to I had a number of years ago when playing a solo campaign in the AWI period.


    Basically, the campaign was set on a small island where the Americans were conducting secret talks with a high ranking French official. The British were charged with capturing him, and to do this landed troops on the island, but only had a limited period of time to complete the operation.. The battle following was the culmination of the campaign, and I fancied seeing if I could reverse the result from the last time it was fought.


    Feel free to follow the links to my AWI pages for a fuller description but in summary history was repeated, rather than changed, and as per the last time after a bitterly fought battle with the bayonet the British were triumphant again.. although suffering 25% casualties - great fun...

    Wednesday, May 23

    Dervish Cavalry...


    As promised, and as a welcome break I'm sure from all the battle field wordage recently, some pictures of the recently completed Dervish cavalry... these are Peter Pig 15mm figures from the Patrols in the Sudan range.

    Also, some pictures of the small batch of British infantry that I completed at the same time. As I've mentioned before, I paint for the wargame table, and this tends to be very obvious when you look at them close up, and none more so than in the case of these guys, who look great (nb. "beauty is in the eye of the beholder"!) from tabletop distance, but dreadful close up! J

    I'm not too happy with the figure quality - they're fragile and I've had two or three break at the ankle, but the scultping is not too good either - and a good sculpt is a requirement for my painting style which relies a lot on dry brushing and washes ie. I need a well defined surface to get the quality.

    These are Lancashire Games 15mm's that I bought a number of years ago as the start/basis for the project. They were very cheap, and I think this shows... having said that, I bought a big bag of Dervish foot from them at the same time and I really like those..

    Separately I've just taken delivery of John Tincey's book on Sedgemoor (eBay comes to the rescue again) and I've just found a scenario in the batch of Practical Wargame magazines I bought, for the skirmish at Philip St Norton (just before Sedgemoor)... I'll feed back on these as I read and digest...

    Friday, May 18

    Sedgemoor.. campaign background and initial manoeuvres..

    If I'm visiting a battlefield in the UK, then without fail, my first point of call is the Battlefields Trust website - the Battlefields Trust is a charitable organisation whose aim is to preserve battle sites from the depredations of councils, road builders, and people who generally want to build supermarkets or roads on them.

    They deserve our support and the website does a fantastic job of providing background and other supporting material to a whole set of battles... Sedgemoor is one of the sites covered and the map following is from the Battlefields trust page - they do a number of aerial photo's as well (Google-earth style) which are quite good, but for me, the standard Ordnance survey map of the location today, with the superimposed unit positions at the time, is perfect... the following is slightly cut down just to centre on the battle - the full maps available by clicking: here


    So what about Sedgemoor.... I find it useful to set a battle in context, and my reading has dug up the following..

    ..the battle was the culmination of what's known as the "Monmouth Rebellion" - a Protestant uprising led by James, Duke of Monmouth (the bastard son of Charles II) against the Roman Catholic King, James II.

    Monmouth was the son of a mistress of King Charles II, & was born at Rotterdam in 1649, when the King was still in exile. He was brought up and educated in France, but came to England with his father at the Restoration in 1660 and was made Duke of Monmouth in 1662. Charles II had no legitimate children, so the heir to the throne was his brother, the Duke of York (James), who was a Catholic. Monmouth was seen as the leader of the Protestant cause, however, and also as a possible successor to the throne.

    When Charles II died (February 1685), James, the Duke of York succeeded his brother and was crowned James II, King of England. Monmouth, who was by this time living in Holland, was persuaded to lead an invasion against James in the name of the Protestant religion. Effectively a new English Civil War...

    Monmouth sailed from Holland to Lyme Regis in Dorset (see the map to the right which is from a Government archive website here) in three small ships, with just 82 men, & short of money, guns and supplies - you can tell this was not the best prepared of invasions, and the shortage of guns in particular was to be a critical failing...

    He landed at Lyme on June 11th, and issued a call for supporters to join him based on his Protestant cause. By June 13th the King received the news of the rising and at once sent a cavalry force under Lord Churchill (also known as Marlborough) to check the rebels until the slower-moving infantry and guns could get into action.

    After just two days, Monmouth had an army of about a thousand foot and 150 horse - on the 15th he moved out of Lyme and marched to Axminster (Lyme was then occupied by the Royal Navy cutting off his escape, and stopping any hope of reinforcement through the port). He arrived in Taunton on the 18th after collecting more men as he went, and on the 20th (somewhat optimistically) he was proclaimed "King".

    In the meanwhile Royal troops under (Lord) Feversham and (Colonel) Kirke had reached the eastern boundaries of the county and busied themselves with the safety of Bristol (a major port and therefore possible reinforcement point) and also stopping any attempt by the rebels to move out of Somerset.


    Monmouth was still desperately short of money and men - he was particularly short of horses and guns - but unpersuaded he moved on Bristol. At Bridgewater, he was forced to equip 500 men with bills improvised by riveting scythe blades onto 8 ft poles - see picture to the left which is from this excellent web site and is of scythes from the Tower of London armouries collection. 

    History has it that large numbers of the Rebel troops were armed with agricultural tools - one source however says that this may not be true and that rather than being bumpkins, the average Monmouth rebel was literate and well motivated and probably lived in an urban environment - they would have been similar in many ways to the devout Massachusetts men of the frontier wars of early America.

    Either way, to make matters worse. the weather turned worse as the Rebels moved towards Glastonbury, though further recruits brought the rebel army up to between six and seven thousand men (interesting side note, one of these was the novelist Daniel Defoe of 'Robinson Crusoe' fame).

    The critical decision was now taken by Monmouth to march on Bristol; knowing the city to be well fortified and prepared on the southern side, he planned to attack from the eastern side, after crossing the river Avon at Keynsham. Heavy rain, however, drove them back into Keynsham for shelter. During the night, Royalist cavalry (Life Guards) under Colonel Oglethorpe, launched an attack on the rebels and, without doing a great deal of harm, were successful in breaking their morale.

    Almost all chances of success had now vanished and Monmouth's men, at dead of night in rain and darkness, moved hastily out of Keynsham towards Bath which was defended and refused them entry. So they moved on to Norton St Philip where they stayed for the night.

    Regular troops, under Lord Feversham and Colonel Churchill, had joined forces in Bath and, with the Wiltshire militia, moved against the rebels. An advance party of dragoons and musketeers made contact with the rearguard of the rebel army, who were well sited behind hedges covering the deep lane leading into the village of Norton St Philip. In this, the first real contest between Monmouth's men and the King's regular troops, the fierce fighting demonstrated the strength and courage of the rebel forces and resulted in a tactical victory for the rebels when the Royalist forces withdrew.

    Monmouth considered a move westward (to Frome) but the Royalist army blocked the way and he retreated first to Wells and then further west towards Bridgewater. As he retreated the royal army, now fully reinforced, moved after him, sent out scouting parties to discover where he was going and preparing to cut off any movement towards Exeter and Cornwall.

    On the 3rd July Monmouth arrived back in Bridgewater - just 12 days after leaving it the first time, but in considerably different circumstances. The rebels now numbered no more than 3500 strong, but the Royal force, although smaller was far more experienced.

    The scene was now set for the final act...

    Thursday, May 17

    Summer trip thoughts... and stuff...

    Wow - over 1000 visitors since I started the Blog in earnest back at the end of February...!! My site counter has a statistics option that tells me that of the 1000 odd visitors who've visited, roughly half of them are unique visitors - so basically it looks like I'm getting repeat visits which is quite nice, and being a humble soul, not what I would have expected at all...! J

    Yesterday evening I started the basing operations for the Dervish cavalry and British infantry I painted over the weekend - basically getting the bases cut and painted, and figures glued to them. The new spray varnish that I bought, despite saying Matt on the can, gives a slightly gloss finish to the figures - I've always preferred a matte finish, but I have to say that I quite like the gloss look - it tends to give depth to the colours... I was going to get some pictures last night, but decided to wait until I had got the flocking and other terrain effects on.

    Otherwise it's quite quiet on the wargaming front at the moment - I continue to read a huge parcel of 'Practical Wargamer' magazines I obtained on eBay, and yesterday I heard from John Tunstill (of 'Discovering Wargames' fame) that a batch of "Wargamers' Newsletters" I bought are also on the way from Italy - especially looking forward to that..
    On the book front I'm three quarters of the way through "Front Line" by Richard Holmes, that Darrell (my regular wargaming buddy) lent me. It's one of his early books, and written I think before he developed his style - absolutely fascinating, but I think it suffers slightly by having too many examples and analogies, if that's possible... Slighlty lighter, I'm also reading the Harry Pearson book (picture to the right) on his early life in wargaming, and wargaming history in general - absolutely brilliant - and laugh out loud funny much to my wife's disgust! I especially liked his discussion on what it was like being the father to a little girl as it definitely struck some chords... the story of him lying in the bath under the gaze of 14 naked Barbies was apt, having two girls I have slightly more than that round the edge of our bath... and how he'd hoped for a boy (but only because it gave him the excuse to buy more miniatures on the pretense they were for the child!), but when it turned out to be a girl he eventually discovers that it doesn't make a lot of difference as the average adult male can't figure out what's going on a little boys brain, any more than he can a little girls - and in fact the average adult male has considerable difficulty figuring out what's going on in his own brain! Amen to that..... well recommended.

    I have also been advised by my wife (who is truly an angel) that I have permission to slope off for a couple of nights next month... regular readers may remember that last year I visited the English Civil War battlefields of Roundway Down, and Landsdown - this year under the influence of new projects and interests I intend visiting Sedgemoor and Langport... Sedgemoor (follow this link to the Battlefields Trust site which I totally recommend) mainly because it was the site of Marlborough's first victory (against the rebel Duke of Monmouth) in July 1685 - the local tourist office have been really helpful and I already have some literature, maps, and a battlefield guide... Langport on the other hand is one of the lesser known English Civil War battles and was between Sir Thomas Fairfax commanding the Parliamentary forces, and Lord George Goring commanding the Royalists. The battle was in July 1645 (so exactly 40 years before Sedgemoor) and and was a Parliamentary victory which arguably led to the Royalist loss of the city of Bristol. I'll base myself in Bath (just because I think it is a truly lovely place with a nice ambience - oh, and home to a very decent pub I know..J), and my other plan is to visit Bovington which is home to the Tank Museum... it's beginning to look like it will be an excellent few days! As I find more about the battles over the next few weeks I'll post further....

    Monday, May 14

    Camel Corps

    As promised - after an extended session at the painting table yesterday I managed to finish the basing for the Camel Corps, I then completed another company of British Infantry, and painted up two units of Dervish Cavalry... a good day! Pictures of the latter soon, but in the meanwhile as promised some pictures of the completed Camel Corps unit. These are Peter Pig castings from their Sudan range, and are 15mm.

    Despite my pessimism I'm really happy with the way these guys have turned out, testament I think to the quality of the sculpting as these guys were very easy to paint... I also think they look like they mean business, don't they!? J

    History/Background (the following from this excellent
    web site): In the Sudan campaign of 1884-85 Wolsey tried two innovations - a river column of whale boats (similar to the Red River Campaign of Canada where he won his fame), and a flying desert column of camel mounted troops.
    The idea of a camel corps did not originate with Wolseley, but the Sudan was the first time a camel corps figured into the major plans of the British army. It formed part of what was known as the "Desert Column" which was to be a self-sufficient force of cavalry, artillery and infantry. Though not all infantry involved belonged to the Camel Corps, the four regiments that comprised the newly raised unit were to be the backbone of the force.
    In October 1884, the Camel Corps was officially divided into four regiments. They were:

    ~ Guards Camel Regiment: commanded by Lt. Colonel E. Boscawen - 23 officers, 403 men; 1st, 2nd 3rd Grenadier Guards, 1st and 2nd Coldstream Guards, 1st and 2nd Scots Guard, 100 Royal Marine Light Infantry (RMLI).

    ~ Heavy Camel Regiment: Lt. Colonel R.A. Talbot - 24 officers, 430 men; 1st and 2nd Life Guards, Royal Horse Guards, 2nd, 4th, 5th Dragoon Guards, 1st, 2nd (Scots Greys) Dragoons, 5th and 16th Lancers.

    ~ Light Camel Regiment: 21 officers, 387 men; 3rd 4th, 7th, 10th, 11th, 15th, 18th, 20th, 21st Hussars - this unit was used solely to guard supplies..

    ~ Mounted Infantry Camel Regiment: G. H. Gough - 26 officers, 480 men; 1st South Staffordshire (38th), 1st Royal West Kents (50th), 1st Black Watch Highlanders (42nd), 1st Gordon Highlanders (75th), 2nd Essex (56th), 1st Sussex (35th), 2nd Duke of Cornwall's Light Infantry (46th), 3rd King's Royal Rifle Corps, Rifle Brigade, Somerset Light Infantry, Connaught Rangers, Royal Scots Fusiliers.

    Tactics/Use: Contrary to popular opinion the Camel Corps never used their camels for cover, nor did they ever fight mounted as cavalry. From the very beginning they were conceived of as a mounted infantry force, and fought as mounted infantry. In a memorandum dated 27th October, 1884 and signed by Redvers Buller, the following guidelines were issued: "The soldiers of the Camel Regiments will fight only on foot. They are mounted on camels only to enable them to make long marches. The camel is a good traveller; but he is a slow mover. He cannot be managed as easily as a horse, and he cannot be mounted, or dismounted From, with great rapidity. The men of the Camel Corps must therefore trust slely to themselves and their weapons when once they have dismounted, This cannot be too strongly impressed upon the men. " (Colville, II, p.240. The Black Watch in Egypt and the Sudan..)

    When under attack the Camel Corps dismounted and lashed its camels' knees together, thus eliminating the need to keep "horse-holders" back per regular mounted infantry. The camels were placed In "a compact formation under guard" (see below) and the main force would march away to battle so as to keep the camels From being brought under fire.

    British Soldier with two camels, Camel Corps, Egypt, 1st Sudan War, c1885. NAM 1963-11-194-2

    Saturday, May 12

    Madeleine McCann

    Like many parents at the moment, my wife and I have been really moved by the abduction of little Madeleine McCann while on holiday with her parents in the Portuguese Algarve... she's only 4 (today is her birthday)... on the BBC news this morning, seven days after her abduction family members asked for the public to offer as much help as possible in publicising her disapearance. The following is just a very small attempt to do that on their behalf.. see also http://news.bbc.co.uk/1/hi/uk/6648995.stm


    Tuesday, May 8

    More Gatlings...

    "The sand of the desert is sodden red, -- Red with the wreck of a square that broke; -- The Gatling's jammed and the colonel dead, And the regiment blind with dust and smoke. The river of death has brimmed his banks, And England's far, and Honor a name, But the voice of a schoolboy rallies the ranks, "Play up! play up! and play the game!"
    ("Vitaï Lampada" - Sir Henry Newbolt) 
     
    ...happy to say that my Gatlings have now been completed and join the British forces in the Sudan, ready to repel ravening hordes of charging Dervish, hopefully in an unjammed state... see pictures below - one for the Naval Brigade, and one for the Army - I'm quite pleased with how they turned out, these are by Essex Miniatures in 15mm
     
    I've been doing some research on them, and found that the design was patented on November 4, 1862 - the diagram above is from the official patent application. 

    The Gatling was the first large scale manufactured machine gun. Although only a handful of the original 1862 model Gatling Guns were ever built, it was enough for the military to see the possibilities... apparently the first Gatling guns were very crude; barrels had tapers up to 1/16th of an inch from the breech to the muzzle (!) "Lead would shave, bullets tumble, and black powder spewed forth in all directions. But the battery guns would fire. The awesomeness of the Gatling gun’s firepower, from 250 to 600 rounds per minute was truly incomprehensible" (from this web site
    The later guns (as deployed in the Sudan) used a hopper on top to hold the bullets (720 capacity), and used the metal cartridge - they could reach 1000 rounds a minute depending on ammunition supply, and the speed of the hand turning the firing handle..
     
    ...finally - one 
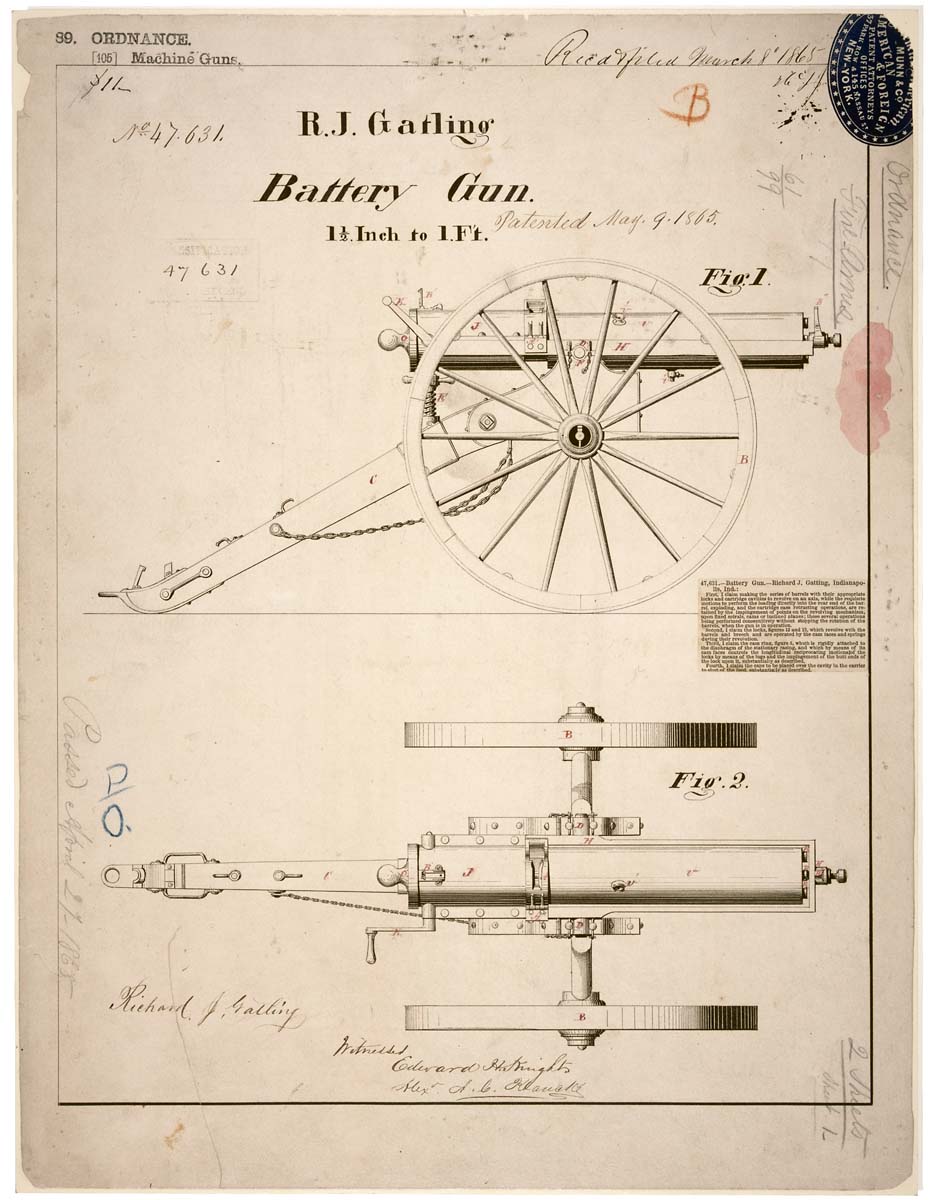
last word on the Gatling - apparently the Afghans used camel mounted gatling guns to defeat a Persian cavalry force 3 to 4 times their size - the following is from this web site  - I have no idea whether this is actually a true representation, but his is the only reference I can find.... can't help thinking the camel would get very cheesed off if the guy actually opened fire! I suspect that the camel was used as transport, rather than as a 19th Centruy self-propelled gun?? Answers on a postcard.. 
     
    Things proceed apace with the Sudan project - over the weekend I finished 12 mounted Camel Corp for the British forces - basing started this morning ( I got 10 minutes before work) and as usual pictures will be forthcoming soon....

    Friday, May 4

    The Gatling's Jammed..

    ..just a short update - it's been a busy week! Have the day off today - unlike what seems like the rest of Europe, the UK has it's May Day holiday this coming Monday (the 7th) as opposed to the actual day, so I decided to make a four day weekend of it. So what have I been up to on my day off?? Quite a lot actually - my other half is at work, and the little'uns are at school so it was a chance to get on and do some stuff...

    First thing this morning I pawned the cats (*) in order to fill up with petrol for a trip to London, or at least the outskirts of the city anyway. I recently bid for, and won, a large number of "Practical Wargamer" magazines on eBay - 26 of them for only a pound, which kind of made me feel really guilty at paying so little for what was/is an excellent (and sadly missed) magazine. The only thing to offset the guilt was the fact that they were "pick up only" (due to the weight), so it cost me a tenner to collect them given they were in London! When I got there the seller had also thrown in some freebies (a few copies of "Military Illustrated" and "Military Modelling") which was much appreciated.. nice guy, and relevant feedback was left. 
     
    On the way back I stopped off at a little pub I know called "The Harrow Inn" (this is it on the left), at a little out of the way place called Steep. Well worth a visit anyway, but given I had to come back almost through the back garden on the way home it seemed churlish not to visit... a very pleasant hour then ensued eating rare roast beef sandwiches (with home made horseradish) and drinking Bowman's "Swift One" which at 3.8% was nice refreshing ale on a warm spring day - and went with the sandwiches a treat!
     
    Having arrived home, I then completed the varnish coat on the latest figures to leave the painting table which are some Essex Gatling Guns for the Sudan forces - I've painted two, one with a regular army crew, and one with naval crew. Pictures soon..
     
    * We have two - and I wouldn't be parted from them really...!