Monday, October 29

...back from my travels...

I'm now back at my home computer after a week away.. always nice to get home and all that, but in this particular instance the family and I had a lovely break, staying with my Dad in Edinburgh.... so it wasn't quite as nice to be back as it normally is!

My wife and I have long accepted that at best we're "tolerated" when we go to stay with him, as really, we are but a means to an end, specificaly to transport his grandchildren to him! J The up side of this however, is that we are quite often told to make ourselves scarce for the day, so get to wander around Edinburgh, drink beer, chat, browse, and visit places safe in the knowledge that our two spuds are being spoilt rotten by their grandparents...

...and in this case, this visit was no different... so what were the highlights?? Well, on the wargaming front I wandered up to have a good look at the castle (picture above from the excellent undiscovered scotland site..)

I also got to visit Wonderland a huge model shop that I was originally tipped off to by Fire At Will - well worth a visit, but almost certainly of more interest to the plastic collectors amongst us than fans of the little metal men...

..other than that the other highlights were the beer (Caledonian "Deuchars" and "XP", Stewart "Cascade" were the best), the people (much more friendly than donw here in the south!), and the undisputed highlight for me as a Rebus reader was a visit to the Oxford Bar (his hang-out in the books) - fantastic (and the beer was good too, as you would expect!)

Having got back yesterday and re-read the part 2 write up, I was a little disapointed in the quality of my writing, so I have gone through and corrected/added/edited as appropriate - in my defence I was a little rushed and the PC in question was very slow!

Friday, October 26

..The Ambush Scenario - The Game - Part 2..

...so picking up where we left off last time... J

Move 5

Seeing the French withdraw, the British light infantry decides to quit the broken ground, and head for the slopes of the hill overlooking the valley. Their intention is to try and out-flank the American front line (shades of Thermopylae!). In the meanwhile, the remaining British cavalry (2/16th) decide that it's time they charged and approached the US cavalry with the intention of clearing them from the path of their advance. The British infantry continues to move up, with the 17th finally reaching the head of the convoy.

Position at the end of the British phase of move 5
The American cavalry fires ineffectively, but are roused and enthused enough by their previous success to stand to receive the British charge, but not to counter charge

For the American cavalry the melee is a disaster – they break and rout [rules comment: a bad dice throw by the Americans, with other modifiers, resulted in a 4 point negative difference to the British, so they broke, but also lost two points of damage. Not good when you’re only starting with 6 – that’s a 25% casualty rate!]

In their move, however, the Green Mountain Boys deploy into line behind the Militia with the intention of relieving them as soon as possible. Behind them the French are marching down the valley as quickly as they can.

Move 6

The British Light infantry reach the summit of the hill. On the road the cavalry seemingly incapacitated with the madness of their previous victory charge ahead with the intention of attacking the militia (all that stands between them and the bridge) but are repulsed! [Rules comment: amazing dice throw that shows even militia can put in a Guildford Courthouse effort when the need arises! They threw a 10 on 2D6 which with modifiers for target, and militia firing, was more than enough to cause the damage, and the halt!] In the background however, the British foot are drawing remorselessly closer!

In their move, the militia having successfully held the British cavalry are withdrawn through the Green Mountain Boys by the Americans. The Green Mountain Boys take their place in the line of the battle – the French regiment is now also within a move of assistance.

The American cavalry check morale and halt shaken.

End of move 6


Move 7

Both the British cavalry units have to check morale – the 2/16th rout from the casualties taken when the militia fired, the 1/16th recover from their earlier rebuff in the melee, and move back up towards the head of the convoy..

Time for a tea break…. which can also be taken even in solo games and which is vital to the cogitative processes of this wargamer at least... you'd be amazed at how many cunning ploys have come up whilst partaking of a cup of tea and digestive biscuit...J

After the break, with the road is too narrow for two regiments to attack in line abreast, the Welch Fusiliers take the lead (as you would expect!). The 17th, still in column, cross to the south of the road so that they can advance alongside them in column.. the 24th reach the edge of the hill above the Green Mountain Boys, who greet their appearance with a rousing volley that opens some holes in their ranks…

In the American move, the cavalry recover, and the Green Mountain Boys inch forward to close the distance, but remain out of musket range. The French finally reach the head of the valley which frees up the Militia to clamber up the slopes with the intention of driving the British light infantry away from their position overlooking the US lines.

The Militia almost accomplish this – the British light infantry, already having been shaken by the volley from the Green Mountain Boys, fire off an ineffective volley but in the ensuing melee just manage to hold their own with both sides withdrawing from the melee to regain their breath – the militia however have had the desired effect and pushed the British back away from their dominant position overlooking the road….

Move 8

In this move things start out well for the British but end disastrously.. the Light Bobs recover from their discomfiture (but not without having to withdraw in order to do it), and the British 2/16th recover and halt under the tender (and personal) remonstrations of their Brigadier…

Elsewhere, the Welch Fusiliers launch their assault and with steady advance come into musket range of the waiting Americans who unleash a veritable hailstorm of lead – the Militia and the Green Mountain Boys each inflicting casualties… the Fusiliers halt – visibly shaken…

Things can only get worse though, and in their phase the Americans assault in turn. In the face of the damage from firing, and the cold steel of the advancing Americans, the Fusiliers break and rout from the threat!! Things are not looking good for the British – with only the 17th between the Americans and the wagons...

Position at end move 8... the Fusiliers can be seen routing on the left - north of the wagons...

Move 9

The 17th move gamely into the pass – they’ve seen what’s happened to their compatriots but it is vital the wagons get through to the bridge.. behind them both the cavalry units form up in close successive lines looking to charge through the infantry to get at the Green Mountain Boys if at all possible… the British Lights move forward in support of the assault..

True to form the Americans open fire, with the Green Mountain Boys again causing damage and halting the 17th in their tracks – the militia are not quite as successful and hold the British Lights… the Green Mountain Boys then charge home and in a carbon copy of the previous engagement push back the 17th, and then rout them!!

Move 10

It was clear to even a tactical midget such as myself, that the British need to try something different – pushing their units piecemeal into the pass was not delivering results – accordingly they decided to attempt an attack via the hill slopes. Pushing their beasts to the limit the British cavalry attack, two regiments abreast, by deploying onto the hill slopes.

At the same time the lights come in on the flank of the militia – the Americans fire and hold both cavalry units, but in the ensuing melee the British lights break the militia – first blood to the British!!! (at last)…

End Move 10..


Move 11

After going at it hammer and tongs for the previous 10 moves the two sides draw breath and consolidate.In their phase the British morale checks are a mixed bag – the 2/16th break and rout again, the 1/16th withdraw to recover. The Welch Fusiliers recover and advance again into the pass, the 17th pass their check but halt shaken…

On the hill the Lights hold while their colleagues reorganise, but take further casualties from musketry.

The Americans attack to push the British Light infantry off the heights, but the British succeed in holding their position..

Move 12

British morale is now beginning to fragment and it is more and more difficult for them to put together a coherent assault – if it wasn’t for the importance of getting the wagons through Wade Smith would have withdrawn by now… things can only get worse, though...

In their morale checks the 17th fragment once again and rout – the 2/16th recover.

The Welch Fusiliers and the 1/16th again start to attempt something different…

In the American turn they again hold – they don’t need to do anything, so don’t! J

Move 13

The British realise they cannot win but in one final throw of the dice (quite literally! J) push their two remaining units into a desperate charge down the slopes into the American and French regulars – they are met by crashing volleys that hold them in their tracks, and in the ensuing phase are charged in turn.

They are too weak, and both units break and run… the British commander realises he cannot win and withdraws from the field leaving the victory, and the wagons, to the jubilant Americans….

Final positions..


Post match analysis

  • A good game and the solo mechanics worked really well - one the whole I was happy with the random element, as you were never quite sure when the ambush was going to be triggered. The 2D6 roll was geared towards getting a result where the ambush was triggered at the point the British were most committed.. so in hindsight I might remove the modifiers as the ambush was triggered quite early, which gives the british a much harder time of it..
  • The British attempted their usual full frontal assault (my fault!), but in this game, without the room to easily deploy flanks, all the Americans needed to do was stop them one unit at a time. The British tactics for this game were flawed, and if I were to play it again (which I will..) then I would be looking to do something a little different (so if you're reading this DG don't expect me to do the same again!J)
  • I evened up the sides for this game (in terms of points) as I thought the ambushers were a little outnumbered - as it happens I didn't need to, as the Americans strongest unit wasn't even engaged due to the limitations of the British tactical midget... morale of the story - don't tinker with a Charles Grant scenario, they're good enough!
  • Finally - for those who hanker after every fine detail, the tea was Twinings "Every Day", and the biscuits were Digestives from the Tesco own brand range - sacrilege I know, but I think they taste better than the McVitie's ones....J)
..and that's it for this post - apologies for the fragmented report - I'm away from my home computer at the moment so was grabbing some time as and when I could!

Wednesday, October 24

..The Ambush Scenario - The Game - Part 1..

…so without further ado, here’s how the game transpired… one final note, in rules terms each complete move represents about 20 minutes, this is made up of two part moves where in the first part one moves and the other fires, and in the second part they swap about…

Move 1
The British advance guard (1st of the 16th) enters the table and successfully scouts the broken ground at 7. (no–one there) but not that at 8. (failed dice throw). As they are at least a foot on to the table (NB. 15” minimum ahead of the main column..) the Americans test whether they trigger the ambush, but cool minds prevail and they hold their fire.. (dice throw less than 7!)


End move 1 - the 1st/16th in the distance, the main body enters the table Light Infantry to the fore, and then the Fusiliers...

Move 2
The British continue to advance down the road, the advance guard again does not successfully scout the rough ground at 8, and the British main force begins to enter the table. By the end of the move the British 24th Light Infantry and the Welch Fusiliers are on the table plus the first wagon..

This is obviously too tempting a target for the Americans and in their turn they trigger the ambush..!

Turning over the cards, it reveals the following American units in each of the respective ambush poisitions..

  • The 4th Dragoons – point 6/.
  • Saintonge Regiment – point 2/.
  • Massachusetts Militia - 4th Battalion (Light) – point 4/.
  • Green Mountain Boys - 1st Battalion – point 3/.

It’s an interesting deployment and for me as the solo player it gave me a couple of interesting conundrums. For the time being though, the American plan is for all units except the French to converge at the head of the valley opposite the bridge, where they will try and stop the British. The French will either join them there, or otherwise, depending on what the British do (and being also the British I can confirm I didn’t really have a clue what that would be at that particular moment!)

Move 3.

The British light infantry head quickly for the broken ground at 7. with the intention of cutting off the French from any attempt at a flank attack. The rest of column moves forward as quickly as their wagons allow. The rear guard (the 2nd of the 16th) moves up to the head of the column to assist the advance guard…

The Americans continue with their plan; in the first engagement of the battle the American cavalry charges the British advance guard – they need to drive them off before they are reinforced with their colleagues from the after guard!

In the ensuing engagement, the British cavalry fire but without effect (must be surprised with the speed of the US attack!) They recover enough, however to stand against the charge (though not enough, to counter charge!). .

In the melee the two units fight each other to a standstill, and both withdraw to recover neither side having suffered significant casualties…. not the best result for the Americans.

Postion end move 3 - American cavalry draw breath, Militia in the near distance and behind them the Green Mountain Boys...


Move 4

An hour has passed in real time, and the British continue to advance, the 2/16th move into line behind 1/16th who stand following the re-buff from the melee in the previous turn.

The 17th Foot (in column of march) move up alongside the wagons to move towards the head of the convoy.

The Light Infantry occupies the rough ground at 7/.

Realising that they can’t make any difference on this side of the engagement, and in the face of the British Light Infantry – the French regiment disengages. Deploying in column of march, it moves around the end of the hill to the end of the valley so as to provide support and assistance to the Green Mountain Boys. The Militia halt in line between the hill and the river preparing to sell themselves dearly… the American cavalry charges again – time is running out!!

True to form the British firing again fails to have any significant effect, but this time in the face of the more aggressive enemy the British cavalry breaks and runs! Flushed with their success the US cavalry attempted to exploit the breakthrough, but were brought to a crashing halt by some slightly more effective musketry from the 2/16th..

...and with that - we break until part 2... bit like "Batman" when we were kids, isn't it..?! J


Tuesday, October 23

The "Ambush" scenario played solo...

...realising that my regular opponent, DG, was not going to be down in my area in the near future, and suffering from an intense need to push some lead on the table, I decided I couldn't wait and went for a solo attempt at the "Ambush" teaser that I've just obtained. The following is the account of how it went... a very enjoyable game all round...

..first, some setup details/scenario rules and stuff...

this is the table set-up (you can click on to for a bigger view)...


Orbats

..I used the Horse and Musket organisations from the scenario; which transcribed as follows:

American (The Ambush Party)

Cavalry: 4th Dragoons
Line Infantry: Saintonge Regiment
Light Infantry: Massachusetts Militia - 4th Battalion (Light)
Line Infantry: Green Mountain Boys - 1st Battalion


British

Line Infantry: 17th Foot
Light Infantry: 24th Light Infantry
Line Infantry: 23rd Foot (Royal Welsh Fusileers)
Cavalry: 1/16th Light Dragoons
Cavalry: 2/16th Light Dragoons
Two Wagons


..all troops were regulars with the exception of the American Militia. In order to ensure the game wasn't too lopsided I also made the American units over strength (5 points instead of 6), in order to even up the sides.

Tips for playing solo

(I would recommend a read of the teaser in question as the following will then become clearer.. J

I decided who was in which ambush point by random – I had eight blank cards, four marked with the available American units – shuffled, and then placed face down on each point..

In terms of triggering the ambush – the road was 5’ long from entry edge to the bridge, so I decided to roll for the start. In summary, as the first British unit passed each foot mark, on their turn, the Americans throw 2D6 – the ambush is triggered on a 7 or more. The dice are modified as follows:

· 1 foot – add 1 to the dice
· 2 foot – add 2 to the dice
· 3 foot – add 3 to the dice
· 4 foot – add 4 to the dice
· 5 foot – add 5 to the dice


I kept the discovery roll for the broken ground area's at 7. & 8. Basically, a 4,5 or 6 on a D6 means that any troops remain undiscovered. (You might want to consider a distance modifier as well?? Perhaps only throw when within a foot…?)If they were discovered, then you also do the additional die roll for how long before the main ambush they are spotted. This will also nullify the need to continue rolling for when the ambush is triggered..

Special rules for wagons:

· The wagons can only move on the road.
· Damage - each wagon is worth a number of strength points (4 each). Hits are inflicted in the usual manner. Once the wagon gets to half points it moves at half rate. Once it gets to 0 points it is stopped.
· If a wagon is immobilised or destroyed, no other vehicle may pass it. It then requires one full move period with assistance for the wagon to be man handled off the road to allow other wagons to pass.
· Infantry or Cavalry can assist wagons by man handling them to overcome damage - a unit doing this needs to be next to the wagon for one move and can 'donate' strength points from their roster to the wagon roster (which represents the loan of man/horsepower)..
· Wagons suffer the usual morale tests (so can rout), but ignore the retire result instead they just stop where they are.


British – Order of march

Head of column – 1/16th Light Dragoons – who were to operate 15” ahead of main force (minimum) until any enemy were spotted.. followed by..
24th Light Infantry ..then
23rd Foot (Royal Welsh Fusileers) ..then
The two wagons ..folowed by..
17th Foot and finally..
2/16th Light Dragoons


British Winning Conditions:
Two wagons over the bridge is a victory
One wagon over is draw
No wagons over is a defeat...


So how did the game go...? Read on, in part 2.... J

Monday, October 22

Sudan gun crews...

..as promised, some shots of the new gun crews for the Sudan.. all of the following are 15mm from the excellent Peter Pig range..

First one shows a Krups manned by one of the two Egyptian crews, next to a small screw gun manned by one of the British crews (he looks hot doesn't, he?!)


Second one shows both British crews manning the Krups and the screw gun ..


Last one shows one of the Dervish crews - used the flash for this one..

Wednesday, October 17

"Ambush!"

First off, I'm very pleased to report a new addition to the table top teaser page - I've just taken delivery of the July 1979 issue of Military Modelling (at a very reasonable price from a lady on eBay) and have now scanned and added it to my Teaser page. This is the "Ambush" scenario that up until now I'd only seen the play test of.

From my perspective, in addition to the extra background information/mechanics etc, the best thing about it is that it gives a very useful force list so that you can set it in the horse and musket period (the play test was set in the ancient period)

Having read it through it has definite possibilities and I'm looking forward to trying it out the next time my regular opponent is down my way! Trust you find the same..

Other updates - the artillery crews and pack horses for my Sudan artillery were completed over the weekend as I'd hoped. 

They're now varnished, and the first coat went onto the bases last night - I should have some pictures soon. I've completed 3 separate sets of crews, representing Egyptian, British and Dervish artillery... my plan is to base the crew, but leave the guns free standing so that I can swap the guns around depending on the scenario.... it saves me having to paint (and buy) multiple artillery...! Once finished, I'll have crews/transport for two bases of artillery per side...

Saturday, October 13

....wargaming laurels...

..no I haven't won any, but the title is to let you know that I'm not sitting on them either!

No painting per se, though I hope to address that over the weekend, but just to let you know that I've spent the week bringing my various project pages up to date, the eagle eyed among you will also have spotted the appearance of the WW2 project page, that up until now has been in a "construction" phase on my old Geo-cities page... there'll be more updates to these pages over the next weeks and months as I bring pictures up to date, add reviews of books, etc. To save having to keep looking I'll announce them here...

So, plans for the weekend?


  • There are artillery crews and limbers undercoated and ready for a lick of paint on the painting table - they will get that at some point in time over the weekend, and with my other half doing an overtime shift this evening (Christmas beckons!) I suspect it will be tonight as it will also give me the opportunity for the other activity pencilled in for the weekend, which is
  • England play France in the rugby world cup - torn loyalties here, which basically means I won't be disappointed whoever wins... I've supported France in the international rugby for as long as I know (no idea why, I think in the early days it was because I used to like their gloriously shambolic playing style, they're a lot more disciplined these days, but the habit of support has stuck!), but I am of course English - it would be a whole lot easier to support England if they just looked like they were enjoying it a little more!
..so bottom line, I'll be painting as I watch the game, pint of something hoppy from a local brewey at elbow, perfect!

Just one final word on other activities this week - couple of days ago I got a booklet from Caliver that I'd ordered based on a recommendation by Grimsby Mariner, the booklet "DANISH ARMY 1699-1715" is an absolute cracker, and together with the two Charles Grant volumes on the Armies and Uniforms of Marlboroughs Wars is I would say an essential purchase for anyone starting in the period...


Following a mention on Giles AWI blog I'm also reading the new Mark Urban book "Fusiliers" which is basically a regimental history of the Royal Welch Fusiliers during the American War of Independance. It's set against the general history of the war, the strategy's etc. I'm just up to the start of the southern campaign and have to say it's a riveting read - lots of first hand accounts... 5 stars for anyone with a tricorne era/black powder interest.
One final (final!) word, thanks for taking me through the 4,000 viewer mark - I'm gob-smacked as we say in the UK!

Wednesday, October 10

...."glittering prizes..

..and endless compromises,
shatter the illusion of integrity"


...anyone who has stuck with me so far will know that those words are far too erudite for me, and they'd be right! J They are in fact lyrics from a song called "Spirit of Radio", which happens to lead me nicely into the fact that the band concerned, Rush, one of the greatest rock bands to ever bestride the planet (and surely Canada's finest export?!), are in the UK on their "Snakes and Arrows" tour, and last night I had the great pleasure of seeing them play a breath taking three hour set at the Wembley Arena!

Quite simply, these guys are the best musicians, they have quite astonishing virtuosity (stay with me - I'll try and regurgitate the dictionary and resume normal service as soon as possible..), but more than that they also happen to write damn good songs as well.

They played for three hours, with just a small break in the middle, and the set was packed with a host of tunes, a big chunk of which are off the new "Snakes and Arrows" album which I think is probably one of their best in years - outstanding performances of "Far Cry" and "Malignant Narcissism" from this album. They also pleased the older members of the crowd with some stirling performances of their older stuff, "Spirit of Radio" was aired, as was "Natural Science", "Tom Sawyer" (..."A modern-day warrior, mean mean stride, todays tom sawyer, mean mean pride"...), a triumphant "YYZ" in the encore where I swear they must have emptied the back of the sofa for change to put in the electricity meter as they must have turned everything on - volume, lights, lasers, fireworks and some 'interesting' flamethrower devices that I could feel from where I was sitting 20 rows back...! Best of all they also played "Passage to Bangkok" which has to be one of my favourite tracks off the "2112" album... it took me back 30 years to when my mates had clubbed together and bought it for me on vinyl (and I still have it!)...

Astonishing performance, it literally raised the hairs on the back of the neck at times... such is what good rock is all about, and let's hope they're back soon! Thanks guys...

Friday, October 5

Bavarian heavies - Arco

The cuirrasiers are finished, so I popped up to the painting table and grabbed a couple of pictures this morning before work, to share with you..

They've been painted to represent the Bavarian Kuirassier regiment Arco and will be brigaded with their colleagues from the Weickel (or Weidel) regiment that I painted previously... the graphic to the left was their regimental flag (from the excellent Warflag site)..

Web research on the regiments in foreign service is always a little more difficult but from what I understand the regiment was named after one of their most famous colonels, Jean Baptist, Comte d'Arco...


Wikipedia (and there's not a lot else I could find on the web) advises me he was a field marshal in the service of the Electorate of Bavaria during the War of the Spanish Succession. He entered the Bavarian army in 1672, but three years later changed to the Imperial service (his father was in disgrace at court).

In 1683, he returned to Bavarian service as colonel of a regiment of cuirassiers (my assumption is that this was this regiment)


He had a bit of a checkered military career after this - he did well at the Battle of Vienna (1683), and the recovery of Belgrade(1688).

Upon the outbreak of the War of the Spanish Succession, he was recalled to the field, and promoted field marshal in 1702, but he was in charge of the Franco-Bavarian army at the Battle of Schellenberg (July 2,1704) and his army was pretty well nigh on totally destroyed (the regiment were present at this engagement).

He (and they) survived to rejoin the main Franco-Bavarian army for Blenheim, where he was in command of the Bavarian cavalry. He put up a good fight here against Eugene, but was forced to retreat after Marlborough's attack destroyed the French on the right.

He had another cavalry command at Ramillies, and eventually died in 1715 - honoured as a Marshal of France by the French because of his continued support of their interests while in the service of Bavaria.

Monday, October 1

Cuirassiers, cavalry & Freikorps

...a good weekend this weekend, I completed the aforementioned second regiment of Bavarian Cuirassiers for the War of the Spanish Succession project... I'll post some pictures once they're varnished and based. Once again though they were a total joy to paint... Peter Pig are just one of those manufacturers who seem to make figures that match my painting style..!

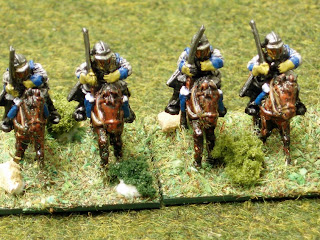
As promised I also got time to take some comparison shots of the new 15mm WSS period cavalry I got from Freikorps at the recent Colours show. Here for your pleasure, are samples from all four of the manufacturers I currently own in this period.. from left to right these are Roundway [clicky], Warrior [clicky], Freikorps [clicky], Minifigs [clicky] & Dixon [clicky] - all 15mm. I've missed Peter Pig out as the only cavalry of theirs you can really use for this period are the Roundheads from their ECW range - shame, really...

same order - slightly different perspective.

...close up of the Freikorps next to my favourite range..


So thoughts on the Freikorps?? The figure design is fine, nothing 'weird' in the way of waving sword arms in the air etc. the figure is a good, workmanlike, cavalryman - nice figure. The cast quality/detail, however, is much coarser than the Dixon. Having said that, it's a one piece cast (so the figure sits well to the horse) and painted up I have hopes that this may provide some cheap(er) cavalry for both sides. One thing of note, this is from their SYW range so is slightly later in period, but not noticeably so at this scale..

..and how do they match up in cost? Pretty well in fact... in order of cost:

Dixon - £3.75 for 5 (having to buy horses and riders separately); so 75p a figure..
Minifigs/Freikorps - £2 for 4; so 50p a figure..
Warrior - £2 for 6; so approx. 33p a figure..
Roundway - £1.50 for 4; so approx. 38p a figure..

...we'll reserve final judgement until the first unit is painted... what's interesting is that I have a desire to paint these guys, whereas the Minifigs/Warrior/Roundway figures are stuck firmly in the "to paint" pile despite having had them for some months now....