Thursday, July 31

Move 52 - 11:00 (day 3)

11:00 (Day 3)..

...first off, the usual reminder that the campaign map is to the left (click on it and any of the other pictures in this blog for the usual bigger view).

...things are picking up fast, and the bad news is that my flanking force has been rumbled; I'll need to get them back in quick.

As part of the pulling back of my troops in the face of DG's force, I'd bought one of my cavalry squadrons right into Carnine (9. on the map) and that resulted in me getting a sighting of a unit that I hadn't been able to spot up until then, on the other side of the river.

I suspect that these guys are cavalry and they'll have been watching every move my flanking force has made - they need to get a message to the British C-in-C before DG can formally react but I hate all that gamey-ness so I'll be conforming as above...

Key to the map is as follows - this was the recon report from that unit of cavalry:
...and this is the composite view of where everyone is....

...more anon...

Wednesday, July 30

Move 32 (15:00 Day 2) to 51 (10:00 Day 3)

15:00 (Day 2) to 10:00 (Day 3)..

...first off, the usual reminder that the campaign map is to the left (click on it and any of the other pictures in this blog for the usual bigger view).

...it's been some time, and in campaign terms we're currently up to move 51, so I thought I'd bring you up to date with what's been happening in the campaign. Yes, we're still playing, but at the moment we're into a cautious manoeuvring phase, and rather than bore you rigid I decided to lay off the posts for a while so as to give a summary/overview that may be slightly more entertaining...

...you may remember that the last time I posted I was cock-a-hoop, as following the decision to put my cavalry in "harms way" I'd hunted down DG's main force at Camsix (6. on the map) behind a screen of his own cavalry. That was late in the previous day, so after getting messages back to my main force in Carnine (9.) the rest of the day was spent shadowing his cavalry, and watching what the rest of his force was up to.

After a quiet night he started moving westwards again in the early hours of the current campaign day, and I am wholly expecting a major engagement 'today'. His cavalry have scouted Eighton (8.), but in the last couple of hours his main force is just coming into recon range.

Overnight, I ordered a couple of moves that should help to offset the superiority DG has over my forces...

Firstly I ordered the infantry in Carnine to start digging earthworks - in the rules we're using, a close order infantry unit can construct 1 strength point of fieldwork every other table top move. There are 6 tabletop moves per campaign move, so that equates to 3 strength points per regiment per Berthier move - with 9 regiments then, an hours move gained me 27 points of fieldworks to use as I want. As an indication a:


  • Timber fieldwork (per 100mm) equals 6 strength points
  • Earth and Timber Redoubt equals 10 strength points
  • Timber Stockade (per 100mm) equals 8 strength points


I'm guessing I'll have a couple of redoubts (for the artillery) and a fieldwork, but we'll see...

Second, I ordered the light militia regiment to march east, to provide extra recon cover, the other two militia battlaions (Close order) I ordered north east, tracking the edge of the river, my plan is to keep them out of recon range of DG's troops so that I can use them as a flanking reinforcement, hopefully when DG is least expecting them! It's a gamble as I'm relying on them not being spotted, but if it goes pear shaped then I'll recall them quickly.

Current positions then are as follows:


...more anon...

Monday, July 28

Battle report - "Alfiyah Pass"

Following the trip to the Eastbourne show, and because DG was down for an extra day, we took the opportunity on Sunday to slip in a game before he traveled home - with so little time, so few visits, and so many interests, it tends to mean that we have to cycle the periods we're interested in, so this time we took the opportunity to visit the red hot desert sands of WWII Cyrenaica for a Blitzkrieg Commander game......

For this game I also took the opportunity to play my first scenario from Charles Grant and Stuart Asquith's book "Scenario's for All Ages". The scenario I picked was the first one "Attack on a Prepared Position", and is an attack and defence game, where the attacking player has to fight his way across a long ridge (with a single pass), and then exit the opposite board edge with a minimum of two units. The ridge is not impassible, but there are the usual terrain restrictions..

Without further ado then, and enough words have passed that it's time for a picture - this is the table:

I then translated the forces in the scenario to the modern era, and decided on April '41 as the specific period. The idea was that Rommel who had invaded Libya to 'rescue' the Italians (Operation "Sonnenblum" - click here) the month before, was pushing back the British so fast, and in such disarray, that they had put together a scratch force to try and stop him and buy them some time.

Using the (quite stupendous) Blitzkrieg Commander site which has a page that allows you to generate orders of battle we ended up with the German attacking force comprising the following:
  • 1 Commanding Unit and 3 HQ units
      These commanded the following:
    • 1 Recce Unit (Motorcycles)
    • 4 Company's of Infantry
    • 3 Support Units (MG)
    • 2 Support Units (ATG, 37mm)
    • 1 Support Unit (Mortar)
    • 3 Light Panzer Unit (Pz-III short)
    • 6 Transport Unit (Trucks/Half-Tracks)
    • 3 Transport Unit (Sdkfz 251)
I took the British, which comprised the following (about half the points the Germans had):
  • 1 Commanding Unit and 3 HQ units
      These commanded the following:
    • 3 Infantry Unit
    • 3 Support Unit (MG)
    • 1 Support Unit (ATG, 2pdr)
    • 1 Support Unit (Mortar)
    • 3 Cruiser Tank Unit (A13)
    • 1 Transport Unit (Universal Carrier)
The British started the game "dug in" - the blue box represents my deployment area. I also paid for trench's out of my points total - as it turned out I could have saved the points and spent better elsewhere, but that's jumping ahead of myself.

I used hidden deployment so that DG had to work to find out where I was concentrated, but basically had the tanks behind the ridge on my extreme right (for no reason other than that flank looked more open and I thought that DG would deploy his armour there).

Moving up the table I then had an infantry company with MG's; a heavy infantry company with MG, mortar and A/T gun in the centre (just below the pass), with two further infantry company's with MG the other side of the pass. See following:

DG took the Germans and started from the left side of the table (the red box was his deployment area) - he came up with a good plan - he loaded his left flank with all the infantry, the MG's, and backed up by the tanks.. in the centre he had his CO with the mortar, and on his right flank he deployed the 37mm A/T guns..

So at the beginning of the game I got lucky in that my tanks were in the right place, and other than one other notable event (see later), that was the only bit of good luck I think I had all game!

The scenario calls for a set number of moves - Grant and Asquith advise making this to be the same as one and half times the number of moves it takes to move from one side of the table to the other - with Blitzkrieg Commander this is a bit difficult as the moves are variable length, but I settled on 9 moves as being something that would cause DG to "push on" a bit!

So how did the fame turn out??

Weeeeeeeeeell.... I may have given you a hint above but suffice to say DG started with the strong push on his left, getting the necessary die rolls to move forward quite quickly (see next picture). His other units also advanced - the CO to the hill in the centre, and his AT Guns towards the village.

My die rolling on the other hand resulted in stalled move after stalled move, and when I finally managed to get the tanks rolling (and I had to use my CO to do it) I then failed to get them to shoot!

My one good bit of luck was on one move with the mortar and MG gun of the heavy infantry company where I brewed two of DG's transports with occupants.

...and that, unfortunately, was that really!

My tanks never got to fire (appalling command dice throws!) before two of them were brewed by DG's armour, and one of them was suppressed. The mortar was then destroyed by effective MG fire from multiple weapons which removed my long range HE ability. Finally DG close assaulted the remaining tank with his infantry and destroyed that:

...he then pushed through with his armour and exiting the table on move 5 in the face of another failed dice throw following one innefectual shot from my AT gun!


Post Match Analysis:
  • After many years of searching for a playable set of rules for WWII, the search continues... no, not really.. Blitzkrieg Commander (click here) are excellent. They give a fast, free flowing game, with a unique approach to command - basically your CO and HQ units are given a command factor which you then dice to get under, so that you can activate your units - every time the commanding unit gives a subsequent order their command factor is reduced by one so that it gets harder and harder to give orders - once you fail that's it, you move to the next HQ, or end your turn if that's the last one... Mine had Command Factors of 8's and 9's, so using 2D6 you would normally expect to get a minimum of a couple of activations - purely through abysmal die rolling however, I kept blowing out on the first activation, or worse still getting the dreaded double six which results in all sorts of nasty stuff happening! Some nights you aren't going to shake lady luck though, and last night was one of them.... not the rules fault, just an off night for me... and payback for that last War of the Spanish Succession game!
  • DG had a good plan - and even with some decent command dice I would have had a hard job holding him. What I will say is that we both enjoyed the game - as Mr. Preece has said recently on his blog (click here), the social aspect of the game shouldn't be overlooked!
  • Refreshments on this occasion were of the iced variety - the weather here in the UK is hot and sultry at the moment, and the loft was warm to say the least!!

Saturday, July 26

"To the Redoubt" - Eastbourne show...

Just back from a lovely day at the Eastbourne show - the weather was perfect, sunny & warm, and the show as always was ideally suited to the retro feel of Eastbourne - slow, laid back, and altogether a little different to the usual highly commercial, big shows, that DG and I usually attend..

The show is a small one - as you can see in the picture - with no more than half a dozen traders but the atmosphere is second to none, and the location is just as good being in an old redoubt, or fort, on Eastbourne sea front which was built in the early 1800's as part of the general fear at that time of a French invasion. The Redoubt (click here) also hosts the military museums of The Royal Sussex Regiment, The Queen's Royal Irish Hussars and the Sussex Combined Services, and entrance to the show also gets you entrance to this museum.

...it may have been a small show but it didn't stop Henry doing what looked like a good trade...!

..those of you who also follow the Battlegames blog will know that Henry was busy painting this week for a participation game - here's the first group about to embark on their attempt to get the survivors from Isandlwana to the "safe side" of the board, in the face of what I was lead to believe would be a number of nasty surprises*

(* mostly wielding big pointy sticks and shouting 'usuthu'..!)


..two shots of the aforesaid survivors - I was advised that Henry was still gluing the sand to the bases this morning, but they looked damn good, and I was really taken with the colouring to the helmets, and the detail on the faces...

As always the Bring and Buy was particularly good again - DG managed to nab a copy of "Battles with Model Soldiers" by Featherstone in excellent condition for just £6, I got an Osprey Campaign on "Alamein" in mint condition for just a fiver... best of all DG picked up an entire 15mm Ancient Indian army for a pittance - all still in the original bags...!

So having shopped 'til we dropped (well perhaps not quite given the small trader presence!) we moved on to the museum - theme for the show this year was the Zulu Wars, and my eye was immediately grabbed by this Gatling gun:

It's a copy rather than being real - but I was quite surprised at how big it was!

As for the games - well I have to say not as good as last year - game of the show was this one, but there really was no other competition (as far I was concerned), the other games being Warhammer/SciFi or just not as pretty...

..this was put on by Deal Wargames Society, the same group that put on the crossing the Irrawady game that I featured here. This game represents the Allied invasion of Madagascar in the Second World War - Operation "Ironclad" click here

Other than that - these exquisite figures caught my eye on the Perry stand:


Lastly, no show is good unless you leave it feeling enthused to try something, or paint something, and this show was no exception - last year it had me rushing back to paint the Orange Lillies (click here) this year I have a feeling it will be these guys, representing the Earl of Donegal's Regiment of Foot (precursors to the Orange Lillies and the Royal Sussex Regiment):

..it's those orange facings again (!) but I am also just as enthused to also paint naval brigade!

Friday, July 25

Nazaire raid...

The holiday is fast approaching, and those of you who have been browsing here for a while will know that when on holiday I do have an interest in dragging my family kicking and screaming to the nearest site of military interest – even if only once! 😀

These trips are invariably fraught with some danger or another, usually the weather – it either howls it down with rain, or is so hot that even the locals are passing out with heat exhaustion. Last year you may remember I dragged them off to Bayonne and we were not "disappointed" - Bayonne is beautiful, but the weather was of the former persuasion (in fact to be honest we came back from that holiday with webbed feet and hands!)

This year I'm hoping to be able to drag them off to St. Nazaire as, for many years, I've had an interest in visiting the site of "Operation Chariot", also known as the St. Nazaire Raid. Chariot was a Second World War operation to deny the Germans the use of the only dry dock on the Atlantic coast big enough to take Tirpitz or Bismark.

Luckily most of the original features are still in place, so if I start my usual amble with the following pictures which are from Multimap, and are current:

First, this is the entrance of the Loire - the dock at St. Nazaire is in the red box.. Second - this is the dock area itself (the red box in the previous picture basically):


I'll refer to the various highlighted features as I describe briefly what happened - I'm not going to go into huge detail as there are a number of very (very) good websites that go into huge detail on the raid, including video and photo's of the place and participants...

In summary though, the German defences at St. Nazaire were considered the toughest in western France after only those of Brest. Both sides of the Loire estuary approach (see first map) were heavily fortified, and armed with amongst other things 150 mm howitzers, 170 mm guns, 75 mm guns, 88 mm guns, and 20 mm or 40 mm cannon. There were even two 240 mm (!!) railway guns.

In the harbour area itself there were around thirty single 20 mm guns, two quad 20 mm guns, approximately fifteen 40 mm guns, and a flakship just off the new port.

The garrison numbered about 6,000 men (including the artillery crew)

The British plan relied on surprise to succeed but basically a flotilla of shallow draft boats (MTB's and a destroyer) were to race up the Loire, while the German defenders were distracted by an air raid put on by the RAF. The destroyer was packed with tons of explosives, and would then be rammed into the dock gates (bottom of the red box in the docks map), scuttled, time fuses set for destruction some hours later, while commando's carried on the destroyer and the MTB's would disembark to destroy other targets in the area - these latter ships would land troops on a feature called the old mole (blue box in the map). Once the attack was complete, the British were then to regroup on the mole before making their escape on the other ships in the flotilla. Altogether the raiding party numbered 600 men.

Speed was key, but in addition the destroyer (a US lend-lease ship called USS Buchanan, renamed HMS Campbeltown) was physically modified to resemble a German destroyer. Captured code books allowed the ships to respond to shore based signals and the plan was to appear as if they were a returning convoy.

The attack started with the RAF raid which was particularly ineffective (Churchill ordered them to minimise the possibility of civilian casualties, and the RAF reduced the number of planes due to conflicting requirements from other raids/missions). The flotilla wasn't spotted until it was about a mile and a half away from the docks, but the false signals and a kriegsmarine flag on Campbeltown, resulted in them getting just over half a mile closer - the Germans then opened fire in earnest and Campbeltown hoisted the white ensign (there's no record of it but I like to think they may have let of the ships sirens at the same time - that bit at the end of "Battle of the River Plate" always stands the hair on the back of my neck on end!)


Campbeltown rammed the end of the docks at about 01:34, and was moving so fast that it crumpled in about 40 feet of the front of the ship - the commando's were disembarked and they completed their mission to destroy various pieces of equipment to do with the docks (pumping stations, engines, etc.) before withdrawing to the mole as planned.

The other ships weren't so successful - these were mostly lightly armoured MTB's and a number of them were destroyed before they managed to land their commando's on the mole. In the end, very few commando's were landed, and none to the mole. Not good when this was supposed to be the embarkation point for the rest of the force.....

In the end, the remaining MTB's picked up who they could (usually from other sinking boats, or from the water) and escaped as best they could - leaving behind approximately a 100 commando's in the docks. Under constant fire from the shore based guns, in the end four MTB's made it back to the destroyer escort off the mouth of the Loire. Two of these were abandoned due to damage, and the remaining two were scuttled when the destroyers came under air attack on the way back.

The commando's left behind in the docks and elsewhere, tried a break out, but in the end were surrounded, and captured - British casualties totalled 169, with 200 captured (but apparently 5 did manage to escape the encirclement and make it to Gibraltar!); German casualties were 42 killed and 127 wounded..

This last bit is unedited from Wikipedia entry (it deserves to be read unedited)

"The Campbeltown's charges were timed to go off at around 0900 hrs at the latest. Meanwhile, a German search of the ship failed to discover the hidden explosives. The detonation time came and went. During this delay, senior German officers arrived to inspect the damage and were photographed on deck. They were accompanied to the dock by two Commando officers who had been taken prisoner. The captured officers knew what was about to happen but remained silent, allowing themselves to be killed rather than give the Germans an opportunity to defuse the explosives. It was not until 1035 hrs that the Campbeltown finally exploded, destroying the caisson and killing about 250 German soldiers and civilians in the immediate area".

..suffice to say that this was a most dramatic and heroic raid (a total of 5 Victoria Crosses were won!), but it was won only after huge sacrifice; is it any wonder that I find military history so fascinating?! Unlike the Dieppe raid earlier in the war, it was undoubtedly a huge success though, the dock (the primary target) was severely damaged and remained unusable until 1947.

Can't wait to go and see it - not only is the dock and the mole still there, but you can also still see the U-Boat pens (yellow box in the docks map) - in fact I think there is a museum in one of the end pens.

Further reading (and I particularly recommend the second one):

http://www.combinedops.com/St%20Nazaire.htm
http://www.stnazairesociety.org/Pages/index.html
http://www.jamesgdorrian.com/

Saturday, July 19

De Montreval...

Those of you who read here regularly will know that I love to dig up historical tid-bits and other facts about the regiments I represent on the table top - well in this case you (and I) are going to be disappointed - I can find out absolutely nothing about them...

The French cavalry regiments of this period - of which there were almost 200 - are remarkably poorly documented. There's a lot of uniform detail (though in the case of this regiment even that was missing) but not much else..


Even Grant didn't list this regiment so once again I owe a debt to Iain Stanford and Dan Schorr on the Early Linear Warfare Yahoo group for the uniform details...


So there they are - these figures are Freikorps, 15mm of course, and I have to say a delight to paint after the Essex...

The only thing I do know about them (and the reason they were painted in the first place) is that they were in the brigade of the Marquis de Silly at Blenheim, along with Regiment de Orleans, Regiment de St. Pouanges & Regiment de Ligonday - nine squadrons in all. The brigade was under the overall command of Marechal de Camp, the Duc d'Humeries. At Blenheim they were positioned between Oberglau and Blenheim, where they were part of a force that comprised 64 French and Walloon squadrons.

Today I bought Kleer Future floor polish, some Payne's Grey, and some Windsor and Newton Peat ink as a result of the many hints and tips that I'm picking up, so it's time to try a little experimenting I think....

Wednesday, July 16

Grant's "Ancient Battles" and a data dump...

It struck me the other day that I've been on a bit of a War of the Spanish Succession drive just lately - it's the way it sometimes goes, of course, you just get enthused, and the more reading and researching you do the more the period sucks you in... Bearing ever in mind the words of that wise wargamer on the Old School Wargaming group however, that interest is kept burning bright by painting and researching in all your wargaming periods and projects this post is a little more diverse... :o))


First off then a book review - you may remember some time ago that I mentioned I had managed to get a copy of Charles Grant's "Ancient Battles for Wargamers" at a very reasonable price on eBay, well, I've just finished reading it, and a lovely read it is as well...

If you've been in wargaming for a while you may remember the series of articles Charles Grant (the senior in this case) did in Military Modelling on the great battles of ancient times and how to recreate them on the table top. This book is a gathering together of all that diverse information, edited, updated, and with some entirely additional information added.

The book was first published in 1977 (in what I think of as the golden age of wargaming - not that it's rubbish these days!) and is 111 pages long. It comprises chapters on the battles of Kadesh, Marathon, Granicus & Pydna and in addition, there are separate chapters on some noted military units/soldiers of the period, in this case the Greek Hoplite, the Immortals and the Thracian's.

For me, whose interest in the Ancient period is now only a secondary one (ie. I own a few DBA armies which are very rarely used, and back in the day used to have Samurai and Early Indian WRG 6th Edition armies of about a 1000 points..) the best chapter funnily enough is the first one. The chapter on Kadesh is gripping and has huge possibilities for a scenario or game in other periods - the other battles are much more straight forward.

The accounts of the actual battles don't provide any surprises - and in these days of the "interweb", is easily obtained from many sources, the best bits of course are the calculations on how Grant worked out how to transfer the battle to the table top - scenery, and figure numbers etc. My perception is that he often used the tried and tested "finger in the air" technique when the sources were in doubt! He also uses the "figures to table" relationship to work out numbers - for example, if he knew that a piece of scenery covered a specific area rather than getting tied up in real numbers he works out how many figures could fit in the space and works everything out from there - an excellent idea in my view.

The chapters on the soldiers/units are (I think) of less interest - but they do have some snippets of interest, and even I remember the endless discussion in Slingshot (the journal of the Society of Ancients) about exactly what a romphaia was which he touches on...

All in all - a good read, and a necessary part of anyone's classic wargaming library. 6 or 7/10 I think...

======================================================


Next by way of a "data dump", I need to let you know about a couple of web data sources I stumbled across this week that definitely had me stirred up...!

You'll be aware that one of my great joys when painting figures and presenting them here is to also do research into commanding offices, battle honours, history, etc. Well check out the following...


First - For the British forces in my various projects, simply the best web site used to be regiments.org. I say used to be, as some time ago it disappeared off the web with a statement on the web page saying it was "down temporarily"..... as weeks passed to months I gave up on ever seeing that information again, imagine my delight then, when I stumbled on this exchange on the Victorian Wars site Bottom line - you can download the entire website from here it's a 28Mb download but an absolutely key reference site for British land forces. I've already done it and I would urge anyone interested in British military history to do the same - we can't let this hard work go to waste.. (NB. Once you've downloaded it, you need to right click on the icon, select properties, and uncheck the "blocked" option - after that, just double click the icon)..

Second - Next the French - those of you with an interest in the Lace wars will probably know of the plates produced by the pairing of Lienhart and Humbert (of which the picture to the right is a sample). I first discovered them on one of the French army web resources, listed on my War of the Spanish Succession Project Page, but as time went on, I also discovered that they were one of Charles Grants sources for the two War of the Spanish Succession volumes he wrote for Caliver. Imagine my joy then when I found that these too are available as a download in their entirety from here

..and that's it for now - stay tuned for a squadron of French horse that were completed last night, battlefield research, a review of the upcoming "To the Redoubt" show at Eastbourne (the theme this year is Zulu Wars & Henry Hyde is doing a participation game which should be good fun), a campaign update, and hopefully a game report if DG and I manage to get together..

Sunday, July 13

Wyndham's Horse..

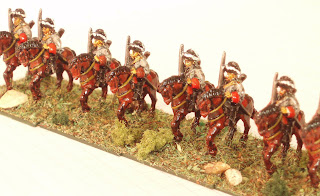
So sprayed and based, here they are at last...

As was usual in this era the regiment was named after their Colonel who was a gentlemen called Hugh Wyndham; he took command of the regiment on the 31st January 1692.

The regiment was descended originally from the Ninth Regiment of Horse, who had been raised in 1685 in response to the Duke of Monmouth's rebellion during the first year of the reign of King James II.

On it's founding the colonelcy of the Ninth Horse had originally been given to Richard, 2nd Viscount Lumley of Waterford. In accordance with tradition of the time, the regiment became known as Lord Lumley's Horse but shortly thereafter, Lumley petitioned the Queen Dowager to permit naming the regiment as "The Queen Dowager's Horse", which request was granted.

In 1691, during King William's Irish Campaign, the regiment distinguished itself, as a result of which it was posted to London and was re-named "The King's Carabiniers".


This regiment, more than many of the others I've researched, seems to have changed names quite a lot:

1685.07.31 The Queen Dowager's Regiment of Horse
ranked as 9th Horse, named for Queen Catherine, widow of Charles II; also known until 1751 by the names of colonels
1690 ranked as 8th Horse
1692 The King's Regiment of Carabiniers (re-named for William III)
1694 ranked as 7th Horse
1740 His Majesty's 1st Regiment of Carabiniers
1746.12.25 ranked as 3rd Horse on Irish Establishment
1751.07.01 3rd Regiment of Horse
1756 3rd Regiment of Horse (Carabiniers)
1788.04.01 6th Regiment of Dragoon Guards (transferred from Irish to British Establishment)


The regiment served with distinction throughout the War of the Spanish Succession and was present at all of the major battles of the period. During the assault on the Schellenberg they were in Woods Brigade (Ten squadrons of English horse comprising in addition Wood's [2 squadrons],Schomberg [2 squadrons], Cadogen [One squadron] & Lumley's [Three squadrons]).

At Blenheim they were still 2 squadrons strong, and in Brigadier General Palmes' Brigade along with Wood's (reduced to one Squadron) & Schomberg's (still 2 squadrons).

Wyndham was the second son of Colonel Francis Wyndham (a noted ECW commander) & Anne Gerard, and was born in 1649. I've not managed to find out much about him but I know he was considered an experienced officer of cavalry, who had distinguished himself at the Boyne, and at the siege of Limerick. He died (a bachelor) in 1706, at Valencia in Spain - there's a bit of a tantalising lead to follow up as I suspect he may have been killed on active service as part of the campaign in Spain**.

When he died, the Colonelcy was passed to Brigadier Francis Palmes (1st October 1706) - the same as who had commanded the brigade they were in at Blenheim. He had been wounded at Blenheim, but made a Lieutenant-General in 1709. In 1707 he was elected MP for West Loo; in 1708 he was sent as Envoy Extraoridinary to the Duke of Savoy, and in 1710 to Vienna. By all the accounts I've read, he was highly regarded by Marlborough...

Figures are Essex 15mm, purely a personal perception but I do get irritated with the tiny bases on Essex figures - it makes it very difficult to temporarily base them for painting. The figures are also a mixed bag - some are very nice, and some are excellent - unfortunately you don't get to choose which one's you have! Figures are also two part and I found the men didn't always fit as well as they should to the horses...

** During the War of the Spanish Succession, Valencia sided with Charles of Austria. On 24 January 1706, Charles Mordaunt, 3rd Earl of Peterborough, 1st Earl of Monmouth, led a handful of English cavalrymen into the city after riding south from Barcelona, capturing the nearby fortress at Sagunto, and bluffing the Spanish Bourbon army into withdrawal. The English held the city for 16 months and defeated several attempts to expel them. English soldiers advanced as far as Requena on the road to Madrid.

Wednesday, July 9

Cavalry painting - part 2...

...just a short post to show me finishing off the cavalry unit I did the horse painting demo on last week...

Having looked at the pictures (!) I think it's worth me re-iterating my prime rule when it comes to painting the little metal men that throw themselves so bravely into the face of withering dice throws on my tabletop...
  • I'm not an artist - when painting my little metal men I largely ignore colour palettes, three (or even two) stage highlighting, or complex shading techniques - I'm not creating works of art but wargame units (and given this particular project, lots of them).
  • I've also recognised that while my skills improve the more I paint, I have no inherent talent in this direction as some figure painters do. I've always known that the key to reasonable figures on the table is a straight forward paint job, and a colourful (simple) basing effort... these guys are there to get their hands dirty rather than stand around the place preening**
  • I'm not a modeller - I have no interest in spending large amounts of time clipping, filing, gluing, and generally "fancifying" the figures I use on the table top - to be honest I do little more than file the bottom of the base flat, and trim off the more obvious lumps of metal that shouldn't be there.. I stand in awe (really) of those who sculpt extra equipment and such with Miliput etc.
** which in no way negates my delight in seeing the truly excellent pieces of work that others create - I'm thinking particularly here of the Grimsby Mariner, Tarletons Quarter and Minden Miniatures sites...

So - forewarned and forearmed, let's proceed.. you may remember we finished the last montage just after completing the horses, next step the riders.

First off I did the red for the coat which for me is not usual as I normally start with the flesh area's (one it makes the figure come alive, and two it means you can cover any mistakes later in the cycle). In this case I knew I'd be using the flesh stage to paint other equipment (more anon).

As usual you only paint the white highlighted area - red paint needs to be good and opaque to cover black, so the white in this case is providing the necessary undercoat.. you'll notice that I avoided the webbing over the shoulder.. the paint b.t.w is a budget bottle I bought at "To the Redoubt" some years ago - it's not too red, and is a reasonable thickness.. looks like I got a bit excited as the mane on the grey is suffering!


Next step was saddle cloth, cuffs, saddle roll & pistol covers - these are done in what is my take on the "sea green" that Grant tells me was the facing colour for this regiment. This paint was a Vallejo that I usually use for WWII German Infantry tunics...


Flesh next - Vallejo Basic Flesh Tone..


Then the "woodwork" - I use a Vallejo ink called "Woodgrain" that I discovered at the "Colours" show a couple of years ago - being an ink it is not opaque, and over black undercoat/white damp brush it looks curiously like the name on the bottle (as the adverts would say)..... I also use it for hair as being an ink it gives an excellent effect..


Black next - I used the Windsor & Newton black ink as it has good coverage over white - boots and sword scabbard completed, and I touched up the tricorns where the white damp brush may have covered a little too much.. For me, this is the step where I check all the figures for any bits missed or that need tidying up - the black ink is perfect as it covers a multitude of sins...I fixed the horses mane in this step.


Next step is edging - my least favourite step as I'm no good with fine lines. This squadron is destined to represent Wyndham's, and Grant mentions that they had silver edging for the tricorn, shabraque and cuffs. Rather than silver which is a little bright, I used GW "Bolt Gun Metal", that also allowed me to do the carbine barrels in the same stage...


This step on the other hand is second favourite only to the inkwash for the horse as both bring the figures to "life" - I use GW "Flesh Wash" over all flesh area's which saves me doing highlights, but gives good shading. I also use it to paint over white to represent the natural leather of webbing and straps, as in this era pipe clay was not at all prevalent...

With a spot of gold paint on the ends of the swords that's the unit complete.


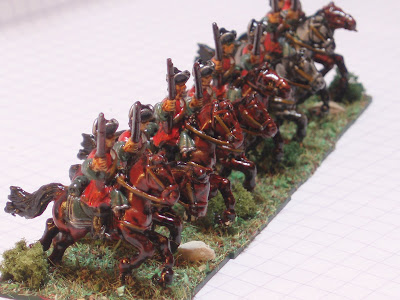
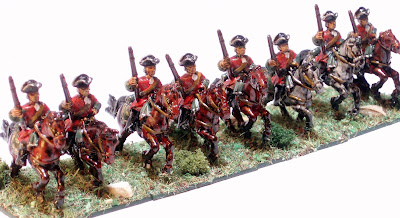
..here's the squadron as a whole...


..preparation/painting time to date is I guess between 3 & 4 hours including the hour for the horses.

I'd call it four hours with basing, which for me is plastic card cut to size (30mm square), painted GW "Woodland Green", when dry glue the cavalry down, and when they are dry paint the entire upper surface of the base and figure stands with a water based PVA glue before covering in a flock and static grass mix before finally adding a few stones and Woodland Scenics flock (for bushes) and then standing back to admire..


..in the next post I'll give some unit details..