Saturday, June 25

"Ravenspur" ... a review.

Moving on from events in the last post...

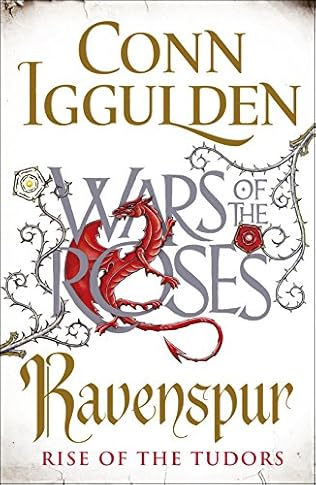
The fourth and final novel in his Wars of the Roses series, and without a doubt the best one of the four... and that despite the fact you know the "my kingdom for a horse", moment is coming...   I'd say that each of the books improved on the one before, and Iggulden clearly "grew" into them over the series...

So (and yes, my English teacher always told us not to start a sentence with "so" ) what do we have in this book.... well to be honest any review is going to read a little like a history book as the events covered by the span of the book (basically from Warwick's return to Bosworth) are fairly tumultuous, and numerous! What I always get from good historical fiction though, is a better idea of how the events unfold - there is something about setting these events within a human story that helps me to see the "how" and "why" that you don't always get from a straight history book...  the better the story teller the more you're hooked in, and able to see all the whys and wherefores of events... and that for me is why I read so much historical fiction.....

So (there I go again..) after his exile at the end of the previous book, this one starts with Warwick's invasion (from France and supported by Louis because of Edward's support of his enemy Charles the Bold, ruler then of the separate state of Burgundy) in support of the still badly ill Henry VI (who I found an immensely sad figure throughout the books - clearly he was mentally ill, and some modern theories are that he had a form of schizophrenia - but basically he was manipulated by any powerful faction that happened to control him).

At the beginning of the book Henry is being held in the Tower for his own 'protection', by Edward (IV who has taken the throne) and his brother Richard (of Shakespeare's "crookback" fame). The invasion catches Edward unaware and poorly prepared, on an extended hunting trip in the north with just a few followers, and the York'ist faction is forced to disband following the defection of their main force (under Montagu) to the Lancastrian side. Edward and Richard go into exile in the Netherlands where eventually, and in tit for tat, Charles the Bold finances his own invasion.

Edward lands at Ravenspur (hence the book title, but also known as Reavenspurn) near York, enters York, reunites with his brother George (a slimy toad if ever there is one, who is married to Warwick's daughter and up until now has been a close ally of Warwick) and marches south gathering an army as he goes, entering London and imprisoning Henry (again)..  Edward IV, by the way, comes across as a really active, dynamite, man of action throughout the stories..  Iggulden thinks he is perhaps Britain's best ever battlefield King (and there's been a few), but he also has his weaknesses and Iggulden describes them as well....

Edward then marches out to face Warwick.

While this is all happening, Warwick has been waiting for reinforcements from France under the command of Henry's wife, the indomitable Margaret (brilliantly described in the book - a real titan, and, the real power behind Henry VI during his illness) who Warwick had made up with in France. She also brings Henry's son Edward (there are lots of Edward's in this period!), but their ships are delayed by poor weather, and before they arrive, Edward forces battle with Warwick at Barnet [clicky] and the outcome is the very worst for Lancaster. Warwick is killed, and the Lancastrian army defeated (the battle was fought in fog and in much confusion - at one point one part of the Lancastrian army even attacked another part of its own army!). After the battle Edward IV marches to London and again crowns himself King, and when Margaret's army arrives (finally) from France he defeats them at Tewkesbury [clicky] where Henry and Margaret's son is also killed cementing his position as King with the only other rival left being Henry (Tudor) who in exile in France at this time. Just to make sure, he, or one of his supporters, either known directly, or not, kills Henry VI - never having left the Tower.

Which leaves us in a period of rest and recuperation for England that lasted 12 years until Edward drops dead suddenly, naming his bother Richard as regent until his son (another Edward, the Fifth) reached maturity...  Richard is depicted as the arch political animal, a real Machiavelli, he moves quickly and imprisons both the young Edward, and his brother, in the Tower "for their protection".... and in the master stroke, he manages to engineer a legal statement that they are illegitimate clearing the way for him to become Richard III...  shortly after they disappear...  again either he, or one of his supporters, either known directly, or not, kills them...  despite his actions, I found Iggulden's depiction of the man really engaging...  he was not Shakespeare's 'crook back' - he definitely had a curvature of the spine, but not a hump, he was a warrior, a swordsman, and apparently hugely skilled with weapons....

The book ends with the final invasion by Henry Tudor (soon to be Henry VII), and the death of Richard at Bosworth, which is largely as Shakespeare depicted it (un horsed, he was killed on the ground)..

...and so a brilliant series comes to an end...  Steve the Wargamer rates this one as a 9 out of 10....

Friday, June 24

Black day...

...bad decision....  in my view....


Saturday, June 18

I have been to...Lansdown Hill

I've been meaning to re-visit and write up my experiences of having visited Lansdown for ages now, and I think this is my second or third visit, but when the current Mrs Steve the Wargamer announced the other day that she was off to Bath for the day to visit an old old friend who she hadn't seen in ages, I immediately booked myself a day off  and told her I'd go as well..  not to cramp her style, but to visit the aforementioned battlefield, and also drink some beer in one of the finest pubs I know in Christendom...  result!!  😀

So... 1643, and the focus of the war is in the west of England, with Charles manoeuvring to take Bristol (vital sea port, source of trade/supply, and also handy for his reinforcements in Ireland). The King's commander is Hopton, he has recently been reinforced by the Kings less well known nephew, Maurice, and his force comprises about 4000 foot, 2000 horse and 300 dragoons

Against him the Parliamentarian army is commanded by his old friend Sir William Waller, Major General of the Western Association. Waller is outnumbered, having only about 1500 foot and 2500 horse.

The best site I have found when preparing for a battlefield visit is the Battlefield Trust site [clicky] - I would recommend a visit there, rather than me regurgitating it here - but in essence the battle is in 3 stages

1. Waller takes position in the edge of the Lansdown escarpment - the Royalists are across the valley on Freeze Hill (and Tog Hill behind it). During the day he launches attacks with his cavalry and dragoons (in which he has a slight advantage in numbers) into the valley and on to the opposite hill. Initial results are promising but the Royalists counter attack and force the Parliamentary troops back to their front line..

2. Hopton launches assaults with infantry on either flank, and also launches a full assault up the hill in the centre...  the attack of the Cornish Regiment (surely classed as veteran/elite in any set of rules you want to use!) under the command of Sir Bevil Grenville causes them to take huge losses but forces the front line...

3.Waller withdraws to a  secondary position, and then under cover of dark leaves lit matches on the wall and retreats via Bath...

Some logistics..it is possible to visit the battlefield on public transport, but it is a bit of a walk...  catch the 31/Lansdown Park and Ride bus service..  when I went it was £3.30 return..  bargain..  At the Park and Ride come out of the car park and turn left/north; the battlefield is about a mile and a half up the road..  took me 30 minutes but it's a busy road, and there's only a footpath for part of it,... just step into the curb when a car approaches and you'll be fine...  😀

So to the visit - four seasons in one day but an absolute belter of a day... the following will help orientate the pictures..


Walking up from the Park and Ride, and I took this about a half a mile away from the battlefield..
1. Waller's front line runs roughly along the line of trees, his second line is the wall in the mid-picture
...having had enough of the road, I took a bridle path that allowed me to cross the field leading up to the wall..
2. South side of the wall - Waller's troops took up position behind this wall after having been forced back...
...although there is some doubt that this was the actual wall that Waller's army took cover behind, most sources seem to agree that it was..  it's position is perfect..  it's about 200 yards back from the original position..

3. Is it me or is there a dish shaped cutout in the wall that has clearly been repaired? at a later date?
It's not 100% confirmed but there are a number of indications in this wall of cut outs being made..  the assumption is that it was for Waller's artillery..

4. North side of the wall, looking from the main road => east..
Having climbed the wall, I was then on to the footpath leading to the Monument to Sir Bevil Grenville [clicky] - this was put up by one of his later relatives, and sad to say it is in a poor state of repair and needs some love and attention...  he surely deserves it...  my reading of military history turns up any number of "big men" but he was surely one...

This was not Nature’s courage nor that thing, 
We valour call which Time and Reason bring, 
But a diviner fury fierce and high, 
Valour transported into Ecstasy.
William Cartwright "Elegy on Sir Bevil Grenville"


5. Note the marker flag - of which there are several - that mark the front line of the battle...
5.

The family name changed from Grenville to Granville at a later date hence the discrepancy...  click to embigen
Having paid my respects, I then moved into the wood north/behind the monument - it's generally accepted that the monument actually marks the spot, or very close to the spot, where Grenville was mortally wounded and fell, so it also marks the spot where the Cornish infantry charged up the hill into the mouth of Wallers artillery...

6. Always difficult to show steepness in a picture but that's the line of the new road down there..  this is a steep hill.. now imagine you're carrying a 18 or 20 foot ash pole tipped with a couple of feet of  spearhead with protective collar, wearing back and breast plate, morion/helmet, sword tangling up your legs, and with 17th Century foot wear (no tread on your shoes) - oh, and then some dude at the top of the hill is pounding you with shot and shell...  now tell tell me you don't look at your little metal men with a little more respect...  
...the front face of the hill is covered in trees now, but at the time it would have been much more open - even so I still left in awe at what those men had done...


Coming up on to the open hill top again this shows what was probably Waller's front line - he'd have had his artillery here...

7. Front line looking east - the monument is behind me...
Walking back to the main road there are a couple of information boards here..

8. Click to embigen..
Artillery representation is good..  they would definitely have been on the light side...

8. Click to embigen
Close up of the corner of the panel showing where I was about to go next - the quarry pits..
8.
Having crossed the main road, I then took the private road to the Fire Training School - this runs alongside the footpath (the Cotswold Way) and runs in front of Wallers front line...
9. The quarry pits.. either old earth works, or a place where stone has been quarried, either way Waller put infantry in here..
Having walked through the woods you then come out in to the open - this would have been where Waller's left flank was..  much more open still here..

10. Parliamentary left flank looking west... Hanging Hill wood in the distance
...it then started to absolutely chuck it down - positively torrential ..

11. The Royalist musketeers attacked up this hill - in the far distance - through the rain - is Bristol
Having got to the far end of the Parliamentary line I took shelter in the woods under a tree for a while, read up on the battle on my Hudl, slurped some coffee from my flask, and when the rain cleared made my way back..  there's another information board here..

12. Click to embigen..
Looking north east - Freezing Hill in the distance, Tog Hill in the gloom in the far distance...
13. Freezing Hill..
14. Valley between Freezing Hill and Lansdown..
...made my way back to the road and walked back to the Park and Ride to complete a truly brilliant battlefield visit and walk...  worked out afterwards I'd walked 5.5 miles..

Visit to the Old Green Tree afterwards was well deserved...  as was the pint (or three...  oh go on, four.. ) of Pitchfork - I love this pub, one of my all time favourites, and the beer is an absolute classic...


Brilliant day - none better....

Other links:

https://en.wikipedia.org/wiki/Battle_of_Lansdowne
http://bcw-project.org/military/english-civil-war/west-country/battle-of-lansdown
http://www.english-heritage.org.uk/visit/places/sir-bevil-grenvilles-monument/history/
https://www.tripadvisor.co.uk/Restaurant_Review-g186370-d3931577-Reviews-Old_Green_Tree-Bath_Somerset_England.html

Wednesday, June 15

Southampton Beer Festival 2016

Does it get any better....??  Note the theme to this years event which resulted in an excellent glass
I am over late for this so apologies in advance as my memory may be even more impaired than it usually is after a beer festival..

Brewery Beer (click for
more info)
ABV Notes (from brewery website) What I can remember...
Irving Jutland 4.4% "Jutland (4.4%) Golden Ale with a distinctive floral harvest aroma. The palate has dominant tropical fruit and citrus notes balanced by a light malt character from the pale Marris Otter malt used in the brewing process. The finish has a lasting bitterness complemented with Orange zest flavours from the English Pioneer hops used in the hopback. An ideal summer ale to quaff throughout the balmy evenings". A commemorative beer brewed for the centenary... darker than I was expecting, and also fruitier than I was expecting..  ho hum...
Woodfordes Wherry 3.8% "Fresh and zesty with crisp floral flavours. A background of sweet malt and a hoppy 'grapefruit' bitter finish characterises this champion bitter". In the grand pantheon of beers 'Wherry' holds a fairly elevated place as one of the classics - when I saw this was on (and it's rarely seen round here) I almost bit their arm off but I have to say it was a poor pint, and I was disappointed....  ho hum again..
Red Cat Prowler Pale 3.6%
"With a very light straw colour, this is an easy drinking session beer. It is quite fruity, using a range of modern hops to give light citrus notes. Having a clean dry finish this is a refreshing thirst quenching pint which also goes very well with food"
Bit of a tall order after two slightly disappointing ales, but this one definitely didn't... very dry, hoppy, crisp..  nice!
Dark StarPartridge4%"A best Bitter brewed in a traditional Sussex style using Maris Otter, Crystal and Chocolate malts with East Kent Golding hops. Typical of Dark Star ales, the Best Bitter relies on the heavy handed addition of aromatic hops late in the boil".Dark Star is one of my favourite breweries (they brew two of my top 10) but this isn't one of my favourites of theirs...  bit too dark and earthy for my tastes....
Andwells Spring Magic 4.4% "Golden amber beer with a fresh citrus aroma - golden amber beer, with a fresh citrus aroma. A bitter sweet balance of tart orange peel and home made marmalade. " Described as having a "marmalade" finish and it did, most effective - I did read somewhere that Mandarina hops give the flavour - either way very nice..
Itchen Valley APA
"American Humulus lupulus of the Cannabaceae clan which is perfect for toe twirling - tea totalling not so much. Pleasure inducing fruity nose and a dry bitter bite" Hard to find anything on line for this ale which is a shame as it was lovely - I am advised that it is also marketed as BIF (Big in Flavour). Either way - my beer of the festival - this was superb..
Red Cat Tomcat 4.7% "Having a rich golden colour, Tomcat is packed with 6 different modern style hops providing a very full fruity hop character with just the right level of bitterness. It’s an American Pale Ale, a beer which has seen great popularity over recent years". My second favourite beer of the festival (and only by the slightest amount), which given how much I enjoyed the Prowler Pale by the same brewery means I will definitely look out for more from them...
Urban IslandHigh and Dry5.5%"West Coast IPA. Strongly hoppy with refreshing citrus flavours and a bitter finish".No notes
Dark StarRevelation5.7%"A blend of Warrior, Cascade, Columbus, Crystal and Chinook by the sack full – then dry hopped during conditioning using our ‘Hoptimizer’ (Industrial sized hookah)".Last beer of the festival and I already know this is superb, so I wanted to try it to see how the BIF and the Tomcat compared...  this is hoppy and therefore bitter to the extreme  lovely but didn't knock my #1 off the top...


Tuesday, June 7

"One Hour Wargames" - Scenario 8 - "Melee" - Game

..and so on to the battle- see here for Set Up [clicky]... 

As per the last post the forces are double sized (the book allows 6 units per side, we went with twelve) and will be decided by random using the table I presented last time..  first order of the day then was to decide what each us would be using..

DG threw 1, and I threw 6..  DG opted to play as the Allies, and also opted to play as Defender (given his artillery strength, this was a no brainer). I, therefore, was the Franco-Bavarian attacker (which worked out quite well as it allowed me to use the two Bavarian Cuirassier regiments I have, in their proper role/guise)
Die RollInfantryArtilleryHvy 
Cavalry
Cavalry
16303
26222
36024
48202
58220
68022

..and so to the following picture which shows the end of Move 1...

The scenario requires the defender to place four units on the hill before the game starts (remember we are doubling up), no other troops start on the table, since this is a reinforcement battle..

DG opted to place two of his artillery pieces (quelle surprise!) backed up by a couple of battalions of infantry.. on the first move I brought on my first units; six battalions of infantry...


...few moves later - my cavalry is now all on - the mediums are at the bottom of the picture. I was planning to use these to discombobulate DG and give him something to worry about..  hopefully. The heavies are on the far right...

The attack is going fairly well - I was using the wood to provide cover to the infantry - my plan was to send in four battalions as an assault column up the hill, while I used the other couple of battalions and the heavies to protect the flank...  we would see...  


...few moves later and the last of DG's reserves are arriving (top left) - despite appearances the battalion at the bottom is actually French - they're Wild Geese


...those last reinforcements effectively put an end to my attempt at discombobulation, and before I knew it those three cavalry regiments of DG's were discombobulating me!  What is good news is that my heavies are wreaking bloody slaughter on my right flank (top right of the picture) - I'm rolling up a flank - always a wonderful thing for a wargamer - probably because it's so rare in my case!...


...lots of moves later - penultimate move if I remember rightly - start of move as well as those are initiative dice next to the units - blue for me, red for DG. My heavies are on top of the hill facing one of DG's mediums - the assault column is at the foot, and I have one battalion on top - we're heading for a draw..


...and that was it..  draw... neither side with control of the hill...


Post Match Analysis:
  • DG's butchers bill was immense - despite forcing the draw he lost 8 of his 12 units; I think I lost 4 or 5..  another couple of moves and I could have had it
  • The rules worked well on the whole (well done DG!); we both particularly liked the initiative dice "idea" (nothing new under the sun) as it added an entirely new facet to the pre-move deliberations....  "who do you want to move first, and who can wait"... for reference the rule is as follows:
    • Each Turn both Players roll a number of D6 equal the number of units they have 
    • One D6 is allocated to each unit to show the order in which the Player wishes activate them – lowest dice number activates first
    • Units are then activated individually according to their sequence order (see “Unit Activation”)
    • When there are ties (ie. both units have same activation score) then the unit on each side is rolled for again, and the lowest D6 activates first, until the activation sequence for that number is resolved. 
    NB.
    • If there are multiple units with the same activation, then the unit failing to activate may need to test (and fail) again 
    • Players can agree to waive the right to decide ties when the units activation is not affected by any other units close by
  • We both agreed the melee rules needed a little work...  Neil has decided that infantry didn't charge in this era, only cavalry did - he's clearly well read, but then so (relatively) am I, and Neil and I have come to different conclusions...  

Saturday, June 4

"One Hour Wargames" - Scenario 8 - "Melee" - Set up

DG is down - so an opportunity for a game and more importantly some actual honest to goodness wargaming related content for the blog! "Blimus", as the Lards would say, "about time!"

Having asked DG what he fancied playing as we've had a good run of ACW games, the Memorial game saw a run out of the AWI troops, and the scenario before last was a much needed Sudan game, I was thinking WWII... but back comes DG with "Marlborough, please" and who am I to disappoint... 

So for this game we are going to return to my favourite book of the moment, and this time we are going to play (the next) Scenario #8 "Melee" which is based on the historical battle of Lundy's Lane as originally described by Stuart Asquith in "The War of 1812 - A Campaign Guide to the War with America 1812-1815", and subsequently re-interpreted by Neil...

We'll use the rules from the book, but DG has re-interpreted them, in the same way as he did for the ACW games, but this time for the War of the Spanish Succession - the basic framework however, will be the same as we used for the ACW rules.

Forces will be double sized - the scenario calls for six units a side we'll have 12, and all arrival/reinforcement rules will be exactly the same as written in the book, just double the numbers.. so we'll start with four units on the hill rather than two, etc etc

Force composition will be random using the table in the book with the following proviso's
  • artillery will always be "light" and never more than three pieces...
  • we ignore troop types that don’t apply to the period 
  • one of the columns in the table had no troop types for this specific period so I substituted “Heavy Cavalry” 
Which gets us to:
Die RollInfantryArtilleryHvy 
Cavalry
Cavalry
16303
26222
36024
48202
58220
68022

In addition:
  • all unit morale modifiers will be 0 (for both sides) 
  • no National characteristic bonuses will apply for either side (ie. British/Dutch firing bonus doesn’t apply etc etc) 
So each side will be totally equal, except for the results of the randomised force generator....  

Table is as follows, north is the furthest edge - one hill, one wood, the road, all other terrain is no penalty:


...aerial view.. left is north, or north is left, take your pick.. 


Thursday, June 2

"Gate of the Dead" ('Master of War' Series) by David Gilman - a review..

Lord, two weeks since the last update/post... shameful...

Not been entirely un-busy, just not enough time to sit down and write it up.. I have however, as always been reading fairly voraciously, and this one was finished a few weeks ago...

As those of you who read my book review page will know I have been very enjoyably working my way through the Julian Stockwin "Thomas Kydd" books, but I found myself with a few days while I waited fro the next book to arrive in that series so picked this up just to tide me over.. I ended up racing through it and it was very far from being a time filler but deserves a post in its own right purely because of how good the book is..

This is the third book in the series and reminded me just how damned good they are...  set in the period of the 100 Years War, this series is about archer Thomas Blackstone, knighted after the Battle of Crecy for saving the Kings life, but now (after events in Normandy in the previous book [clicky]) living in exile in Italy (or rather Tuscany, as there was no "Italy" in 1358) where he is a leader of a band of condottieri in the service of the city state of Lucca protecting it from the attentions of similar condottieri in the pay of Milan. Blackstone is very good at his job and rewarded well, but is still estranged from his wife (again described in the previous book)

Things are going reasonably well for him then, but then he receives a message via a wounded man that  appears to have come from the Queen (Isabella) - it is a summons back to the court in England, and while it is quite obvious that it may be a trap, Blackstone remains a 'Kings man' (despite the exile) so decides to return. As expected a number of attempts are made on his life during the journey, and when he arrives in England the Queen tells him she needs him to fight the Black Prince in a tournament that has been announced, and which has attracted the very best knights in the whole of Europe...  he does it, but in a way that only the Prince can see as to all intents and purposes he yields, in the meeting with the Prince, and the King, Isabella explains that English political handling of problems in France are leading to the chance that they will lose their holdings (England still held the French King at this time and were demanding a huge ransom, which effectively France couldn't pay, but meant a power vacuum that the French Barons were exploiting for all its worth). The King orders Blackstone back to France, into the heart of the Peasants Revolt, to rescue the French Kings family, but holds out the hope the Blackstone's estranged wife might be with them.

After many adventures, skirmishes, and battles, this he manages to do - and reunites with his wife who has forgiven him. At the end of the book however, the assassin who has been stalking him since the beginning of the book, is reveled to be in the pay of Milan, and Blackstone has to face him in trial by combat...

..and that's it - no spoilers here, read the book - Steve the Wargamer rates this one 10 out of 10....