Wednesday, February 29

So now, maybe..

...I can get down to some wargaming....  ah.....  only 37 days to launch...... and a shed load of jobs to do on the boat between now and then... 

Friday, February 24

"A Game of Thrones" - a review..


.... ookkaaaayyyyyyyy... this is the strangest book -  for one thing it's almost 900 pages long and when I looked back after 3  weeks of reading I wasn't 100% sure what had actually happened....  did it really need to be so long when so little happened??

Epic fantasy, but without dwaves and elves.. a medieval  setting...  warring families...an untold horror in the wild lands that only features for about 20 or 30 pages (but you know is going to get a  lot worse)....

A huge feat of imagination and maybe the reason the book was so big, and the actual meat so short, was because as a first book he needed to set the picture...

Steve the Wargamer gives this one six out of ten...  but  in the full knowledge that this will really appeal to some people....possibly with more time on their hands.... 

Bring me a shorter book next time...!

Wednesday, February 22

84th Regiment Pennsylvania Volunteers

Apologies for the lack of posts lately... I hope normal service will ramp up shortly but "life" has a nasty habit of intruding every now and again, and in this case, over the last two weeks has conspired to rob me of what I conservatively estimate is about 6 hours a day! 

The ACW Campaign rolls on - for which hearty thanks, as it's nice to escape every now and again.. family sicknesses (now't bad - but time consuming), having to replace my car (last one just got old all of a sudden), and this week a massive exam as part of the sailing course  I'm doing [click here..... if interested ]  for which I had to do a fair amount of revision, have all conspired to leave me with less time than I could really do with!

So...  with new car bought (Qashqai - love it...), family getting better, and exam completed (last night - cautiously optimistic on outcome...) time at last to finish off the latest painting which I started a couple of weeks ago!

These guys represent the 84th Regiment Pennsylvania Volunteers...


The following has come from the "History of Pennsylvania volunteers, 1861-5; prepared in compliance with acts of the legislature", by Samuel P. Bates (which you can read in its entirety here [click here] - astonishing resource...)  ...  I've edited it slightly to bring it down to a more manageable length....
 
"The Eighty-fourth Regiment was recruited under the direction of William G. Murray [in the the book above, his is the portrait on the cover], in the counties of Blair, Lycoming, Clearfield, Dauphin, Columbia, Cameron, and Westmoreland in the state of Pennsylvania. The men rendezvoused at Camp Crossman, near Huntingdon, and subsequently at Camp Curtin. Recruiting commenced early in August [1861], and towards the close of October an organization was effected by the choice of the following field officers:


William G. Murray, Colonel
Thomas C. MacDowell, Lieutenant Colonel
Walter Barrett, Major


On the 31st of December, the regiment was ordered to Hancock, Maryland, arriving January 2d, 1862. Here it received arms, Belgian muskets [muzzle loading, rifled percussion musket], and crossing the Potomac

The book goes on to indicate that the regiment had it's baptism of fire shortly after this, when Murry took command of a small detachment that was facing a far larger force under Stonewall Jackson and by skilful manoeuvring managed to get the regiment out largely unscathed...


Two months later the story continues on with their involvement in the Battle of Kernstown (or Winchester as the book calls it); as your probably aware Kernstown is the battle I'm using as my reference for my American Civil War project - so I'm building forces that were present at the battle...

On the 2d of March General Lander died [he was their Brigade commander], the command devolving on Colonel Kimball [we've met him before here], and soon after the regiment moved on to Winchester. Here General Shields took command of the division, and about the middle of the month drove the enemy up the valley, four miles beyond Strasburg, skirmishing with his rear guard, who destroyed bridges and obstructed the way as he went. As Shields returned towards Winchester, Jackson reinforced, followed closely on his track, the Eighty-fourth marching on the 20th from its camp near Strasburg, without a halt, to Winchester.

William Gray Murray in
his Captains uniform
At five P. M. on the 22d, it returned at double quick through the town, and moved to the support of the Union Cavalry, posted at the west end, which the enemy was engaged in shelling. Soon after the regiment arrived upon the ground General Shields was struck by a fragment of shell and disabled, the command again devolving on Colonel Kimball. The Eighty-fourth was ordered to fix bayonets in anticipation of a charge, but the enemy soon after retreated and was driven about two miles in the direction of Kernstown, where the regiment bivouacked for the night.


On the following morning it was engaged in laying out the ground for a camp, when the enemy at eleven A. M. attacked, and it was immediately ordered into line in support of artillery. Under cover of a wooded eminence on the right, the enemy advanced, and with infantry and artillery gained a foothold upon the flank behind rocks and a stone wall, where he seriously threatened the integrity of the Union line. This position the Eighty-fourth was ordered to charge. Forming upon the high ground near the Kernstown Road, it moved gallantly forward through an open valley and up towards the wooded eminence, where were the guns; as it gained the crest, the rebel infantry rose up from behind rocks and the fence where they had been concealed, and poured upon it withering volleys. The fire was returned with good effect; but standing without shelter, and at close range, it was fearfully decimated.


Colonel Murray's horse was struck, when he dismounted and advanced on foot. A moment later, while at the head of his men, and leading them on for the capture of the guns, he was himself struck in the forehead by a minnie ball and instantly killed. At this juncture, being without a field officer, with two of its captains fallen, the regiment fell into some confusion, and a part of it fell back under the shelter of the crest. The remainder, led by Lieutenant George Zinn, taking shelter behind trees, kept up a steady fire. At this juncture the Fifth Ohio came up on the right, and with other troops, forced the enemy from his position. A general advance was ordered along the entire line, and the foe was driven in utter rout.

The account goes on to report that out of the two hundred and sixty men of the 84th who went into battle, twenty-three were killed, and sixty-seven wounded...  in addition to Murray, Captain Patrick Gallagher and Lieutenant Charles Reem were also killed... the regiment went on to serve throughout the war and in total lost during service 6 Officers and 119 Enlisted men, and 1 Officer and 98 Enlisted men by disease... (interesting numbers by the way - as my reading would indicate disease was almost as deadly as battle for the soldiers of the day)


Figures are 20mm, from Newline Designs..  welcome to the ranks, chaps...

Wednesday, February 15

Bluebear Jeff's linked Teaser challenge....

Over on Bluebear Jeff's blog, along with some decent news about his improving health, in a fit of pure genius he proposed an idea for us all to make up a linked campaign of three to seven teasers made up from Charles Grant's "Scenarios for Wargames"..

"Create a series of three to seven scenarios from Grant's "Scenarios for Wargames" that will make for a logical simple mini-campaign of linked scenarios.

You can even, if you like, make a "campaign tree". That is to build it in the format of "if Red won Scenario A, go to Scenario B . . . and if Blue won, go instead to Scenario C, etc.
"

Linking more than three is entirely possible, and as Jeff says, Charles Grant and Phil Olley have done it twice already with the "Raid on St Michel" and "The Annexation of Chiraz", but to do that is a bit of a work of genius as I've always thought that you would have to make way too many decisions on increasing/decreasing forces in order to make sure that the later teasers don't just become walkovers and a little boring...

I've decided to go with a linked series of three teasers, and I've tried to minimise the changes to forces as much as I possibly can, so the original forces will play through all three teasers - if you do play this and one of the teasers turns out to be hideously mis-balanced, feel free to modify in any way you feel fit... reinforcements for either side should be considered as entirely plausible!

So here's my idea for a linked series of three teasers...

Background

It is the summer of 1705, and "the French army commanded by Marshal Villeroy and the Elector of Bavaria having taken refuge behind their fortified lines, the Duke of Marlborough had formed a scheme for forcing these stupendous barriers and the first battalion of the ROYAL Regiment rejoined the army in time to take part in this splendid enterprise. The lines were menaced by a detachment on the south of the Mehaine which drew the greater part of the French army to that quarter and during the night of the 17th of July the allied army marched to its right and at four o clock on the following morning the leading regiments approached the works at Neer Hespen and Helixem" (from "The First, or Royal Regiment of Foot" by Richard J. Cannon)

First Teaser

So we open the campaign with Teaser #9; "Attack on the Camp" (which is, as near or dammit, the "Dawn Attack" tabletop teaser available here)

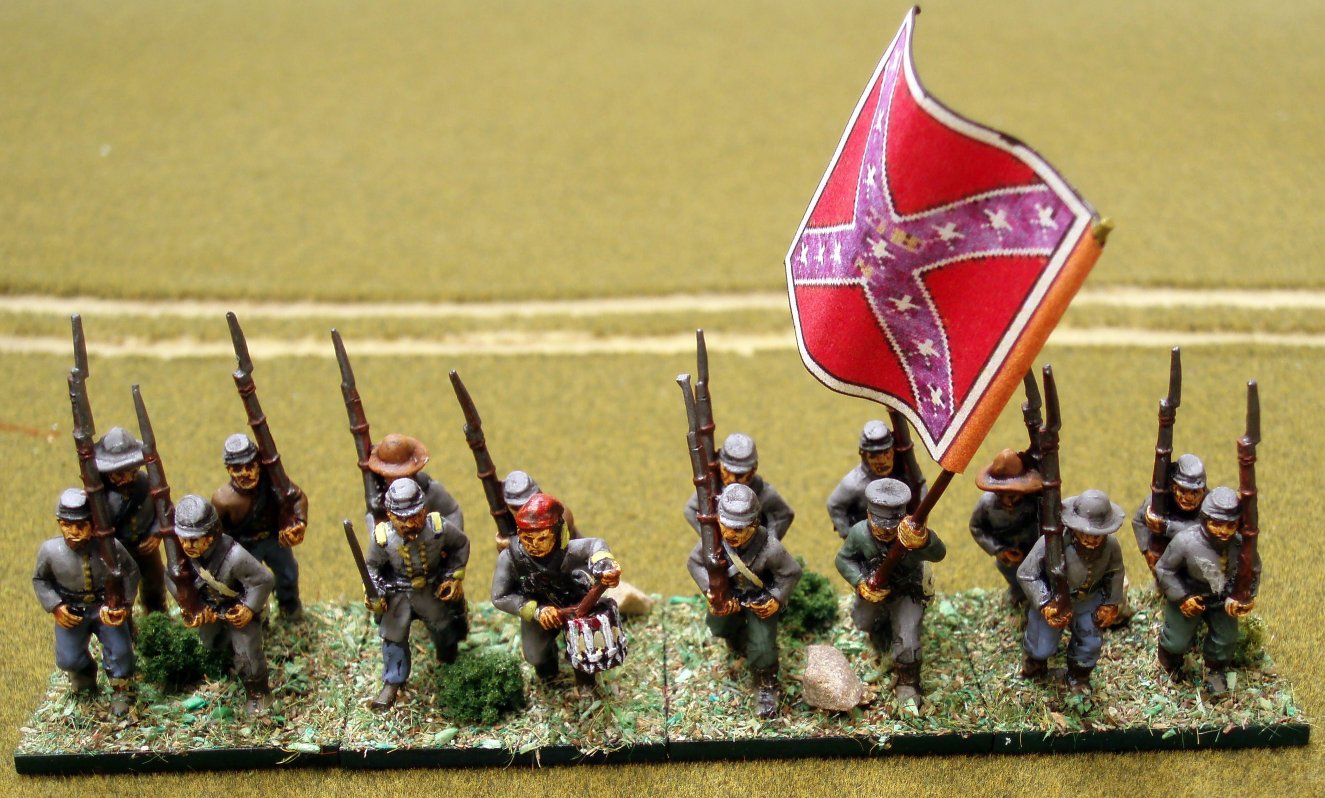
I've fought this one with my American Civil War troops (with great enjoyment I might add...) but in summary, the French playing Blue are asleep in their camp little knowing that events further away have left them dangerously exposed. They have some cavalry vedette's out to act as lookout, but in the cold morning pre-light of dawn they are attacked by a substantial British force playing the part of Red...

The set up is as per the Teaser in the book with the single exception that the British get an additional regiment of infantry, and an additional squadron of cavalry...

You will need rules to allow for ready'ing of troops from sleep once they are aroused, time for orders to be transmitted through the camp, and any panic when troops try to escape across the bridge...  the tabletop teaser version of the scenario has some useful mechanics to cover this, plus some other mechanics that can also be used eg.:

  • All movement is at half move distance only, because of the pre-dawn darkness.
  • dice for when the the nearest outpost sees the British
  • if the main force reaches the camp before the outposts see them then the outposts are considered captured..
  • the alarm is triggered when the British force touches the edge of the camp, otherwise the vedette starts moving towards the camp (infantry rate) to raise the alarm on the turn indicated.
  • Once an outpost sees the enemy approaching, or the British reach the camp, it may be considered to be light enough for all units to move at normal speed.
  • The vedette must reach the camp area before any movement may begin in the camp.
  • From the point at which the outpost reaches the camp, the warning spreads inwards through the camp at the rate of x cm’s (I used 10) per period.
  • All movement within the camp area is half speed.
You get the idea..... it is wholly expected that the British should win this scenario - either comfortably or not, they will drive the French from their camp and start in pursuit... it is in their best interests to do this at as low a coast in casualties to them, and as high casualties to the French, as possible...

I also leave it to you as to whether you allow either side to recover casualties following the battle... in a campaign I use the Charles Grant "thirds" method - consider one third dead, one third heavily wounded, and one third lightly wounded.. because this is a pursuit only the one third considered lightly wounded are eligible to return to the standards, dice for them, and I would suggest a negative modifier for the French (to reflect that it is more difficult for them to get back given the British hopefully won this battle!)

Teaser 2

Escaping towards safety following the previous rude awakening, the French are moving through a valley when their commander realises that this is ideal terrain to turn and try to hold the British while word is passed to the main force that they are under attack and in urgent need of reinforcements, and so the scene is set for Teaser #3; "Holding Action (1)"

Forces are as per the end of the previous teaser, and should comprise enough for the British to push through and cause the French to lose due to the winning conditions of the Teaser. When setting the war-game "day" to govern the duration of the game, I would select mid-morning as the start.

Some minor modifications, the French are being hotly pursued so limit the extent/distance of the flank positions, and don't allow entrenchments/redoubts - within these limitations hidden units are fine.. to reflect the closeness of the chase consider giving the British the option to set up closer than you would normally but it goes without saying they will be in column of march..

It goes without saying that it is in the British forces very best interests to win this battle as quickly as possible, and at as low a cost in casualties to them, as possible... one of the joys of these campaign scenario's is that you are forced to make decisions about when to make possibly wasteful and extravagant manoeuvres - in a normal game you wouldn't think twice about the lives of your little metal men..

So if as expected the British do win then they push the French on, both sides recover any casualties, and we come to..

Teaser 3

It is entirely likely that you may need to give either side a few reinforcements for the final Teaser which is "Reinforcements in Depth (2)"; Teaser #16.

The French, exhausted and near end are told that reinforcements are on the way and that they must stop and hold at all costs...

Once again the Teaser is as per the book but you may need to modify the French reinforcements so as to maintain a meaningful ratio of forces - this may well mean that the French get reduced, or even no, reinforcements depending on how the British have done up until now....

I leave it to you to decide whether the British get any themselves, but preferably they shouldn't - the British commander should live (or die!) by his previous mistakes/losses..

...and that's it... I've filed this for a possible later game - maybe solo - as I still have the "Raid on St Michel" to finish, and the "Annexation of Chiraz" to start! If you play it, let me know how it turns out....

Thanks for the idea, Jeff... most enjoyable...

Thursday, February 9

Battle of Waynes Junction... Part 3

...following on from the two previous parts of this elephantine report (here and here), the battle has now ended with a Confederate win.... you might argue that this was somewhat of a Pyrrhic victory, but given that Waynes Junction is the primary Confederate objective of the campaign [click here] that DG and I are playing I can't see that I had much choice as to whether to attack it or not, so first part of the job done - all I need to do now is get those supplies home....

Either way - here's how the battle ended.... at the end of move 18 you'll remember that I was beginning to get a little worried as there were still ten game moves to complete before I would say I had officially won the game, and precious few fresh Confederate units to do it with... the next ten moves then were dominated by the tactical doctrine "hold on with your fingernails"..

Move 19 (next picture) and the 126th NY are making their (very slow, and therefore menacing) approach but I'm hoping a flank approach by the 21st NC (top of picture) will worry DG enough to make him stop, even if the regiment in question is down to the bare nub.. (for the Fire and Fury players among my readers, both DG and I were now on heavy casualties modifiers)

It didn't, and by move 20 (next picture) he'd seen off the 8th Louisiana to his front.. the damn supply buildings are blocking the line of sight from my 6th NC, and all I can get off is a few desultory volleys..

Slightly to the south my artillery continues firing at the 7th WV without much success - simply put, all our forces were worn out...


Turn 21 (next picture) and faint heart never won fair maid and all that... the rebel yell is heard again as I throw in a last ditch charge to clear the New York boys away from my objective... success!


Turn 22 (next picture) back to my original positions while the Union 126th NY lick their wounds...


Turn 23 (next picture) and DG decides to see off the the flank threat so that he can have another go - the New York regiment were "green" but they didn't act like it... a sterling effort. To the south DG moves the 7th WV into cover...


Turn 24 and stalemate...


Turn 25 (next picture) and DG advances on the 21st NC and brings the 7th WV out to open fire on my artillery - you'll note a number of piecemeal units being manoeuvred to the south...


Turn 26 (next picture) and it's all too much for the 21st NC - they rout north (off the picture)


Turn 27 and the primary question in my mind is has DG left it to late??!

He has, he has! Talk about skin of your teeth....


Around about now one of my staff officers was wounded and killed during an exchange of gunfire.. I don't care, I still hold the supply buildings and, in terms of my objectives, I'm winning but the charge of the 7th West Virginia on my artillery has seen for them... the last gasp of the Union though...


End of game...


Post Match Analysis:

  • Another good game for me - I enjoyed this game even more as the plan went exactly as I'd hoped - can't even say it was the dice that won it for me this time, it was purely down to the quality of the regiments I had.... in stand losses though the Confederates lost 86% (!) against the Union 75%. The battle lasted 6 hours in real time, but at the end of the I hold Wayne's Junction and the supplies it holds.
  • During the night the Union forces withdraw to the south and the Rebs consolidate on the battlefield. Lost troop stands will return to the colours according to experience (we're dicing for stands to return with a positive modifier based on unit training - I can only hope I recover more than I did after the last battle as these are good guys!)... damaged gun stands are repaired according to experience... wrecked gun stands are permanently lost (that'll be that artillery I lost at the end of the game gone then!)
  • Something like our fourth game with these rules, perhaps the second with this version (which are the full set as sold) but I have to admit I struggled a bit with them - in the end DG was correcting so many of my errors I just asked him to do the calculations for me so that all I had to do was throw the dice and move the units! I need to do something about this - I'm thinking at the moment I prefer the old beta version of the rules simply because they were... simpler.... I may post separately on the issues I'm having - see what other folks have to say, but I may not!
  • My final objective is now to get those supplies home to Stewart Springs.... I have a few surprises for DG up my sleeve, but that story will continue on the Campaign Diary blog..
  • Still not happy about the random die/dice rolls but you lot already know about that..  thanks for some excellent feedback that DG and I will be discussing prior to the next game...
  • DG's come up with a few other things to also sort out:
    • Firing dice modifiers based on experience - it seems strange that all other elements of the game include modifiers based on experience, but not shooting??
    • Provisional commanders; should we allow them at brigade level or just divisional?? Seems a bit of a kludge to us...
    • Spent unit capabilities - there doesn't seem to be anything that penalises a unit that has taken a significant number of casualties.....
    • End of battle criteria - campaign battles seem to throw Fire and Fury!
    • Town/village as cover ie tactically significant structures - it seems strange to us that in a regimental level set of rules buildings are so unimportant - maybe it means that there weren't so many buildings that they would be considered, but it needs some thought..
    • Buildings blocking line of sight and stuff; how much of a stand must be in the arc of fire, line of sight and range?
    • Command Radius; same thing, how much of a stand must be in the radius to be considered in command?

In the meanwhile the campaign rolls on...

Friday, February 3

27th Virginia Infantry

Colonel John Echols commanding officer
27th Virginia Infantry
(courtesy of Wikipedia)
Steve the Wargamer is having a veritable painting frenzy...  2012 has started well....

Next off the chocks some more reinforcements for the ACW project... first on the side of the Confederacy

These guys represent the 27th Virginia Volunteer Infantry who at Kernstown were commanded by  Colonel John Echols (that's him to the left) who was severely wounded at the battle.

The regiment served in the Stonewall Brigade along with fellow regiments the 2nd Virginia Infantry [click here], 4th Virginia Infantry [click here], 5th Virginia Infantry, 33rd Virginia Infantry, Rockbridge Battery, West Augusta Battery, and Carpenter's Virginia Battery [click here]....

John Echols had formed the "Monroe Guard" in 1859 following John Brown's raid at Harper's Ferry, they were part of the Rockbridge Militia company. The company came from Monroe County, Virginia and left Union, the county seat, on May 13, 1861 under the command of Captain Hugh Tiffany. Company D joined six other companies at Harper's Ferry to form the 27th Virginia Infantry Regiment. The regiment was organized in May, 1861, and accepted into Confederate service in July...

Quite pleased with the motley look that these guys have - Reb regiments were far more varied in appearance than their Union opponents.....

The 27th fought at First Manassas, where it earned the nickname “the Bloody 27th” because of its losses, Kernstown, and in Jackson's Valley Campaign. It then participated in the campaign of the Army of Northern Virginia from the Seven Days' Battles to Cold Harbour, moved with Early to the Shenandoah Valley, and was active around Appomattox.


The regiment reported 57 casualties at Kernstown and only 1 officer and 20 men surrendered at Appomattox.

Theoretically, they had 300 men at Kernstown - clearly they were still low on numbers following the events at Manassas, as even by Confederate standards this was a small regiment...  in Fire and Fury Regimental terms, at 40 men per stand, that's about 8 bases - I mount my figures on double bases, hence 4 stands....

Echols himself - the yellow represents a triumph in itself being my first use of the Valejo yellow I bought at Warfare - superb!! Echols was heard to have words with the drummer ...  clearly he's spent far too long hanging around with those rough zouave types!
So... 16 figures, all Newline Designs 20mm for a total of 16 points - next up a Union regiment - the 84th Pennsylvania I think....

Wednesday, February 1

Black Watch - a review..

Image courtesy of the Black Watch
museum shop site...
http://theblackwatch.co.uk
The parents in law bought me this for Christmas, and as someone who has been disappointed in the past with some presents people think I will like because of my hobby, this one was an absolute cracker, and read pretty quickly... so what's it about??

Well this is another personal account by a young soldier who fought in the British army from D Day to the armistice, but unusually this time, is from the view of a soldier in one of the veteran Highland regiments..

Tom Renouf joined as a 19 year old, and served with the Black Watch, who were part of the famed 51st Highland Division who had fought from Dunkirk (where they were mostly captured), reformed, went to the Mediterranean where they fought from Alamein to Italy before being withdrawn for refitting for the Normandy landings...

After initial training he landed with them in Normandy on the 7th and spent his formative soldiering fighting against the likes of 12th SS Panzer Division Hitlerjugend ("Hitler Youth")

After spending a brief period supporting 3rd Canadian Infantry Division, the division was sent across the Orne River, and spent two months supporting the 6th Airborne Division in its bridgehead. During this period it fought many difficult actions at places such as Breville (11–12 June) and Colombelles (11 July).

Its performance in Normandy was, overall, considered disappointing, which lead to them getting a replacement commander, Major-General Tom Rennie, who had served with the division in North Africa and Sicily.

On 1 August 1944 the division, became part of First Canadian Army and fought in Operation Totalize, before advancing to Lisieux. It then continued east over the river Seine and headed for Saint-Valéry-en-Caux, which had been the scene of the division's surrender in June 1940 and a particularly poignant moment. The division's massed pipes and drums played in the streets of the town, and a parade included veterans of the 1940 campaign.

Leaving St Valery, 51st Division was engaged in Operation Astonia, the battle for Le Havre. After the successful capture of the town, the division went on to take part in the Battle of the Scheldt in October 1944, finally passing into reserve and garrisoning the Meuse during the Battle of the Bulge, now as part of XXX Corps. It was not involved in heavy fighting during the early stages of the battle and was deployed as a stopgap in case the Germans broke through.

In January 1945 the division, helped to cut off the northern tip of the German salient, linking up with the US 84th Infantry Division at Nisramont on 14 January. Following this, the division was involved in Operation Veritable, the clearing of the Rhineland and the later Rhine crossings, ending the war in the Bremerhaven area of Northern Germany.

As an interesting aside Renouf was involved with the capture of Himmler himself (and he still has the Gestapo commander's watch) & was a witness to the horror of the concentration camps which the unit helped to liberate.

Seriously wounded and later decorated with a Military Medal for gallantry, Tom Renouf describes the events well, he's quite good on the battles and although none of the views are particularly controversial one's - even of Monty bringing in Rennie as the replacement commander - he's well worth a read....

Steve the Wargamer rates this one a six out of ten...