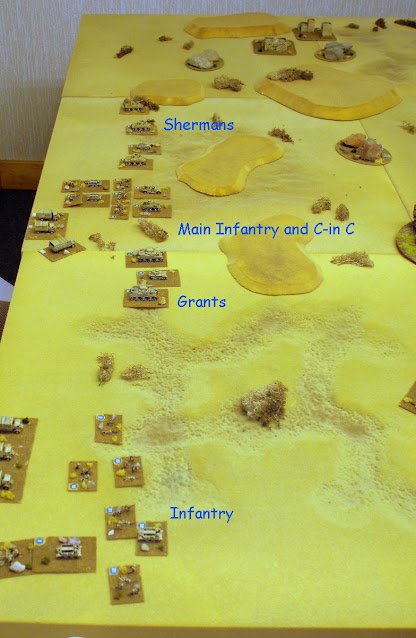
As this was only our second game I decided to keep it simple, so decided on an encounter game. Each of us had command of a small'ish WWII battle group, which I had generated previously from the excellent "Battlegroup" application available on the Blitzkrieg Commander website. This application is worth a few words in its own right as it is an absolutely excellent resource. Basically you select nationality/theatre/date, then the number of points per side, and it then gives you a menu driven web page that allows you to select units up to the points value your allowed. The units allowed, and quantities, are then driven by the theatre, nationality and date; so no 6 pdr's for the British in 1941, limited numbers of long barrelled PzIV's for the Germans early in the war ectetc.
Once you've finished, you can then generate your OOB to print out (which I'd
show you, but the output is copyright). So what's so good about it?? Not the
points value calculation (though that's kind of handy when you just want to
set up a quick, equally balanced, encounter game), but all the notes and
combat values that are provided on the OOB - hit values, save throws,
movement, how many hit dice are all documented - together with the quick
reference sheet it's almost all you want. Very useful!
So - the British had 2 units of infantry (3 stands/platoons per "unit") with integral MG's and mortars. Each infantry unit also had a 2Pdr A/T gun - one towed, the other on Portee. Armour support was provided by a couple of troops of cruisers, one of Sherman’s (comprising 3 tanks), the other a weak troop of Grants (2) - complete with relevant command units and transport, this came to just over 1000 points in Blitzkrieg Commander terms...
The Germans (with their Italian allies) were heavier in infantry, lighter in armour - they comprised 3 units of infantry (same make up as the British) two of these being German, and one Italian. The German infantry had integral MG's, and 50mm Pak's for anti-tank defence, the Italians had a light tankette flamethrower. Armour was Pz. III's (3 tanks with the short barrel 50mm), and a troop of Italian M13/40's (another three tanks) - complete with relevant command units and transport, this also came to just over 1000 points.


As the German commander, DG's plan was for a bold thrust through the centre with the Pz. III's and one of the Infantry units straight. Meanwhile having loaded up the other German infantry unit and support weapons in his half tracks and lorries there would be a wide flanking move on his left (to occupy the village), this would be coupled with a shorter distanced flank attack with the Italians and their armour on the other, right hand, flank..
The British, being British (!), were happy to react to the German offensive deploying one of the Infantry units to face the Italians, with the other Infantry unit & the Sherman’s in the centre to counteract the attack by the Pz. III's. The Grants were placed between the centre and the infantry on the right to be used against either attack as needed. For the time being, while keeping a watching brief on the wide outflanking manoeuvre to his left, the British commander decided to ignore it....
There then ensued a game of great fun and entertainment - to be fair the first four or five moves involved a lot of book reading as we re-acquainted ourselves with the rules, but we soon picked it up and the turns began to pick up pace.
In summary:
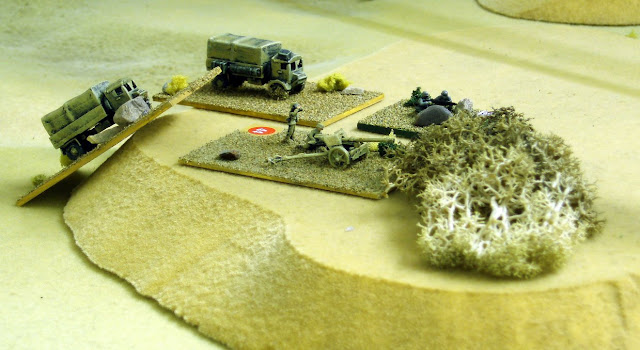
 ~ the main German attack rolled forward with alarming rapidity in the centre,
before coming to a halt just outside of gun range (ran out of command points)
- the Italians were slow off the mark (a low command factor for the Italian CO
made it difficult to get the necessary dice throws to activate them - BC
Commander uses a method of allowing a command unit to issue multiple orders to
a unit, but it gets harder each order you give). The wide outflanking
manoeuvre went ahead as planned with the infantry occupying the buildings, and
the integral anti-tank guns and MG's deploying on the hill overlooking the
British centre (see picture).
~ the main German attack rolled forward with alarming rapidity in the centre,
before coming to a halt just outside of gun range (ran out of command points)
- the Italians were slow off the mark (a low command factor for the Italian CO
made it difficult to get the necessary dice throws to activate them - BC
Commander uses a method of allowing a command unit to issue multiple orders to
a unit, but it gets harder each order you give). The wide outflanking
manoeuvre went ahead as planned with the infantry occupying the buildings, and
the integral anti-tank guns and MG's deploying on the hill overlooking the
British centre (see picture).~ the British (me) had watched the fast German advance in the centre with some trepidation, happily it had ground to a halt just out of gun range, but I was also having difficulty getting units moving - the Germans, being German, have a high command factor reflecting their ability to think on their feet tactically, the British are a little slower (but not as slow as the Italian infantry

~ I soon managed to dispatch one of the Pz.III's, but DG was also having significant success with his flanking anti-tank gun and forced at least two of the Sherman’s back, and then destroyed one, until in one successful move I finally managed to get the Grants going who made serious inroads into the Pz.III's as a result of a successful flank attack.


Post match analysis:
- First off all figures are from the excellent Minifgs 12mm WWII range; I've checked a number of other manufacturers (Pendraken, Chariot to name a few) and never found any of them to match the quality - very nice figures, and I especially like the vehicles... I also like the scale - I'm a dyed in the wool miniatures gamer and have always found 6mm figures, no matter how well detailed, to be basically game counters... these look like miniatures, whilst still being small enough to accommodate the ground scale of a WWII game
- Somewhat unusually for us I don't think we found any major beef's with the rules, despite the fact that this was our second run through - everything is driven by D6s, though we use a D10 to track the available number of commands left (we were sometimes forgetting in the heat of battle!) The mechanisms are clean and simple - next time though I want to add in some artillery (indirect) to see how that plays, and after that aircraft....
- For those of you who I know this is important to, the tea of choice this game was Captain Scott's Strong Blend Tea (a blend of extra strong tea as supped by the legendary Captain Robert Falcon Scott during his expedition to the South Pole, which is being sold by Tesco's in the UK with a charitable donation from each box going to the preservation of Scott's hut at Cape Evans) a suitable beverage for brewing up in the desert, I thought... munchies in DG's case was provided by a slice of my smallest person's extra chocolaty birthday cake, I settled for a couple of Boasters! J

Steve,
ReplyDeleteI'm glad that you and DG had an enjoyable game . . . but I was hoping that it would be another 18th century dust-up . . . perhaps even another teaser.
-- Jeff