"So Carnehan weeds out the pick of his men, and sets the two of the
Army to show them drill and at the end of two weeks the men can
manoeuvre about as well as Volunteers. So he marches with the Chief to a
great big plain on the top of a mountain, and the Chiefs men rushes into
a village and takes it; we three Martinis
firing into the brown of the enemy".
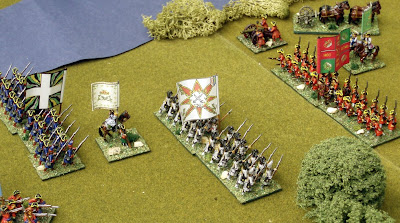
Kipling "The Man Who Would Be King"
Time for another update..
~~~~~~~~~~~~~~~~~~~~~~~~~~~~~~~~~~~~~
Some gaming has been going on.. 😏
Background/narrative:
Following his
capture [clicky], Corp has taken Zeke to the Union camp, where after come cursory
questioning Zeke has been locked up in an old log cabin on the fringe of the
camp.
There are three horses in the paddock tied to the rail in the corner nearer
the cabin as the next morning he'll be taken to a prisoner of war camp a days ride
away.
Elsewhere however, Robbie and Buck have taken it upon themselves to try and
rescue their friend and have approached the Union camp under cover of darkness. It's the early hours of
the morning, they're hoping that the cover of darkness, and surprise, will
aid their endeavour.
Oblivious to all of this, Corp is in the camp sleeping off the effects
of the last of Zeke’s rotgut whiskey, but has assigned Seth and Zack
to guard Zeke until the morning.
Game mechanics/setup:
-
I'm using Ruthless [clicky] again - Ruthless-Fastest-Rules-in-the-West-3.pdf (fireballforward.com) ..they're free gratis, but more importantly they drive a fantastic
narrative (and for me - with most of my wargaming being solo - the narrative
is becoming more and more important, if the rules don't make a good
narrative then I lose interest 😏)
-
To rescue Zeke from the cabin, either Robbie or Buck need to get to the
front door of the cabin and expend one action (“unlock the door”), after
that Zeke can act as required but is considered unarmed until either Robbie
gives him his gun (an action), or he manages to pick one up from anyone else
(also an action).
-
To simulate the effects of surprise neither Seth or Zack can move until
either
- Robbie or Buck fires, or
- Robbie or Buck get within 6” of the cabin, but
-
there is a chance that Robbie or Buck might be heard anyway, so roll once
per turn (D10); on a 1 or 2 they are heard.
-
Once Robbie or Buck are discovered, the alarm is triggered and they then
have 15 moves to get Zeke away before reinforcements from the camp
arrive.
- As it is dark, all shooting outside of 6" range is at -1.
-
Ground is considered good - bushes and fences don't block line of sight but
provide cover, the rock outcrops, the cabin and the horses do block line of
sight and also provide cover.

|
|
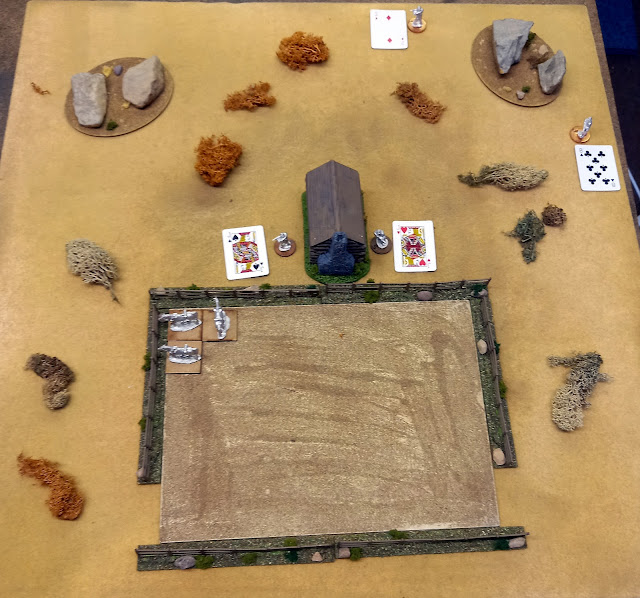
Table set up - those Airfix fences around the paddock must be the
better part of over 50 years old.. 😀
|
Solo amendments and experiments:
Rather than deal a hand of 5 cards per side (or in this case per character, as
I am using the rule writers suggestion to allow individual activation,
rather than everyone on the same side activating on one card):
-
at start of turn just turn over one card from the top of the deck and
place it by each character, then action in sequence as normal
-
to allow the "jump the gun" action to work (as the characters don't have a
deck of five to play cards from) I just used an opposed D10 roll - if the
guy being shot at rolls higher, he gets to fire first
if his weapon is loaded (NB. Snapshot trait adds to the die roll)
-
to allow the "recovery from unconscious" action to work (again,
because the characters don't have a deck of five to play cards from)
- I allow any character on the same side to exchange cards
-
I also give the unconscious character one roll per turn to recover
(D10); 1 or 2 and they recover.
Game:
Move 1: No need to pull cards providing the Rebel characters don't go within
6" of the cabin, but at the end of the turn they dice to see if they have
been heard - and they fail miserably, throwing a 1 on a D10!
Robbie and Buck stealthily approach the cabin - all is quiet apart from
the buzz of the insects. Robbie leans over and quietly whispers in Buck's
ear that he needs him to take care of the guard out back while he does the
same with the one in front. Pausing only to hitch Zeke's gun more
comfortably on his back, Robbie moves off to his right, only to be almost
deafened by the sound of a can rattling across the gravel just behind
him.. what the hell?!
Move 2: Robbie or Buck are discovered, so cards are dealt to all
characters. Both Union characters get by far the best activation cards
allowing both of them to respond first. Given they have only just
activated I thought it fair that there should be some kind of spotting
rule given the dark, and the surprise - in the spirit of the rules I made
this a 50% on a D10, and in both cases the Union characters passed. Robbie
or Buck both rolled high and beat the Union to the draw -
unfortunately, they then both missed! In return , Seth misses, but Zack's
shot caused a serious wound on Buck (Zack threw a 10 on a D10!)
Startled into alertness by a sound he's just heard, Seth scrambles
quickly to the corner of the cabin facing the direction the noise has
come from, a quick scan of the gloom and he spots Robbie and both fire
at almost the same moment - the bullets whizz past. On the other side of
the cabin, Zack has also spotted Buck and they also both fire at the
same time. Buck cries out and drops to the ground motionless
|
|
Start of move 2 - Robbie (2♦), Buck (8♣), Seth (J♠), Zack (J♥)
|
Move 3: Again the Union players draw well and both get the initiative, the
good news is that Robbie pulls a 4 which he swaps with Buck hopefully
allowing him to recover providing they get the opportunity to do that (in the
game rules a 4 allows recovery from unconsciousness). Seth fires, hits, and
then threw a 10 on a D10 (two 10's in two moves for the Union players!!) for
the wound dropping Robbie like a stone! NB. On this occasion Robbie was unable
to "beat the draw" as he was unloaded at the time. Zack's higher initiative
meant he got to Buck and covered him before he could fully recover.

|
|
Start of move 3 - Robbie (2♠), Buck (4♥), Seth (K♦), Zack (6♣)
|
Move 4: Game over - Seth activates first and crosses the ground to cover
Robbie who is still unconscious. Both Robbie and Buck are disarmed and join
Zeke in the cabin..
Things are not going well for the rescue party.. Robbie can see Buck is
down and showing no signs of moving. Across the clearing he sees Seth reload
and fire - and then nothing, all goes black..
When he comes back
to consciousness it is to find himself lying on a dirt floor in what looks
like the inside of the cabin, with Buck kneeling over him, a canteen of
water in his hand. In the other corner Zeke watches them both, resignation
writ large on his face.

|
|
Butchers bill - just the two serious wounds - one each on Robbie
and Buck
|
Excellent game but good Lord, the Confederate players were unlucky! Getting
heard on move 1, missing all their shots, and then the absolute laser shooting
by the two Union players and it was all over before they even got going... and
all of those results were on 10% and 20% chances.. unbelievable - but
sometimes that's the way the games goes!
Love these rules - their 'tinker quotient' is high - and the solo amendments
worked well, and I've already thought of some further enhancements (deal
two/three/four cards and allow the character to use the best.. etc.)
Now I get to figure out how the three can escape.. but let's get some paint on
them first!! 😀
~~~~~~~~~~~~~~~~~~~~~~~~~~~~~~~~~~~~~
The latest from the prolific pen of James Holland - his output
considering the detail he goes into, and the level of research he has clearly
done is remarkable.. Like his Burma book, this one deals with a largely
overlooked, and less "glamourous" campaign (than say, western Europe, Russia
or even North Africa), that of the invasion of Italy.
After the success of the invasion of Sicily, and knowing that they would be
invading France the next year, Italy was always intended to be a sideshow, but
with some clear aims.. get Italy out of the war, divert German forces
from Russia and North West Europe, and finally, in support of the Allied aim
to get absolute air supremacy over the the D Day invasion, the installation of
strategic bomber bases in Italy, that could reach the aircraft factories in
southern Germany more easily than they could from Britain. The Allies also expected to be in
Rome by Christmas.
On the whole by the end of '43 (and this book only covers the period between
the invasion in September, and the end of December) the Allies did
magnificently.. Italy did surrender as a result of the invasion (in
truth they were a spent force anyway), and the Allies also managed to get
strategic bomber bases built and operating (albeit ineffectively due to
weather conditions), but the German forces driven by a slew of Hitler no
surrender, no retreat orders, resisted fiercely and the campaign turned into
one of the most brutal campaigns of the war.
The terrain was awful, one mountain range after another, all of which the
Germans reinforced, but which due to the terrain meant that the Allied
doctrine of "steel not flesh" couldn't be pursued - their advantage in
armour and air support was stifled, by terrain, and by weather which was cold
wet and interminably raining.. it was down to the Allied infantry to win
the battles.. casualties on both sides were enormous as they fought and
defended endless shattered villages and cities, in intense heat and, towards
the end, frigid cold and relentless rain.
As usual, and the reason I like his books so much, Holland provides a picture
of the campaign through countless first person accounts on both sides, and
from all types of people, civilians, airmen, tankers, gunners,
fallschirmjäger, but most of all the PBI ('poor bloody infantry') on both
sides..
Excellent .. very much recommended, and I am hoping fervently, that as the
book ends just as the Allies get to Monte Cassino, there'll be a 'volume 2'...
Steve the Wargamer rates this one a solid 10 out of 10
~~~~~~~~~~~~~~~~~~~~~~~~~~~~~~~~~~~~~
Laters, as the young people are want to say...