Saturday, September 1

"One Hour Wargames" - Scenario 17 - "Encounter" - Game (Part 2)

...well what a cracker...  any solo game that makes you laugh out loud incredulously can't be too bad..  read on for why... 😀

So by way of a re-cap, here's where we left the last installment... this was the end of move 9, fairly even-stevens on the face of it..  the French (attacking left to right) have a toe hold on the hill with one strong flank (above the hill) and one that the cavalry are moving to cover - the Allies are weaker on their right flank, but have two units on the hill, one of which is the triumphant Schomberg's horse..

End Turn 9 and end of part 1

 ...so it was that a little less than a week later, with all household duties completed, I found myself in the loft ready to play out the last half dozen moves...  been a good game as I've spent at least ten minutes a day between the last session and this one, looking at the end of turn 9 picture and wondering about various options/moves...

...and off we go, I've found the old one two works very well in a melee situation, wherever possible attack with two units to one, as the defending unit at best can only hold one...  so it was in this case - both Allied units attacked, Saintonge fired and held Dering's but the cavalry charged home and (as usual?!) routed them...  I sense some battle honours for Schomberg's..

End Turn 10

Things are not looking good for the French...  two units now routing, one unit shaken (the cavalry), but the Wild Geese are on the hill...


...I sensed the moment of decision was coming, and I think this move was probably it..  the French had numbers ont heir left flank and decided to make free with a little one two themselves with a view to driving off the sole Allied foot regiment holding the flank (Howe's)..  if they can clear that flank it gives them the opportunity (with just enough time) to hook right on to the hill..  first part of the plan goes well, Howe's send out a crashing volley to hold Bearn (one down but still one to go), then the plan starts to go a little awry..  Howe's hold, and in the ensuring melee I threw the following (French blue, Allies red) ...  bye bye Toulouse, and all hopes this turn on that flank...


...elsewhere everyone else stands still or exchanges fire..

End Turn 11

In the next turn and the struggle continues..  trying anther attempt at the one two, both sides lose a unit..  Dering's finally break, and Schomberg (again!) for the wild geese...  first time this game the Allies have had sole control of the hill..

End Turn 12

French recovery during the morale phase is miraculous, and once again Saintonge pour forward to contest the hill...  everyone else (French or Allied) is too far away to contest but one surviving Allied infantry battalion climbs the slopes to support Schomberg's

End Turn 14

...can Schomberg's pull it off again?


...and so we arrive at the final turn...    and Schomberg's fail their morale test and break! They only needed get four or less on a D6, and went and threw a 6...  bang..  gone...  

So we end the game with one unit per side on the hill..  a draw...  but i'm going to call it a narrow Allied victory due to the number of fresh units they still have compared with the French...

End Game

What a cracking game...  final butchers bill? The Allies lost 8 strength points, the French lost 11, in both cases from a maximum of 36..

Tuesday, August 28

"One Hour Wargames" - Scenario 17 - "Encounter" - Setup and Game (Part 1)

I know, I know, far too long since the last update, but we're in the middle of the long hot summer of '18, and all my time has been spent either being ill, not going on holiday, working or sailing [clicky], and with time short, something has to give... and no I'm not going into details on the illness/holiday thing except to say they are not unrelated, and "mightily bored you'll be"* if I went into explanatory detail...

*kudos and a virtual pint if you name the movie..

This weekend however, the weather has broken, and having sailed Friday, done family stuff Saturday, Sunday howled with wind and rain all day, and with the family otherwise occupied the loft beckoned.. it was time for a re-acquaintance with the little metal men...

Turning to my favourite book of scenario's I find that I have reached #17, and having read it and toyed with the idea a Colonial set to, it seemed to me that the scenario was purpose built for the Wars of the Spanish Succession, so I decided to go with that..

No changes to the table as designed in the scenario - as is standard for me it's 4' square (to match my terrain tiles) rather than 3' square, with a bit of scenic dressing I came up with the following - I diced for the hill 1-4 'gentle slopes', 5-6 'steep', and it came up as "gentle"..

Feel free to click and embiggen any of the following pictures...

A scene of bucolic charm with nothing but a supply column gently wending their way to the main camp, little knowing that the peace and quiet is about to be rent by shot and shell..  well...   shot anyway...

A solo game but the One Hour Wargame scenario's are quite suited as there is a fair amount of randomness in the game set up step - first I diced for who was the "red" player as they move first in each turn - the French. Then I rolled for forces - six units/side - and as per the following, the French threw a 6, and the Allies, 1, leading to the following forces...  French on the left, Allies on the right:


One of the French units is "guard" (I picked Navarre for obvious reasons) - they gain a +1 morale modifier. The Allies have come up artillery heavy - given the nature of the scenario though, and to add verisimilitude, the guns are classed as "light", in game terms only marginally bigger than a battalion gun...

..little do they know...

Both sides get to deploy one unit for turn 1 - both sides went with cavalry for obvious reasons

Turn 1 - both sides advance - French on the left, Allies on the right..

Tactically this is a fairly simple "problem" - get their "the first'est with the most'est", the only wrinkle being that you also need to be the "last'est" to leave!

The only other wrinkle is that reinforcements up to your 6 unit maximum are diced for and there's only a 50% chance they'll arrive each turn - given the game is only 15 turns, statistically there's a chance that not all your units will arrive by end of game, but I can report that for this game, all units had arrived by about move 8...

France's finest - sabres drawn..  Ligonday.. love the grey in the middle..

Faced by England's finest..  heirs of Cromwell's ironsides..  Schomberg's..  "The Black Horse".. dour sums it up..

Turn 2 and the French get reinforcements (Navarre in this case) and the British don't..  the cavalry are facing off on the hill top... NB. In my rules only the French cavalry have a firing ability...

End Turn 2

Turn 3 and the Allies get reinforcements, the French not - time to bring on the first Allied gun - my plan for them is stand off and hope for a lucky shot at long range..  on the hill the French cavalry close to musket range and let fly causing Schomberg's to become shaken...

End Turn 3

Turn 4 - Both sides get reinforcements - on the hill Schomberg charges Ligonday, and sends them packing (note rout marker)..  Navarre reaches the hill...

End Turn 4

...so initial success to the Allies but there's a long way to go..

Navarre prepare to assault the hill for the glory of France...  Minifigs painted by DG a long while ago...

Turn 5 - and both sides again get reinforcements - these are easy decisions for the French, but the Allied decision point is when to bring on the second gun instead of more infantry...  with three French battalions on the table I opted to bring on infantry this turn..  Schomberg's have done their work and withdraw to the friendly edge of the hill... 

End Turn 5

Turn 6 - more reinforcements for both sides - both sides now have five units of their six...  the French cavalry has continued to rout, Navarre have moved on to the hill..  the British gun is getting close to being in range...

End Turn 6

French infantry marching quickly for the objective..

British infantry doing the same..

Turn 7 - the French get reinforcements - all their units are now on the table...  the gun has forced the French tactics for their deployment - no point in deploying in the face of artillery, but the French will need to deal with it at some point in time as it dominates the hill...  the French cavalry have recovered to shaken..  that British gun deploys and opens fire causing Navarre to become shaken (but no casualties)...

End Turn 7

Turn 8 - last reinforcements arrive for the Allies - both sides are now at full strength. British infantry is deploying to face the French infantry but in significantly less numbers..

End Turn 8

On the hill Navarre have closed to musket range and fired with some effect..  Schomberg have quietly slipped down the reverse slope holding themselves in readiness..


Turn 9 - the action begins to warm up!  You'll note the French cavalry is swinging round the French right flank - not difficult to see who their target is...

End Turn 9

On the hill, in a double assault Schomberg's and the infantry to their right (Derring's) charge forward at Navarre who fail to stop either of them closing, and in the ensuing bloodbath, flee (red pin again signifying rout)..  Regiment Saintonge have taken Navarre's place..  and we have the Wild Geese as back stop..

 
Stay tuned for part 2 - I have to say that it's difficult to see this as being anything other than a draw but time will tell...

Current butchers bill...

French have lost 5SP's (strength points - each unit starts with 6)  - 2 from the cavalry, 3 from Navarre. The Allies have lost 1SP (from Derring's) - despite two successful charges, Schomberg's remain un-bloody..

Thursday, July 19

I have been to... The Tank Museum (and Battle Group South Wargame show)

....and one was truly awesome, and the other ..  err..  not so.. 😏

In our (that's DG and I's) continued search for a replacement to fill the hole in our schedules that has been left by our no longer attending Salute (and therefore missing a wargame show between November - Warfare - and September - Colours!) I suggested we might want to try the Battlegroup South show which is put on at the Tank Museum at Bovington ..

Now the Tank Museum has been on my bucket list for what seems like an age, and DG hasn't been in 20 or so years, so a quick decision was made to give it a go.. and as for wargame shows, there really aren't that many in the south other than the two aforementioned ones and it looked like it might fit the bill...

After a sunny and warm two hour drive into the heart of holiday country (lots of caravans and motor homes, and weekend traffic) we arrived at the Museum without any problems, parking is great, and we paid our £14 entry to the museum (the wargame show is "free" after you pay your entry.. the ticket gets you unlimited re-entry to the museum for a year though, so very good value) and I can only say "wow" at my first sight, what looks like every Airfix/Matchbox kit I ever built as a younger Steve the Wargamer is there in 1:1 scale! 😀

I took a shed-load of pictures which I've loaded into this video ...


..but my stand out favourites in descending top 4 were (of course) the Tiger Hall..  the Tiger II was mahoosive...!


..the Grant as it reminded me of all those WWII games using the Airfix kit and Charles Grant/Featherstone rules forty odd years ago..


...I am drawn more to the early war tanks/era - the bigger tanks (on the whole - Tiger II excepted!) are not so interesting to me, so I loved the Italian desert kit..  this is an M14/41..  couldn't find an M13/40 but the hull is largely the same, just a bigger engine..


...that Carden Lloyd type suspension was clearly very influential at this period of tank development..


...but this was my #1...  Italian L3/33.. basically a Bren carrier turned into a tank...  I cannot begin to imagine just what it must have been like to have gone to war in the desert in one of these..


...this is the flame thrower version.. the fuel for that is in the comparatively unarmoured trailer right behind (!) - so reading the information provided - the pump for the flame thrower is driven by the under powered engine of the tank so range was 40 mtrs (only!) and the crews were advised not to be driving forward when using the flame thrower as they could drive into their own flame! Two men in that, desert heat, paper thin armour, flame thrower fuel just behind you, and in the pipe to the gun which runs under your feet...  where do I sign up?!  Astonishing bravery..


...so as we wondered round we would occasion upon a wargame trader, or game, dotted around the halls in between the tanks and I have to say, that for me (and DG) the show part was pretty underwhelming really, or maybe it was because the museum was so good??  Not many traders, who mostly to me looked like they weren't very busy, and there were some games but mostly (with one exception) there was not much information on what was being played...  stand out game for me was the Siege of Vienna..

Pic. courtesy of the team putting the game on - mine were rubbish!
...good signage and information, and the participant(s) explaining what was going on.. I have heard that they won "Best Demo Game" - well deserved..

Great day out, will definitely go to the museum again..

Monday, July 16

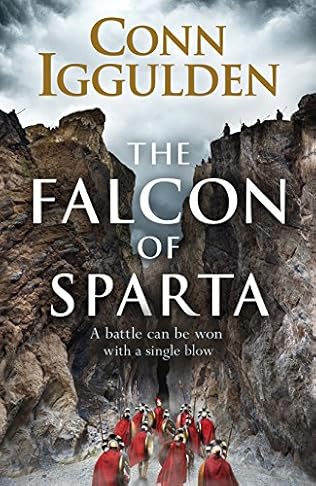
"The Falcon of Sparta" - a review..

Apologies for all the reviews lately but this one is simply too good to be just hidden on the book reviews page..

Based heavily on the events described by Xenophon in his history of the 10,000 (the Anabasis), the book describes the failed attempt by Cyrus the Younger, son of Darius II to oust his brother, Artaxerxes II following the death of Darius

Cyrus raised an army of pro-Persian and Greek mercenary hoplites, which included a large Spartan contingent. It described the events leading up to the march, and then the retreat itself.

Cyrus met the forces of Artaxerxes at Cunaxa, but was defeated* and killed - Artaxerxes offered the Greek contingent terms (enslavement mostly) which they refused and their then ensued a retreat over almost 500 miles for both army and their family/followers - continuously attacked by the forces of Artaxerxes, and the peoples of the lands they had to traverse, while also suffering from lack of food and water.

Simply superb..  wow...   just wow...  this book single-handed'ly wanted me to start painting Achmaenid Persians, Spartans, and other Greek Allied troops - another 10+ !

*some would say that Cunaxa was a tactical victory for Cyrus - but I would suggest this was probably not much of a bonus for getting yourself killed..

Stay tuned for an honest to goodness review of a 'wargaming show'!

Wednesday, July 4

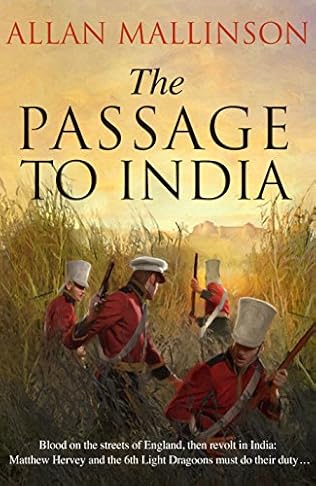
"The Passage to India".. a review..

We Hervey fans have waited a log time for this one (three years), but for me at least, it was WELL worth the wait..

Six months after the previous events in Belgium, this book is set in 1831 at the time of the riots and rebellions over parliamentary reform..

Hervey is summoned to Bristol where widespread fire setting, looting and rioting, has almost taken over the city..  setting to with his usual calm efficiency and zeal, Hervey musters his available forces, assumes command, and puts down the riot forcibly ("flat of the steel, only use the edge if threatened")

Despite it needing to be done, the radicals and liberals, take him to task in the press, and with remembrances of Peterloo still fresh, and Wellington no longer prime minister and able to provide support, an inquiry is held in to the events, and in which Hervey although never charged is brought to the public's attention. The descriptions of what it must have been like for an army officer of the time, treading the fine line always between what is, and is not, seen as 'sufficient force' in civil disturbance is very well put.. either way Hervey is under a dark cloud indeed.

With time on his hands attending the enquiry, Hervey has time to attend a charitable concert at which his estranged wife is playing, and is present when she collapses on stage . .  I always thought of her as a cold fish, but it turns out the doctor suggests post natal depression may have been behind her reserve, and her endless piano practice.. 

A very long overdue recovery and rapprochement follows, but is followed by the further good news that his friend Eyre Somerville has persuaded the Court of Directors of the East India Company to approve an increase in the Madras military establishment and that Hervey and the 6th Light Dragoons are to be sent to the princely state of Coorg where the Rajah is in revolt against the East India Company's terms.

Hervey is given command of the expedition and substantive rank of Major General, and successfully completes the annexation, returning with the Rajah as prisoner..  no spoilers here, as the campaign is arduous, and fascinating...  more here if interested [clicky]

Returning to garrison Hervey is met with further good news, but you won't hear it from me - buy the book you will not be disappointed..


It's been a good year for 10's on the book reviews, so in the words of the immortal 'Spinal Tap', Steve the Wargamer rates this one as an 11.. or at least 10+