Saturday, November 25

"Firing into the Brown" #30 - Malta GC, Volunteer Reviews and a Sally Port

"So Carnehan weeds out the pick of his men, and sets the two of the Army to show them drill and at the end of two weeks the men can manoeuvre about as well as Volunteers. So he marches with the Chief to a great big plain on the top of a mountain, and the Chiefs men rushes into a village and takes it; we three Martinis firing into the brown of the enemy".

Kipling "The Man Who Would Be King"

Time for another update..
~~~~~~~~~~~~~~~~~~~~~~~~~~~~~~~~~~~~~

Just finished a very enjoyable 2nd circumnavigation of the "Harry Gilmour" series, which is a fictionalised account of the life of a young guy in the RNVR in WW2 serving in submarines (very much recommended by the way)..  for a couple of the books the submarine he's on is assigned to the near legendary 10th Submarine Flotilla [clicky], who were based at Malta. 

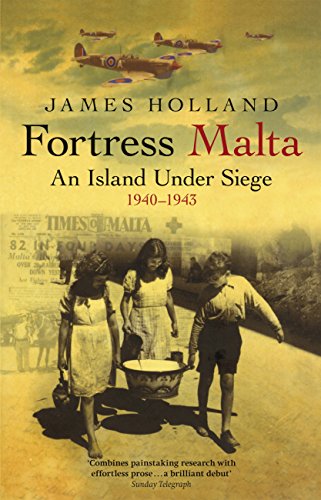
One of the books (David) Black the author quotes as a source for the stories he uses in the Harry Gilmour books was this one by James Holland - and on a whim while in town I spotted it  in Waterstone's while browsing, and bought it. 

SO pleased I did - the book is riveting and is my third "10 plus" of the year - it tells the story of the siege of Malta through the many eyes of both combatants (of both sides) and civilians engaged in the conflict. Nurses, pilots, soldiers, anti aircraft gunners, submariners, admin staff, entertainers, but also lots and lots of civilians having to live their lives in hellish conditions. 

The book is divided chronologically, and covers each of the phases of the siege (which in order very roughly were, being attacked by Italians, then the Germans, then left alone for a bit while the Germans were busy with Barbarossa, before being attacked heavily by the Germans again) and covers the air war, the vital importance of air cover for both defensive and offensive reasons, the submarines (of course), and the role of Malta not just as an island in the Mediterranean, but as the base for vital Allied operations against first, Rommel in Libya, and secondly when that campaign was won, the second front against Sicily. 

Absolutely wonderful - can't recommend it enough..  Steve the Wargamer rates this one as 10+

~~~~~~~~~~~~~~~~~~~~~~~~~~~~~~~~~~~~~ 

Little more on the Lines..  this is the Sally Port  (in blue on the map above), a 6-foot-wide (1.8 m) and 8-foot-high (2.4 m) tunnel built through the West centre curtain to act as a sally port ie. a protected entry or exit to the fortification, to save the garrison having to go the whole way round every time they needed to go to either front or rear of the Lines..

Those door hinges are serious pieces of ironmongery - the gates would have been significant. The tunnel has regular passing points built in to the sides.


~~~~~~~~~~~~~~~~~~~~~~~~~~~~~~~~~~~~~ 

Couple of fascinating contemporary prints featuring the Lines..  this time from the The Easter Monday Volunteer Review in 1868. 'Nother fascinating rabbit hole by the way, as I knew nothing about these annual events.. 

The Reviews were begun in 1861, and basically were a military exercise in how quickly volunteer troops (later these would be designated Territorial) could be concentrated in a single spot. Reviews were held in different venues, including Brighton, Dover, Guildford, Portsmouth, Tring, and Dunstable. Each “review” consisted of a march, a sham fight, and rifle shooting. 

"The Volunteer Review at Portsmouth: The First Hants Engineer Volunteers Constructing a Barrel-Pier Bridge for the Sortie at Hilsea Lines 1868" (c) Alamy

The Lines (albeit slightly stylised) can be seen in the background of the picture above, so this perspective would be from the north side of either the Creek, or more likely the moat, but in that slightly "epic" depiction the London Evening News was want to show!  😏

Picture following was from the same event, but this time taken from the Lines looking North and is a better depiction as you can see the separation between moat and creek, and up on the hill in the far distance one of the Palmerston Forts, built to negate the technological advances in artillery that had already rendered the Lines obsolete militarily by the time they'd been finished..

The Volunteer Review at Portsmouth, the Sortie from Hilsea Lines (engraving) by English School, (19th century); Illustration for The Illustrated London News, 25 April 1868.

Not an event where they just went through the motions..  these exercises were highly regarded. “The whole affair was regarded with importance as demonstrating the efficiency of the Volunteer force, which behaved itself admirably,” said Edward Farr in The History of England. 

The reviews were discontinued in 1878, largely because of the 1871 Bank Holidays Act, which gave the railroads enough civilian traffic on Easter Mondays to refuse to transport the Volunteers, who up to then travelled at a significant discount.

Fascinating, eh? πŸ˜€

~~~~~~~~~~~~~~~~~~~~~~~~~~~~~~~~~~~~~ 

 Laters, as the young people are want to say...

Sunday, November 19

"Firing into the Brown" #29 - "Battle of Grimpen Mire" (OHW #24), and the Lines

"So Carnehan weeds out the pick of his men, and sets the two of the Army to show them drill and at the end of two weeks the men can manoeuvre about as well as Volunteers. So he marches with the Chief to a great big plain on the top of a mountain, and the Chiefs men rushes into a village and takes it; we three Martini's firing into the brown of the enemy".

Kipling "The Man Who Would Be King"

Time for another update.. and about bleeding time too..  eight months since the last one, foresooth!

~~~~~~~~~~~~~~~~~~~~~~~~~~~~~~~~~~~~~

I suppose it behoves me to at least apologise to my reader (you know who you are, Jim πŸ˜„) for my prolonged absence but what can I say - I was busy elsewhere, the wargame mojo left me for a while (well at least the desire to apply paint to little metal men, and set up tables for games anyway - reading in the subject however, was unaffected), it was my first summer as a retired person, so the boat, and Gertrude played a significant part in my absence - the weather (for the first part of it anyway) was glorious, and inconducive to sitting in a stuffy loft...

Clearly however, the mojo is now stirring..  😏

~~~~~~~~~~~~~~~~~~~~~~~~~~~~~~~~~~~~~ 

Based on scenario #24 in Neil Thomas's "One Hour Wargames" I thought it long overdue to get the English Civil War little metal men out for a run..  last game was February..

The scenario posits that one army is trying to clear enemy control from a major road that provides them with both supply and communication. The fly in the ointment though is that while they have superiority in force, their ability to use those forces is constrained by the fact that there is terrain either side of the road that is impassable/unavailable to them...  

West of the road is a dense wood that not only have they have not managed to reconnoitre, but of which they have intelligence it is hard going, and not passable. Meanwhile, East of the road is Grimpen Mire*, a supposedly bottomless marsh of sucking water and soft mud providing no footing or passage for any troops. There only routes north to south then, are via the road, or on either flank.

For this scenario, the Royalists (all regular quality troops) are the attacker and comprise four regiments of foot, one regiment of horse ("galloper") and a regiment of dragoons. Parliament (also all regular) comprises three regiments of foot, and  regiment of dragoons. Both sides were rolled for on the random tables in "One Hour Wargames", substituting "skirmishers" for dragoons

Parliament starts the game with all units on the table but is allowed to have one of them deployed in the woods - following shows the position at move one with the Royalist attackers just appearing at top..  

Parliament has deployed its dragoons in the wood (a logical choice I thought), but as the winning condition for the game is to have a unit within 6" of it at the end of 15 moves they have deployed all three regiments of foot to withstand any Royalist attempt to drive them off. 
 

The Royalists (following) are pushing all their foot down the road - column of march where necessary to move quickly. They gave sent their cavalry and dragoons down the east and west flanks. Parliament is turning their flank foot regiments to face the threat. Blue dice is the move counter so this is turn 3..


"Boom!" - following - and the muskets of both sides open fire as the Parliamentary dragoons and Sir Charles Gerard's Regiment of Foote exchange fire.. to the left John Belasyse's Regiment of Foote [blue flag] and Colonel Thomas Blagge's Regiment [St George flag] have taken advantage of the dragoons being otherwise occupied, to slip past..


It is all too much or the Parliamentary Dragoons (following picture) and after a couple of diabolical morale checks they re seen here routing from the field (bottom right) the Parliamentary commander desperately trying to rally them..  


It's about turn 9 from memory, and in the centre John Belasyse's Regiment (blue flag) have come to close quarter fighting with Colonel Charles Essex’s Regiment (yellow flag - musketry only - neither regiment could get the ascendancy to close to push of pike), no room on either flank for overlaps..  


..the Royalists are 'cab ranking' their foot regiments to maintain pressure in the event Belayse's break.


Here you go - following - we suddenly went back to 197'pffft... πŸ˜†

Crunch point of the battle - turn 11 - on the right Lord Wharton's regiment have formed stand of pike to receive horse but as is always the way the horse swerved and targeted Lord Mandeville's Regiment on the left where the Dragoons had dismounted and were providing flank support..  it was all too much for Mandeville's and they break and stream away past Wharton's..


Move 13 - following -  and I think it safe to say that the Royalists are in the ascendancy..  for Parliament Gerard's have finally broken but not before first having sent Belayse's off with a flea in their ear.. happily the Royalists already have a replacement to feed into the mincer in the form of Sir William Pennyman's Regiment, who finish them off 

Mandeville's (blue) continue to rout to the right/East accompanied by Gerrard's - all hopes for Parliament are now pinned on Lord Wharton's regiment (green flag) who stand like a rock - pikes ready to receive horse, but looking worriedly at Pennyman's - they have yellow dice so they're already shaken, but so are the Royalist horse - can they pull it off?? Can they last two turns??


Final move of the game - following - and no they couldn't...  they managed to see off the Royalist horse but the continued pressure from Pennyman's - with flank support provided again by the dismounted dragoons was in the end too much, and they break and rout ...


...pursued by Pennyman's (following)..  


Royalist mission accomplished - just in time!

Post match analysis..
  • Very close and enjoyable game even solo - and the scenario delivered exactly what it promised it would, a four foot table width is reduced to little less than 9" total available 'advancing room' for the attacker..  very clever..
  • I realised after I'd started the game that terrain placement is key to the game - with only one unit allowed in the woods, it was theoretically possible for the Parliamentary dragoons to just sit in the woods out of range of muskets, but within 6"of the road to meet the victory requirement..  such games'manship is of course is beyond contempt, below the salt, and unthinkable to any of my reader..
  • * thanks Sherlock.. πŸ˜€

~~~~~~~~~~~~~~~~~~~~~~~~~~~~~~~~~~~~~ 

Since the completion of the little local history project based on the Portsmouth canal [clicky] which I enjoyed immensely, the next local history investigation is the old Hilsea Lines [clicky] an 18th/19th-century fortification built between roughly 1858 and 1871 to protect the northern approach to Portsea Island/Portsmouth (not generally known that Portsmouth is built on an island, by the by) but more importantly to protect the key naval base...   the lines were rendered obsolete by advances in artillery technology even before they were completed, and never saw actual action, not even in WW2 where you might have expected a significant anti aircraft presence, but where I suspect the lines would have been too far away from the dockyard to provide meaningful cover..   bit of geography may help here:


Portsea island..  the Lines are highlighted, dockyard circled..

As always, the bogeyman causing the huge expenditure was fear of invasion by the French under Napoleon III - this amble concerns the central section - Bastion 3, specifically - see following - but over this winter I'll go and check the other sections as well, if Gertrude is willing..


Bastion 3 following.. these are the casemates - so this would be behind/south'ish of the gun line which would be firing from the other/north side, connected to these, internally, inside the mound..  


This is very descriptive; helps understanding of the construction and design.. 


Other direction to the first picture ..  so approximately 10 casemates in total in this bastion..


Artillery store entrance I think.. 


Stay tuned - this will be a slow'ish burner - I have details on the sallyport, but the other bastions I plan to visit over the winter..

~~~~~~~~~~~~~~~~~~~~~~~~~~~~~~~~~~~~~ 

 Laters, as the young people are want to say...  and hopefully not so long this time!