Tuesday, October 28

The earthworks are complete..

Over the weekend I finally managed to get some time to finish the rest of those trenches and redoubts that I started just before the last AWI campaign game:


I'm really pleased with these - the trenches are a touch big for the 15's (despite being a smaller diameter dowel) but not overly so, and ideal for the 25's.. these redoubts are scaled to 15mm for use in War of the Spanish Succession games:

..and now on to the next project; British cavalry for the Sudan. These are another one of those expensive units, as I'll need mounted and dismounted versions, but also a separate unit depicting horse holders to use when they're dismounted.

Onwards and upwards...! :o)

Friday, October 24

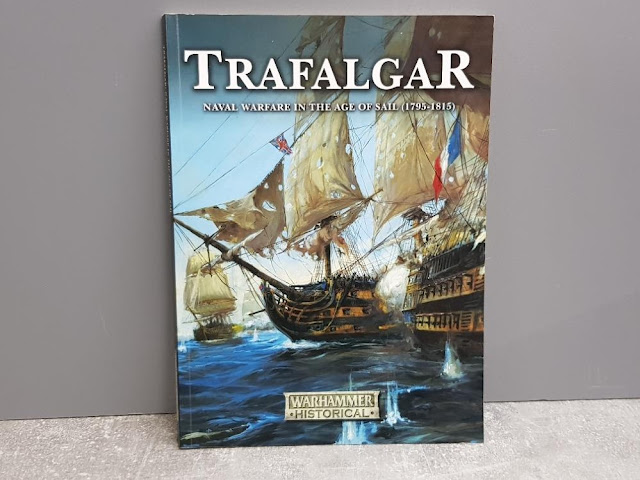
Trafalgar..


More years ago than I care to remember I painted a large batch of Airfix "HMS Victory" and "HMS Shannon" models (click here) with the intent of fighting Napoleonic ship engagements using the rules from Don Featherstone's "Naval Wargames"..

Like many such urges, I expended a lot of energy putting the things together (I can remember the smell of polystyrene glue even today), and painting them, but did not have the skills to turn them into waterline models and couldn't face the thought of playing with them still on those little stands they came with! I can't remember what happened to them in the end, I guess they just went into the bin...

The project may have died a death, but the interest didn't... (as evinced by the large numbers of books on Steve-the-Wargamers shelves by O'Brien, Forester, Llewellyn, Kent, Pope and other authors writing in the 18th Century naval line!) so although I'm not a huge fan of Warhammer historical (though I am more of a fan than I am of plain Warhammer!) the following really did rather catch my imagination:

http://www.warhammer-historical.com/news.asp


I must resist, I must resist....😏


Tuesday, October 21

Sudan Officer Material

The paintbrushes have been flashing in Steve-the-Wargamers wargames room (which in my house is also known as the loft...😏), as I apply paint to some figures that have been found to be seriously missing in my recent Sudan games... Imperial command figures.

My Sudan rules allow for three levels of command, but happily only two of which need to be represented on the table, namely senior commanders (second level) and brigadier commanders (top level); the other level of command is assumed to be present within the unit as represented. Up until now I haven't had any officer figures, but the brief flurry of activity has gone a little way towards remedying this...

In my rules brigadier commanders control small groups of units (up to five usually), senior commanders command the force in its entirety. The following figures are painted to represent those officers from the British army seconded to the Egyptian army from 1883 onwards to oversee it's training, so will probably command groups of Egyptian or Sudanese troops..

..having said that, officers in the Sudan seemed to have a fair amount of leeway in the uniform stakes, so I might very well press them into service to command British troops as well.

Together with a hard core of veteran British NCO's, these officers were so successful that they brought the Egyptian and Sudanese battalions up to the point where they could stand in the firing line and hold their own with the best of any of the British regiments.

Many of these officers were unknown, working hard behind the scenes with little recognition, but there are a few stand out names; Hunter (who commanded the Egyptian Division at Omdurman), Lewis, Collinson and perhaps the best known of them "Fighting Mac" MacDonald...

MacDonald was an amazing character - and that in the Sudan where "characters" seem to have been two a penny! 

Not surprisingly with that name, he was a Scotsman, and had joined the Gordon Highlanders in 1870 at the age of 17. His rise through the ranks was rapid to say the least, and during the Afghan War of 1879 (when he had already been a colour sergeant for 4 years!) he distinguished himself so much that he was given an officer's commission. 

He served as a subaltern in the First Boer War (and was captured at Majuba, but his bravery was such that the Boer commander gave him back his sword and freed him), and in 1885 he served under Sir Evelyn Wood in the reorganization of the Egyptian army, and took part in the Nile Expedition of that year. 

In 1888, he became a regimental captain in the British service (after 18 years service), but continued to serve in the Egyptian army concentrating on training Sudanese troops. In 1889, he received the DSO for his conduct at the Battle of Toski and in 1891, after the action at Tokar, he was promoted major. 

In 1896, he commanded a brigade of the Egyptian army in the Dongola Expedition, and during the following campaigns he distinguished himself in every engagement, especially in the final Battle of Omdurman (1898) where his Sudanese brigade repulsed a determined attack from the Mahdists. The actions of the brigade "manoeuvring as a unit with the coolness and precision of the parade ground" were witnessed and reported by Winston Churchill. Kitchener acclaimed MacDonald as "the real hero of Omdurman". After the Sudan he went on to serve further, but died tragically, and in somewhat sad circumstances...

Whew... these guys have a job to do to stand up to a reputation like that!

At the same time I also painted up two stands of infantry, as I'd found myself with a half company of Sudanese, and a half company of British left over after my last reorganisation.

First off the Sudanese:


According to my copy of "The Mhadist Wars Source Book" (click here) the Sudanese battalions were recruited from the Southern Sudan and the Nuba Mountains. Many of them were already veterans of the old Egyptian Army who had fought in Mexico and Turkey. Some later served with the Mahdists in the Jihadiyya (the riflemen) under Hamdan Abu Anja, who some say was the greatest tactician and general of the Mahdist army.

The first Sudanese battalion, the IXth, was raised from ex-soldiers still in Egypt. The next two, the Xth and XIIIth, were drawn mostly from the survivors of three Sudanese battalions in the Eastern Sudan who had escaped, en masse, from the Mahdists in 1885.

Mine are painted to nominally represent units of the 10th, but the uniform for all the Sudanese battalions were the same so they are interchangeable... figures are 15mm Essex.

Last, and probably least in terms of the picture (they look considerably better on the tabletop) a half company of British regulars to join the ranks of the mythical North Middlesex regiment:

A close up of the paint job doesn't do them any favours - I'm also not a huge fan of the figure either as the pose seems a little stiff and they also have thin ankles...!  Figures are 15mm Lancashire.

Sunday, October 19

Important Bridge Part 2

A column of French infantry slogs its way across the hot dusty countryside somewhere in Flanders..Having left you Colonel Pettygrew style, hopefully champing at the bit to find out how the game turned out, I guess you're now wondering what happened...

The Game

First things first - I as the British had to throw for the arrival time of the troops arriving at point D. These were a not insignificant force as they were comprised of some good, solid, British infantry, my only Guards unit and also my only artillery... almost half my entire force.

With some trepidation then, the D6 was thrown and came up a "3" - not good, but not bad either....

DG and I then threw for who was first to move, and DG having won, he proceeded to march his units on to the table via their respective entry points, and in the order he had previously documented. The rule was simple, the units could only arrive in column of march, could not enter the table except behind the previous unit, and could not deploy until the move after they had completely arrived on the table...

Not surprisingly there was a fair amount of marching in column, as speed to the bridge was of the essence and a change of formation would entail unnecessary delay.. The picture above, and at the top of the page, is of DG's column entering at point B, following are my troops entering at point C - you can see that I'd taken the time to shake the cavalry (Nassau-Friesland - Dutch and behind them Alt-Hanover Cuirassiers - Austrian) into line once I'd got far enough on to the table not to impede the infantry marching behind.

Using his Cuirassiers to the full, first blood in the game went to DG, with a full squadron over the bridge, and a second squadron actually on it, well before my guys had even managed to put in an appearance - see picture below - you might imagine that at this point I was getting a bit worried that my column arriving at "D" would have to fight it's way on to the table!

Happily, just as the Cuirassiers exited the bridge, the first of the British column at "D" entered, and I had opted for my cavalry to lead - there then ensued a truly comical comedy of errors as both DG and I threw lousy dice to manage the formation change of our respective squadrons to line (see the blue dice which we use to mark disorganisation in the following!!) and failed completely:

Eventually however, "good training" will out and the first engagement of the game was between the now organised British cavalry and the first squadron of Cuirassiers. Being still disorganised the Cuirassiers didn't bother to fire... and in the subsequent test the Bavarian's threw high, and broke from the melee so badly that they took casualties - score one to the Allies as the cuirassier squadron routed towards "B".

Leaving my units at "D" to make their way onto the board and face off DG's units arriving from "B", I decided to try something a little different on my left flank, and with all the forces having arrived on the table from entry "C" I sent them across the river, fording just by the church - in retrospect this was a foolish move, but at the time it seemed like a sound plan to break the deadlock of trying to fight on narrow frontages across the bridge.

Unfortunately the attack came to nothing, and I guess it was from this point that the British dice started to turn against them... firstly, I had sent too few units - an attack of that type really needs some weight behind it, and three battalions was not enough.
  • One of the regiments (Rechteren - first battle and suffering from "new unit" syndrome!) was hit by the French artillery, was pushed back, and then routed (could I throw under 5 on one D6?? Could I heck as like....)
  • The second unit was then hit by the artillery, made it to the church wall, but was faced by overwhelming French units - including the wild geese who were definitely not suffering from "new unit syndrome"! Cue them to break as well.....
  • The third unit (Stirler's - Swiss in Dutch pay) occupied the church and then came out to face the hordes - surprisingly they drove the French regiment directly to their front off with casualties - but by the time this happened it was too little too late...
Rechteren take cover in the church yard
End of the battle and Stirler's stand proudly in front of the church - the French regiment they had driven off can be seen at the table edge, but now recovered and ready to come back at them..

The main focus of the battle had shifted to the British right flank and the open area between "D" and "B" - DG and I battled for some considerable time in that little part of Flanders!

First success went to the British (this was just before the turning point mentioned above!) with the British cavalry (fresh from their success against the Cuirassiers) driving off the French cavalry (De Montreval).

The Foot Guards who had come up with the cavalry to help provide an overlap, then charged and drove off the first of the French regiments (Toulouse). Unfortunately any further success, however, was not to be...

First the cavalry were driven off by one of the French regiments and then the Guards began to slow down - good as they were they couldn't take on the whole of the French army on their own, and Ingoldsby's who had come up in support were also driven off in rout following some devastating shooting. Three prime units all running for the board edge, and could I still throw under 4 or 5 for a morale recovery? I refer you to my previous response....!

The Dutch cavalry seeing the previously routed cuirassier squadron forming then launched a ferocious charge while still in column and contacted them on the flank - unable to return fire the Cuirassiers were routed for the second time, and the Dutch pursued inflicting further damage until they in turn were attacked by the now recovered De Montreval and driven off in their turn..

British morale was now at a considerable low - the dice were definitely not playing ball, and I could not get any momentum going in the attack. In such situations there's only one thing to do - so I put the kettle on...

Following refreshments and reflection I decided the next steps - the objective was the bridge and I was going to make damn sure I got to a point where I could deny the dastardly French the victory...

By this time the last British battalion had come on, with the artillery just in front of them. The artillery deployed, opened fire, and then proceeded to hit very little (damn dice again), but the one bright spot in the British firmament was the attack by Meredith's across the bridge.

DG had finally managed to get the second squadron of Cuirassiers off the bridge and had brought up the Royal Italien to hold his end of the span - up came Meredith's, flags flying, drums and fifes going for all they were worth. Marched across the bridge, and a devastating volley from the French sent them back... pausing only to recover their morale, shake themselves down, pick up their brigadier for additional moral support, and strike out again - back over they went...

This time the Royal Italien missed, but not only that, so did the French artillery.... even more unlikely, the Royal Italien then failed their test to stand and routed away!! Meredith's proudly marched over and took ownership of the inn.... now that's a battle honour in anyone's book!!

Meredith's charge across the bridge..

Unfortunately - that was the end of the battle, with most of my forces scattered DG had ignored Meredith's and sent the wild geese (Lee's) across the bridge to support his other regiments, and I decided that honour was the better part of valour and that I would surrender....
Final situation - Lee's are crossing the bridge to help out the French line, my only available troops are the half strength squadron of horse, and Orkney's who were also under strength...


Post Match Analysis:
  • The game played well but with some huge swings in luck to DG and I; I definitely had the first third of the game, but after that it went wholly DG's way - in one of my moves I threw three separate dice looking to score under 4 or 5 and failed them all - three regiments failed morale! Ah well, such is life when you trust to lady luck to keep an eye on your little metal men.....
  • This is about the eighth or ninth game we've played with these rules now and we didn't have any glaring issues with them - two things I will look into are:
    1. Army break points - I think both DG and I are a long way past fighting to the last man. We both agreed that in a scenario like this then my army should have broken a lot earlier than it did - one of the idea's we have is to steal the simple mechanism they use in the Blitzkrieg Commander set... a break point that is a proportion of the army's strength, with the breakpoint set high or low depending on the level of training of the army..
    2. Attacks/melee's when in column of march - it seems strange that we don't consider the frontage of the attacking unit in a melee situation - one for some further thought..
  • Tea on this occasion was the excellent PG Tips de-caffeinated; I'm now a fan, and am quite willing to admit I was in the wrong about de-caffeinated! The biscuits were a triumph being McVities Oat and Chocolate Chip cookies - and very nice they were as well!

"The Important Bridge".. Part 1

An impromptu visit by DG this weekend lead to the possibility of a quick game yesterday evening, so while waiting for littlest'un to finish her ballet class, a quick browse of "Scenario's for All Ages" (which I would recommend wholeheartedly to any gamer for a positive feast of game idea's) highlighted "The Important Bridge" (scenario number 10) as looking particularly interesting..

The name of the scenario is a give away, but it turned out to be even more interesting to play than the preliminary reading would lead you to believe!

In summary, two forces have two advance guards (so four forces in total), with orders to capture and hold a bridge at all costs. The four forces come on the table at separate points, and one of the forces is delayed slightly (throw 1D6 for the entry move) to put a little bit of chaos into the mix.

The table therefore looks as follows (please click as usual for a bigger, clearer, view):

The French entry points for this game (they took the part of Blue Force) were A & B, the British (Red Force) entry points were C & D, with the force at D being the one delayed.

The forces for each side were pretty similar - I had to modify the suggested forces as listed in the book as I don't have any dedicated light infantry, so I substituted Guards for Lights (one a side); I also don't have any light cavalry (yet), so substituted mediums for light. Happily I had enough heavy cavalry (thanks to Alt-Hanover's arrival) to field the recommended numbers of heavy cavalry..

Both forces therefore ended up with 56 points a side (using morale points as defined in the rules I use), with:
  • Red force fielding seven battalions of infantry (one of Guard), 3 squadrons of horse (one Heavy), and one medium artillery piece.
  • The French had a slightly different composition as they fielded seven battalions of infantry (one Guard), but two of the three cavalry squadrons were heavy, they also field a medium gun.
Where the difference really came in was the way that these forces were then divided between the two advance guards.

The French had their main strength in the force arriving at point "A" - four battalions, both heavy cavalry, and the gun - this then left 3 battalions and the remaining cavalry to enter at "B".

The British also had most of their strength arriving at the river entry point - 3 battalions of foot, 2 of horse (one heavy) and the gun - with the force entering at "D" comprising the remaining infantry and cavalry unit. It was this latter force that would throw for entry time...

So - with the columns of march for all four forces documented (so that there wouldn't be any argument about which units arrived when), and the delaying dice thrown - let the game commence...

..which of course will be the subject of the next post! :o)