Before I launch into the next part of the scenario introduction, I have decided to amend the scenario introduction described in the previous post (#1)...
I was in two minds when I originally decided the orders of battle, as I only gave the Union commander two regiments of foot (albeit with gun). Further thought however (I blame the rush of oxygen to the brain while cycling to work), reinforced my opinion that if we were to have a closer game, then the Union commander needed reinforcing. The Teasers are remarkably elegant and the orbats that Charles Grant provides are an integral part of the Teaser, just as much as the back ground and the mechanisms. In this case a read of the mechanisms gives the clue as to why in the original teaser the side occupying the camp has a significant numerical advantage (12 units versus 8 for the attacker) - the mechanisms in question are described lower down..
Accordingly, I have added another regiment of foot to the Union OOB, and added an additional building to the camp, as follows (as usual, click on any of the pictures for a gratifyingly bigger view):

Updated legend is now as follows:
1. The gun (deployed)
2. 3 stands of infantry - 8th Ohio
3. 2 stands of infantry - 8th Ohio
4. Artillery crew/limber
5. 3 stands of infantry - 67th Ohio
6. 2 stands of infantry - 67th Ohio
7. 2 stands of infantry - 14th Indiana
8. 2 stands of infantry - 14th Indiana
It may well be that this is still not enough, but I have some scope to "trim" the scenario further by adding additional troops to the Union OOB - an additional gun..
This is how I'm tracking where everyone is by the way - an A3 sized print of the village allows me to put the relevant troops where they are quartered - much easier to track..
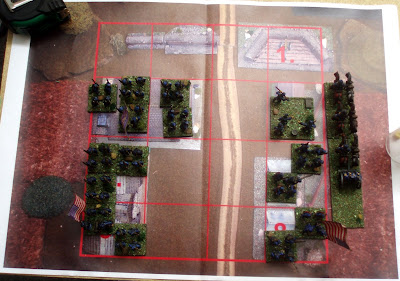
..and without further ado, here is the rest of the scenario setup...
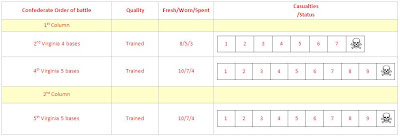
Orbat:For simplicity I left all troops as basic ie. trained, with no exceptional colonels etc etc.
All infantry are armed with a rifled musket, with bayonet...
I’m going to treat the bigger of the two Confederate columns as a “brigade” which in Regimental Fire and Fury means the impetus dice applies to both units (providing they are in command) giving greater control, the other column will be treated as an independent.
The Union regiments will act as independents, until (or should that be if??) they manage to form a cohesive line when I will consider brigading them.
 Scenario Introduction Part 2
As each grid is alerted, each stand of infantry within the grid throws two dice which will decide its action as shown in the tables below. The artillery (crew and limber) are considered a single element.
Tables:
Infantry dice score: |
2 |
Break and run, unarmed : cannot be rallied*, retire to the north (NB. North is bottom in the picture of the camp. |
3 |
Break and run, armed. Take the shortest route out of the camp. May be rallied when out of camp if not attacked. |
4 |
Stand for three periods during which they will run if attacked, but may be rallied. Throw again after three periods. |
5 & 6 |
Stand two periods then throw again. They may defend themselves if attacked. |
7 |
Stand two periods, then deploy out of camp moving north. |
8 & 9 |
Stand two periods then deploy out of camp by the shortest route |
10 & 11 |
Stand one period then deploy out of camp by the shortest route. |
12 |
Deploy out of camp by the shortest route in the next period. |
* Bases are considered disordered so dice on standard "Disordered Troops" column to rally..
Artillery dice score: |
. |
Limber |
Crew |
2 |
Horses bolt |
Gunners run |
3 |
Horses bolt |
Gunners retire de-moralised north but may be rallied out of camp. |
4 |
Half the horses bolt, the remainder controlled by gunners who take six periods to prepare the gun for movement. Will break and run if attacked. |
5 |
Horses retained, gunners take six periods to prepare guns for movement but stand and fight or fire if attacked in the last three periods. |
6 |
Horses retained, gunners take five periods to prepare for movement but will fight or fire if attacked in the last three periods. |
Gunners move to man gun. |
7 |
Horses retained but guns cannot be moved. |
8 |
Horses retained, gunners take four periods to prepare guns for movement but will stand and fight or fire if attacked after the first period. |
9 & 10 |
Horses retained, gunners take three periods to prepare guns for movement but will stand and fight or fire if attacked. |
11 & 12 |
Horses retained, gunners take two periods to prepare guns before moving out of camp. Will fight or fire if attacked. |
Gunners run |
- When horses bolt, or troops run, they move at 2/3 speed through the camp in the direction indicated by throwing a direction dice (alternatively throw two dice - with 12 being 12 o'clock or due north and so on round the clock face, one o'clock being the only direction to be unrepresented).
- On meeting an obstacle (tent/house/barn etc.) they will go right or left (odd or even dice throw) and continue in the original direction.
- Any bolting or running moves are compulsory and are done before normal moving at the start of a period.
- Any unit or person in the way must be able to move out of the way or in the case of bolting horses, they will be run down.
- Similarly, in the case of running infantry, anyone in the way must throw a D6, three or more being required to avoid being swept up in the rout.
- Each period the bolting horses may throw one dice, a six being required to halt them. Once out of the camp, the horses move at normal speed and continue in the same direction by-passing all units.
Optional Rule(s)- Any Confederate unit attacking into the camp will move at half speed, but will have no penalty for disorganisation, whereas all Union forces fight disorganised in the camp (half points for firing/-1 in melee).
This one is harsh, and was present in the original scenario. More than anything else I believe it explains the numerical superiority of the defender in the original scenario.
Given the far lower superiority in numbers in my scenario however, the Union commander is going to be fighting at enough of a disadvantage that I can leave this one out. If he was to have more troops, then I would consider bringing this one back in..
- The original scenario has the option of suspending half movement when the columns are spotted - the assumption being that it is dawn. An alternative, to slow down the Confederate approach - is to assume dawn finishes as they reach the camp..
- The original scenario has the option to cause the attacking Confederate columns to be sent off in random directions (as a result of confusion in the dark) - I'm not using them..
Winning/Losing ConditionsStraight from Mr Grant
"The Union force will have won if it rebuffs Confederate and defeats him causing him to withdraw, while Confederate will win if Union is decimated or driven from the table".
Next post move 1...
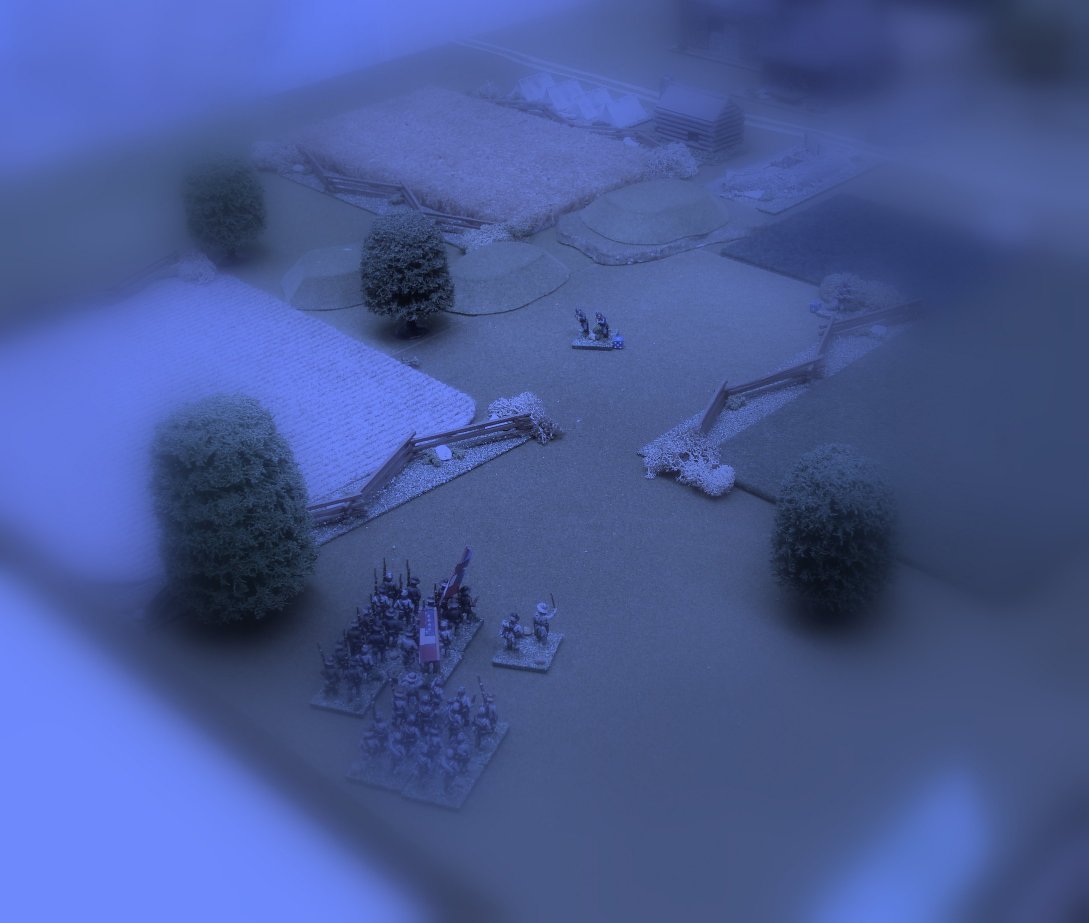 To the east they are not quite so observant - throwing a 3 and a 4.